The first method is the command-line setup — it’s lightweight, fast, and perfect for tech enthusiasts.
The second method uses Docker — the simple, plug-and-play option for those who prefer a one-click setup.
We’ll also dive into how to build AI Agents and connect them with MCP (Model Context Protocol) under both setups —
covering the key differences, setup details, and common pitfalls you should avoid.
By the end of this article,
you’ll not only master how to use n8n for free,
but also experience how AI Agents + MCP together can completely supercharge your automation.
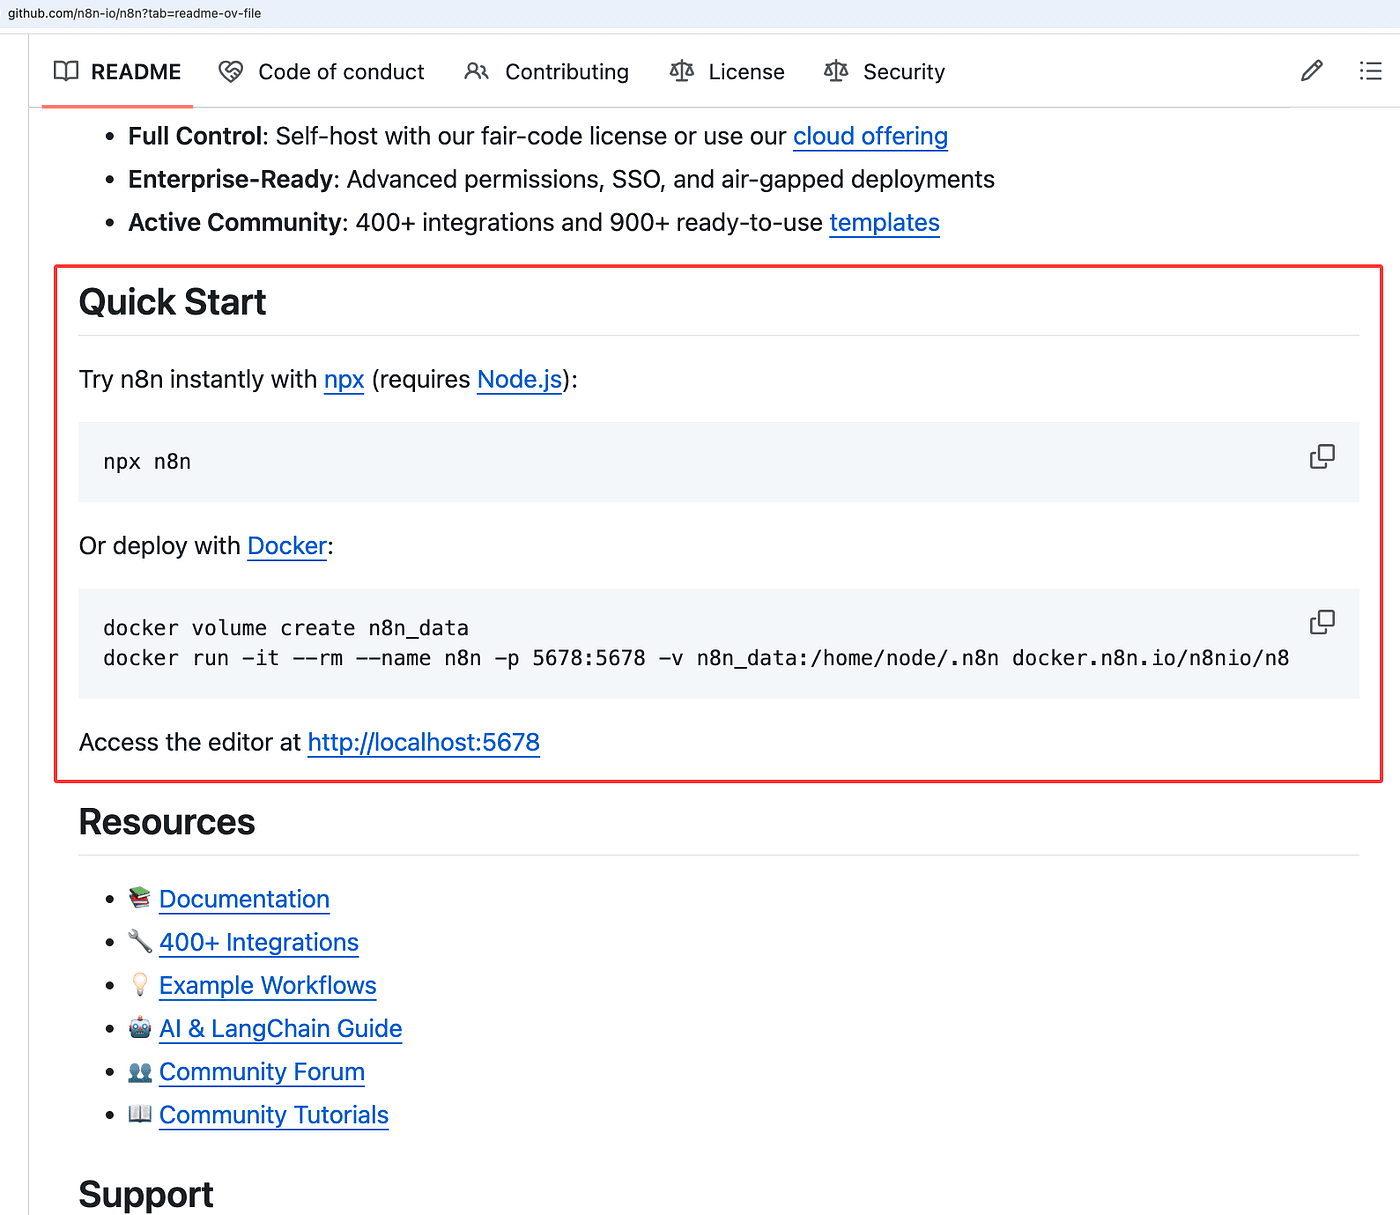
There are two free ways to use n8n.
As long as we follow the tutorial from the official n8n GitHub,
we can start using n8n completely for free.
You might find words like npx or Docker unfamiliar.
Don’t worry — I’ll explain what they mean and how to use them step by step.
By the end, you’ll be able to run n8n locally just like I did.
Method 1: Install n8n using Command Line
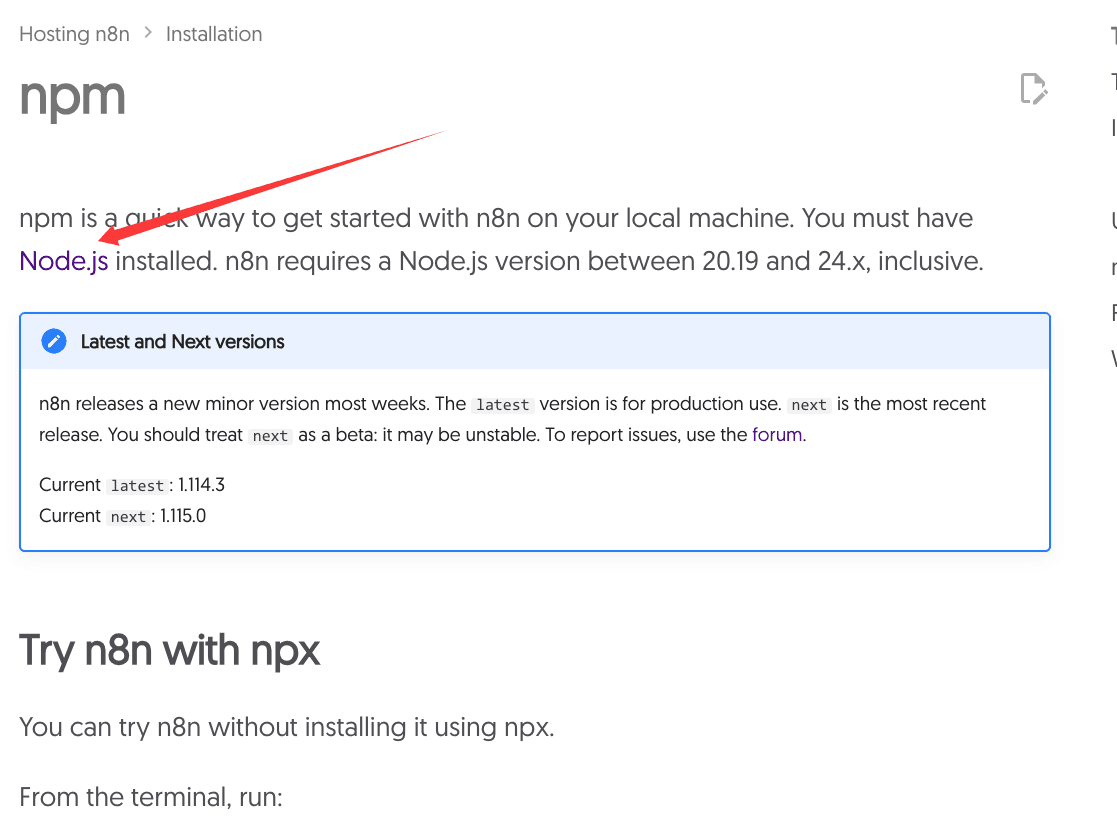
Click into the npx installation tutorial.
This will take you to the official n8n documentation page.
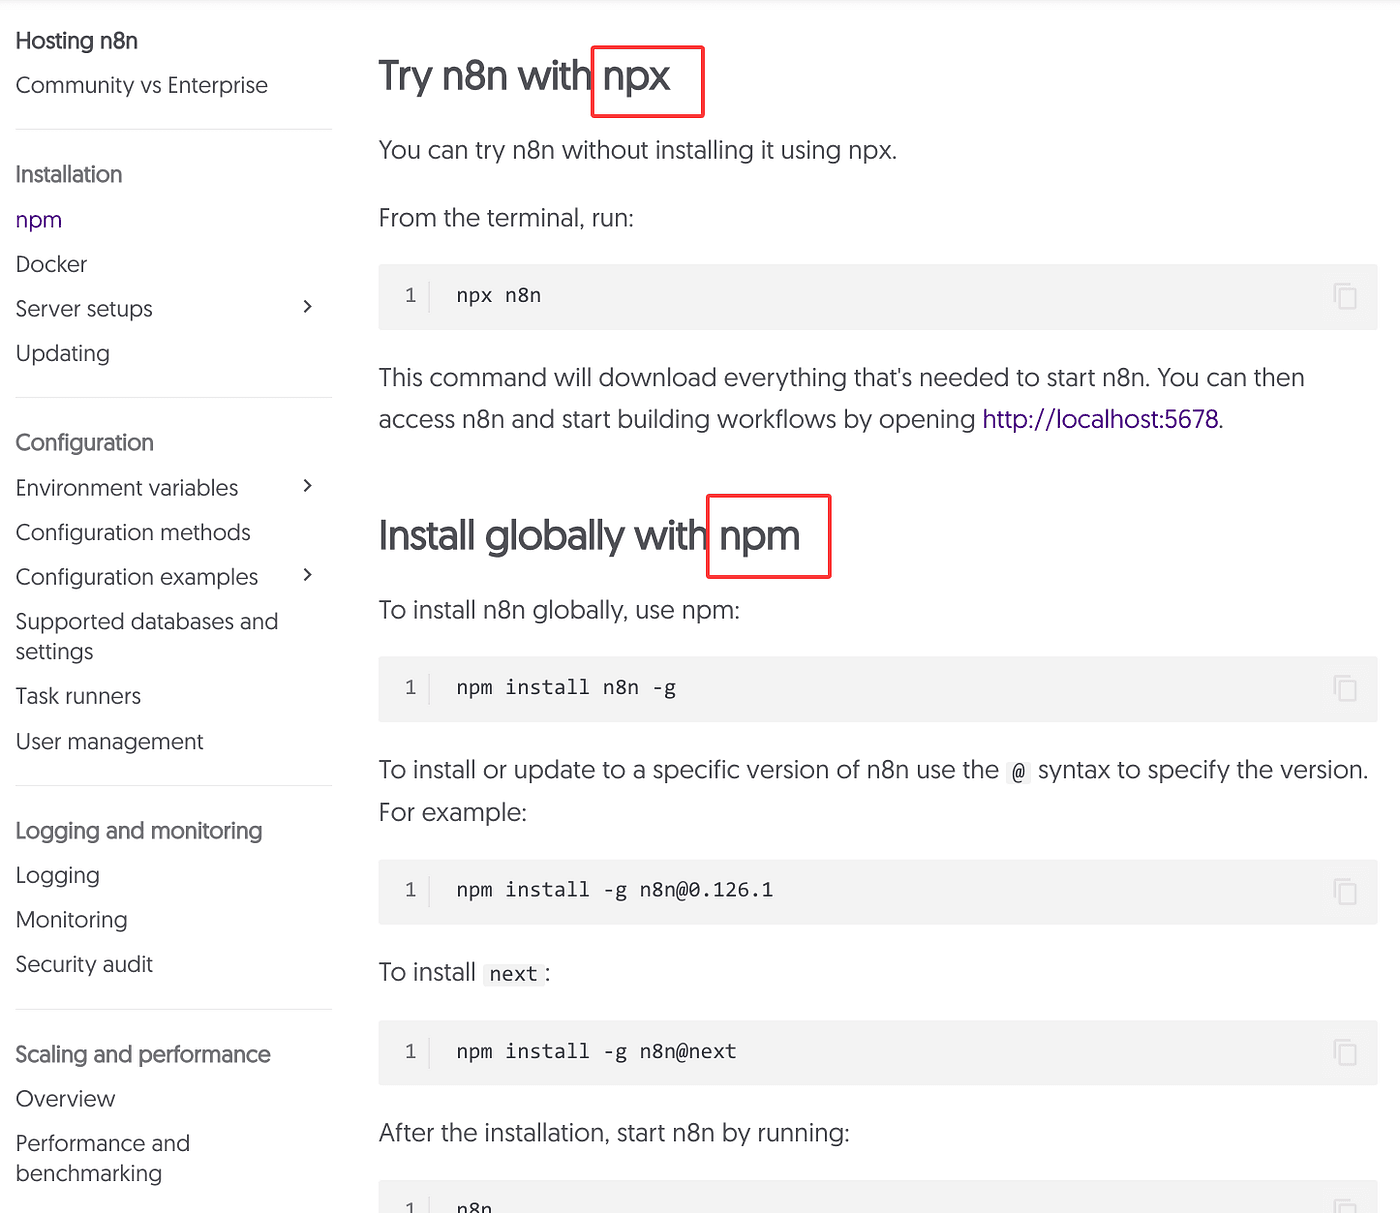
The official guide says that you need to install Node.js first,
and the required Node.js version should be between 20.19 and 24.x.
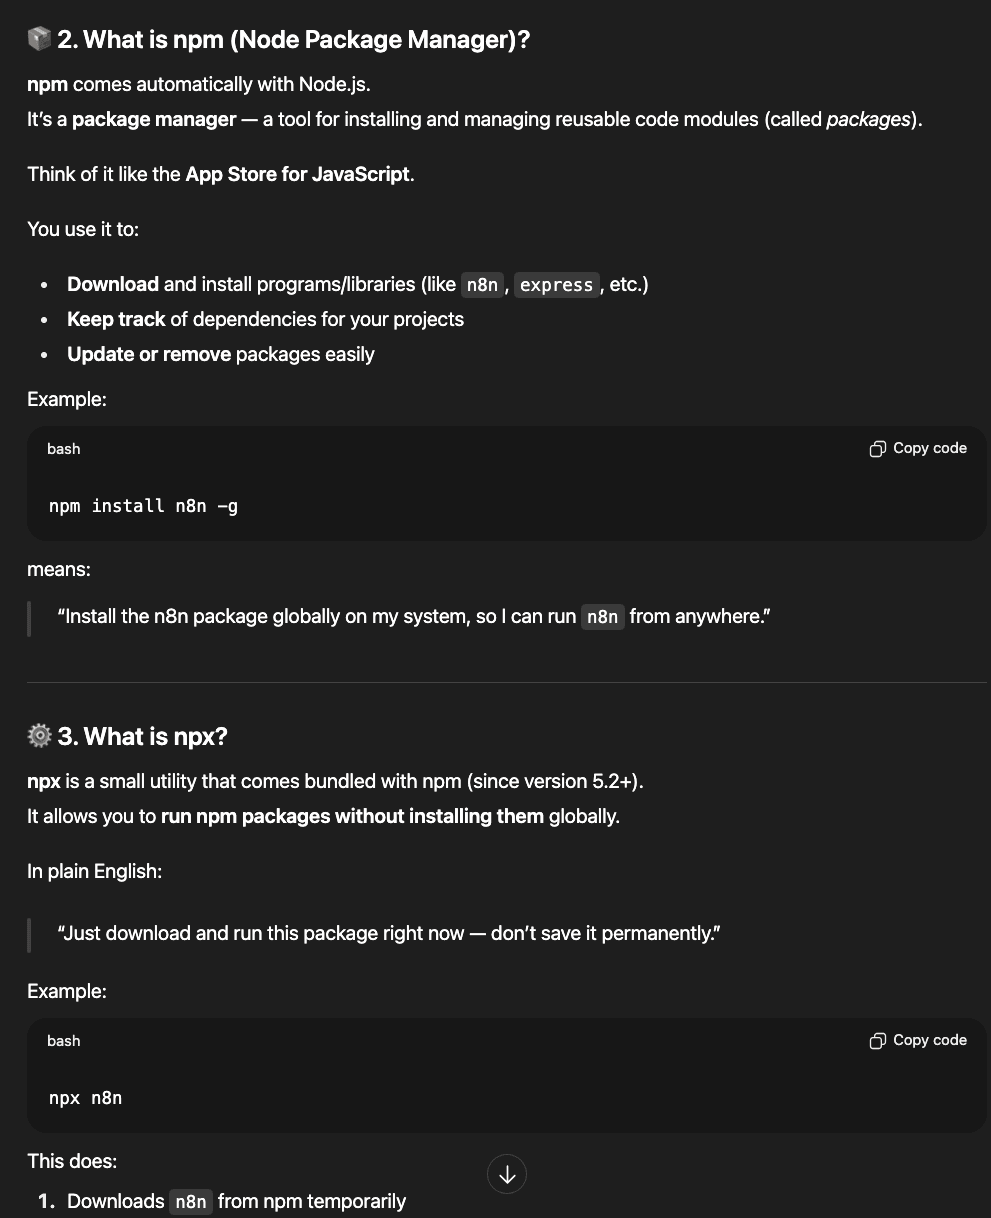
Before we start, let’s take a quick look at what npx, npm, and Node.js mean.
So, Node.js is a JavaScript runtime environment.
That’s why n8n needs Node.js —
because it provides the environment where n8n actually runs.
Therefore, before installing anything else,
you must install Node.js first.
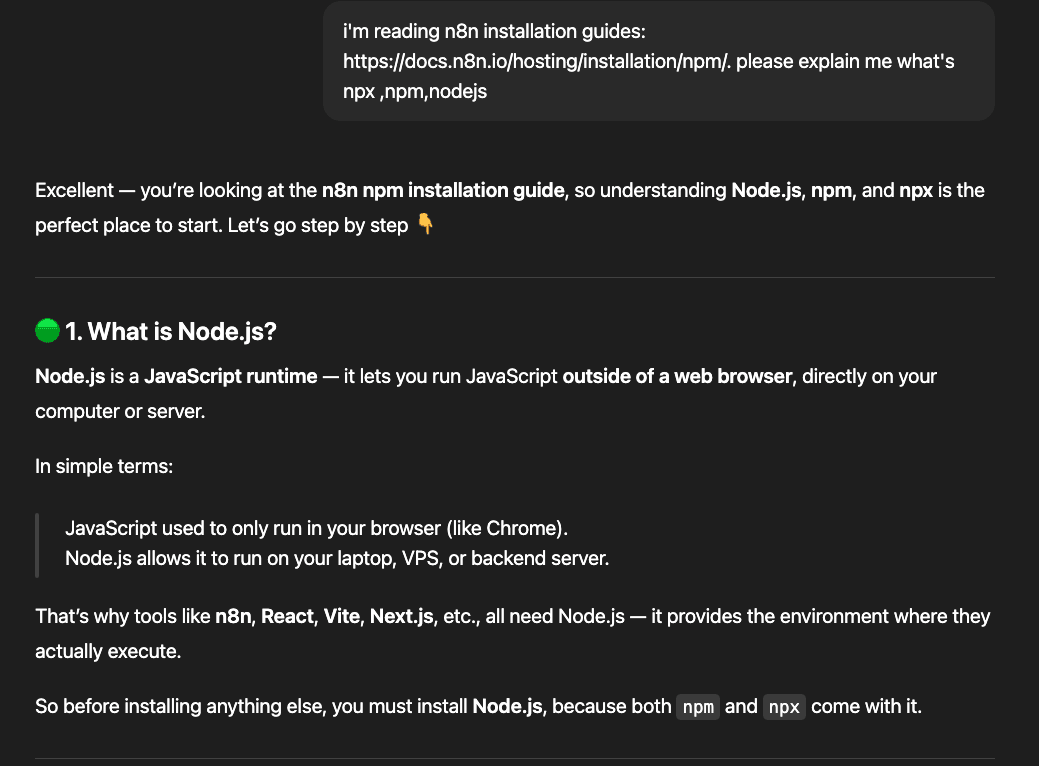
Once Node.js is installed, you’ll automatically have npm and npx available.
Here’s the difference between npm and npx:
- npx comes with npm version 5.2 and above.
- npx runs n8n instantly without installing it globally — perfect for testing or one-time use.
- npm installs n8n globally, so you can run it anytime later.
Once we understand these, we can start installing.
First, install Node.js.
As mentioned earlier, choose a version between 20.19 and 24.x.
Select the correct version based on your operating system.
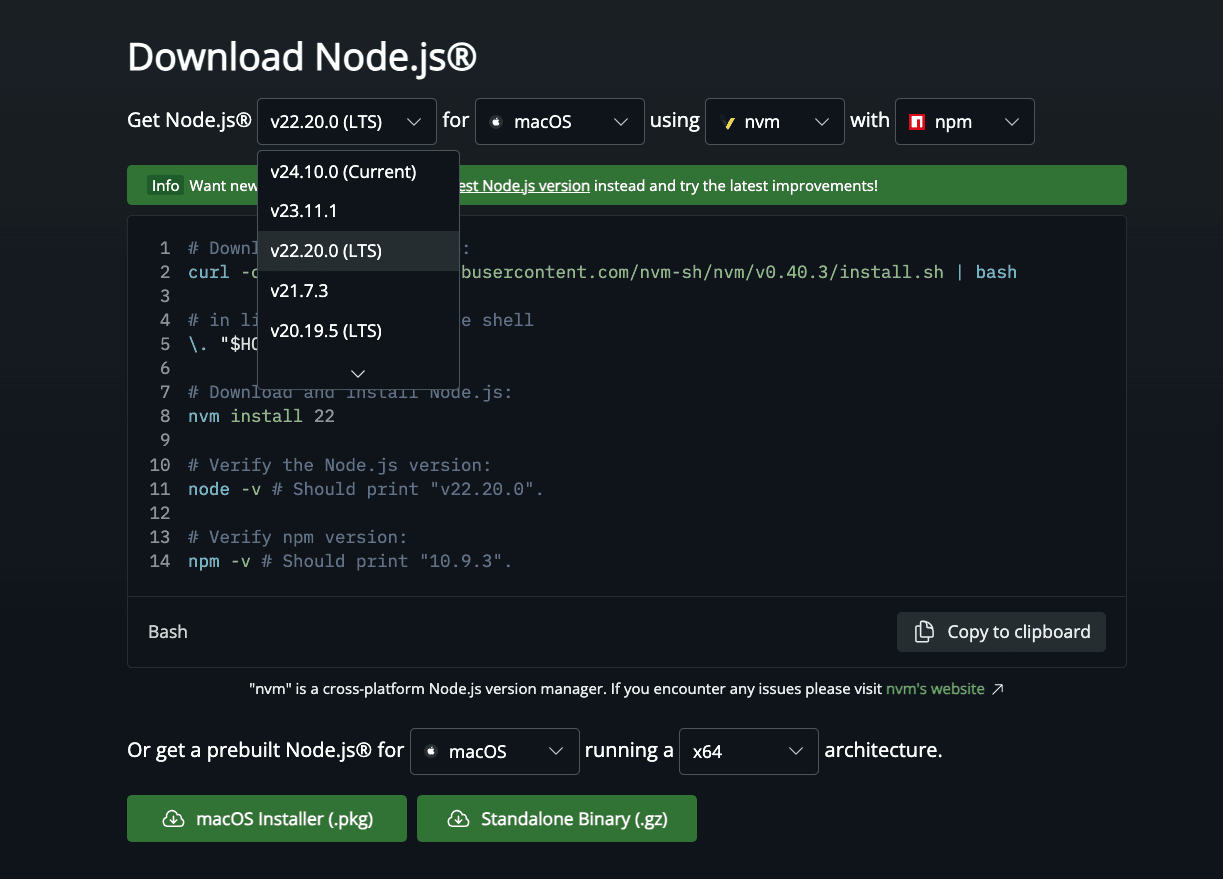
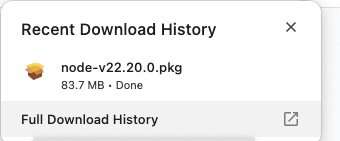
Download it, install it, and you’re ready to go.
NPX
Next, open your command line interface and enter the following command to check the installed versio
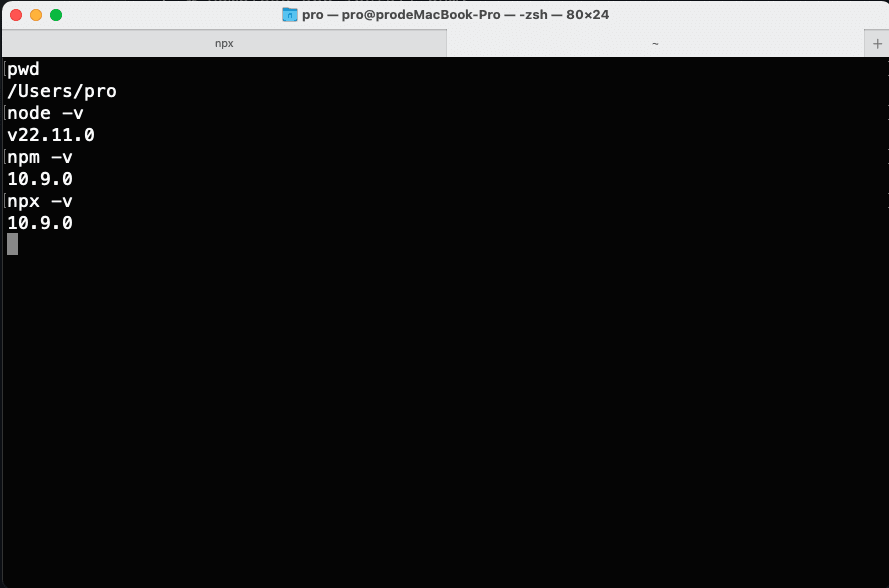
If the version looks correct,
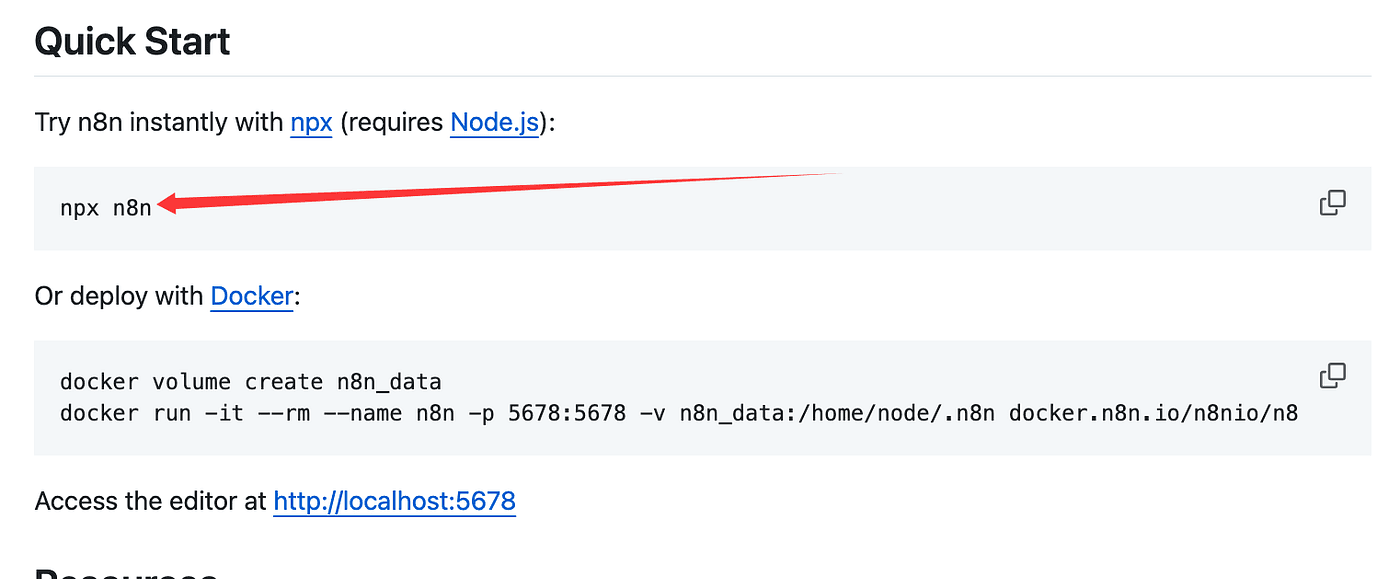
you can start the local n8n service directly with this command:
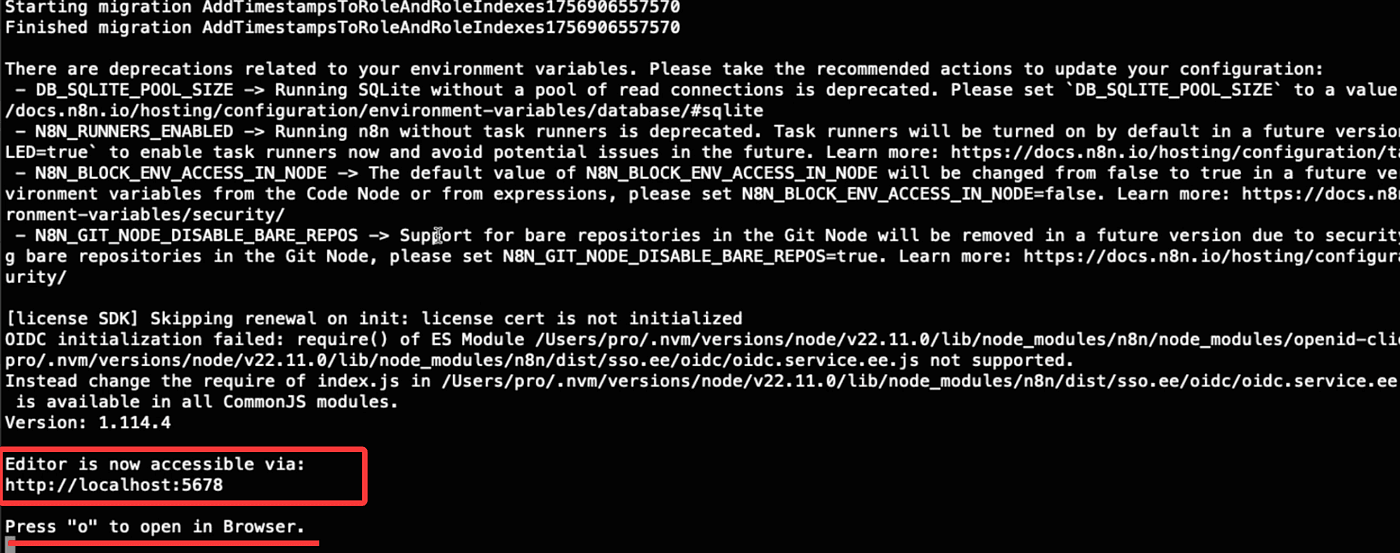
npx n8n
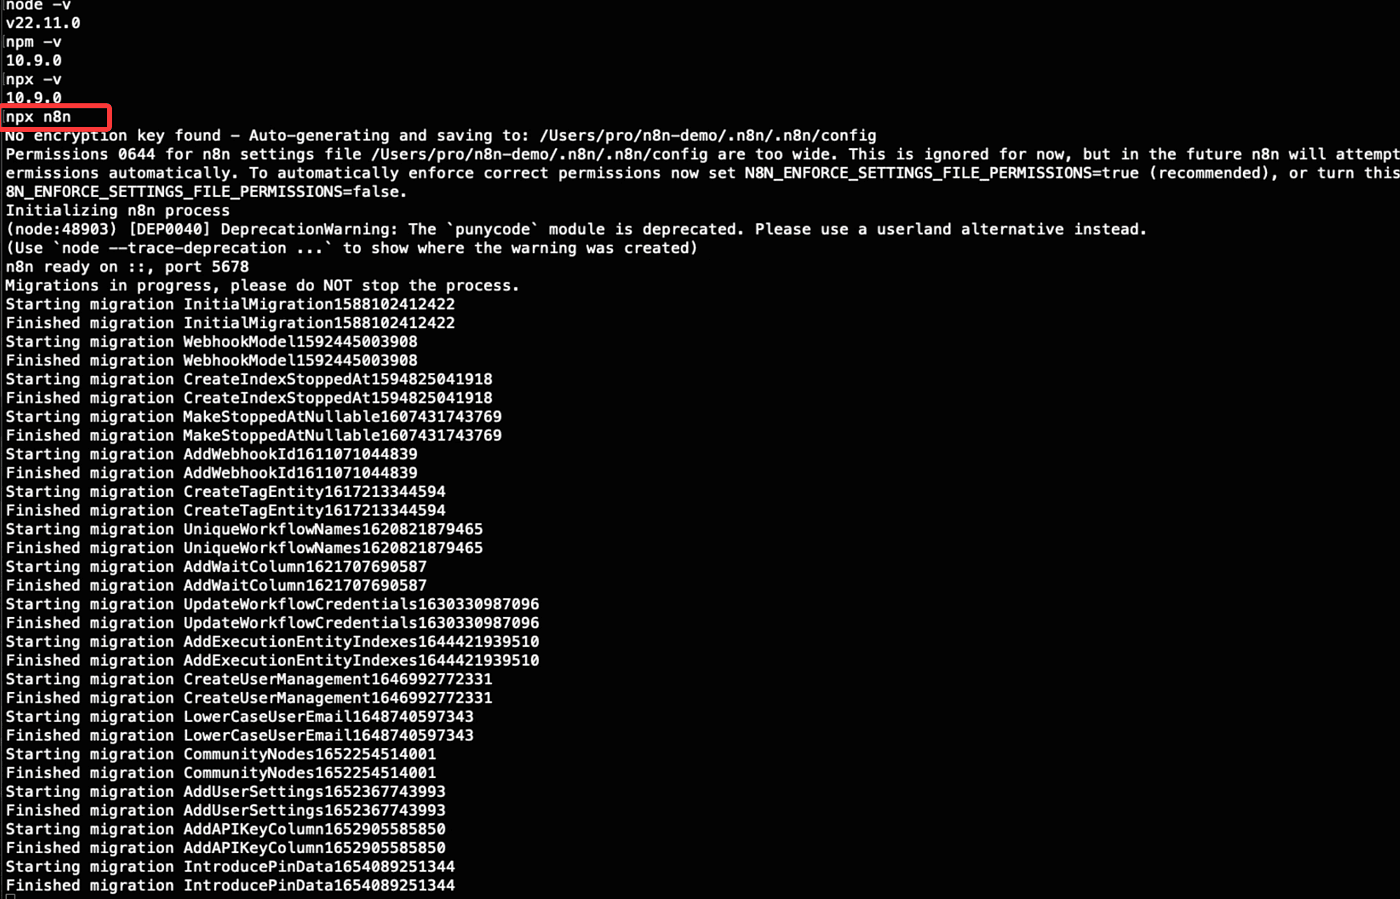
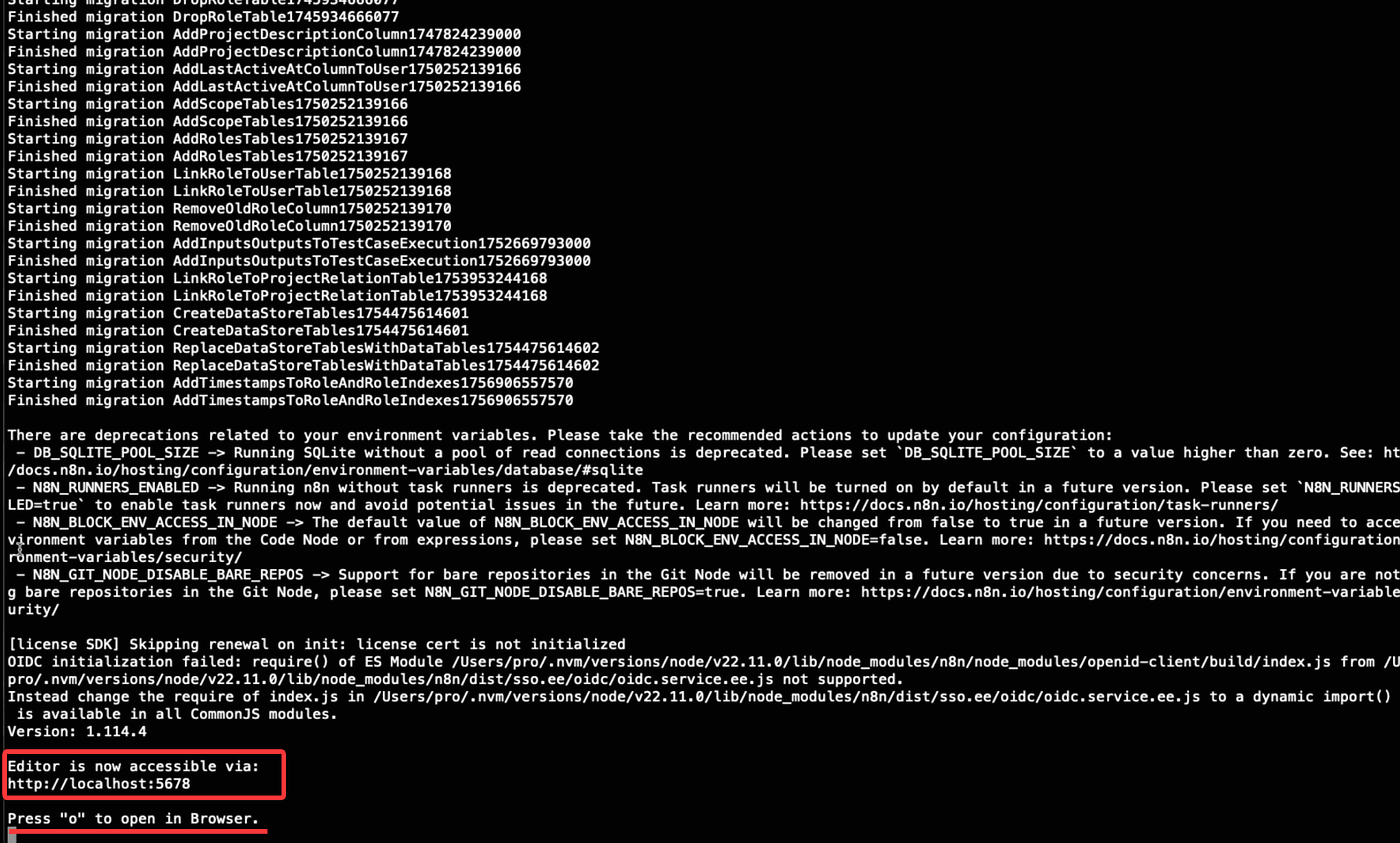
Once it runs successfully,
you’ll see a local access URL: http://localhost:5678/
Follow the prompt — press “o” to open it in your browser.
Then go through the registration process by filling in some basic information.
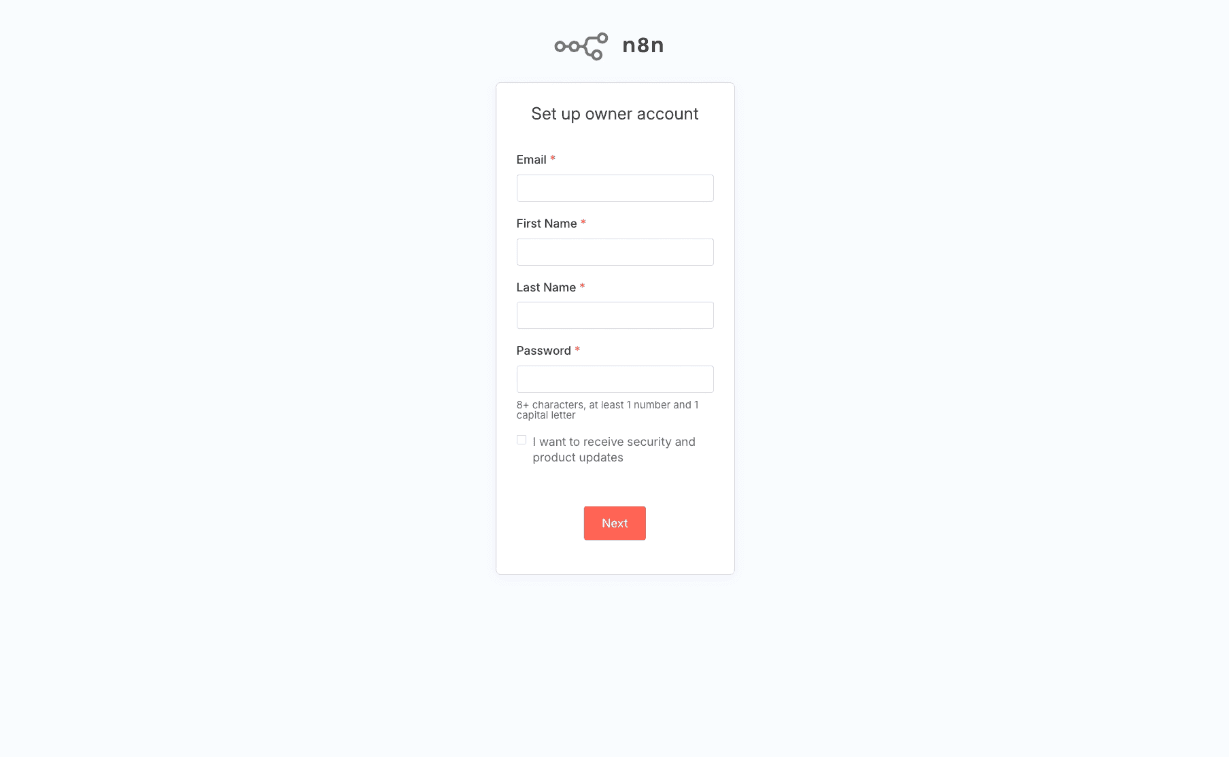
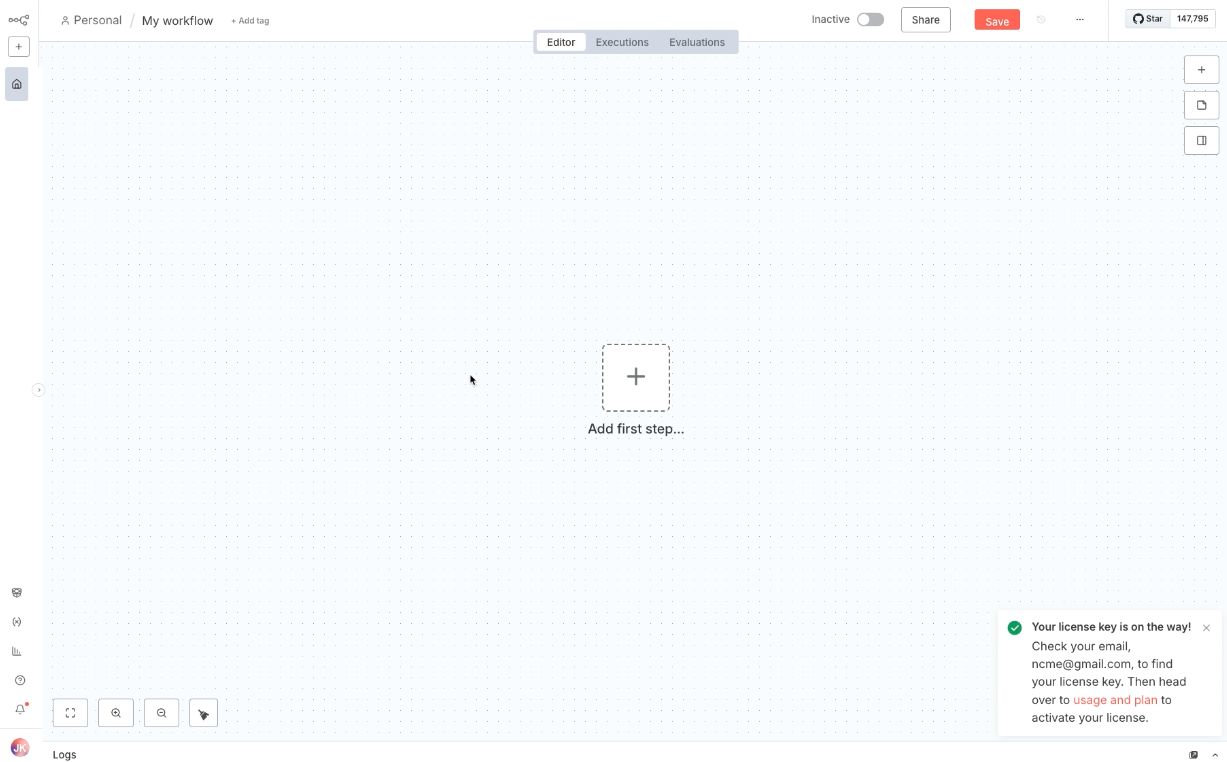
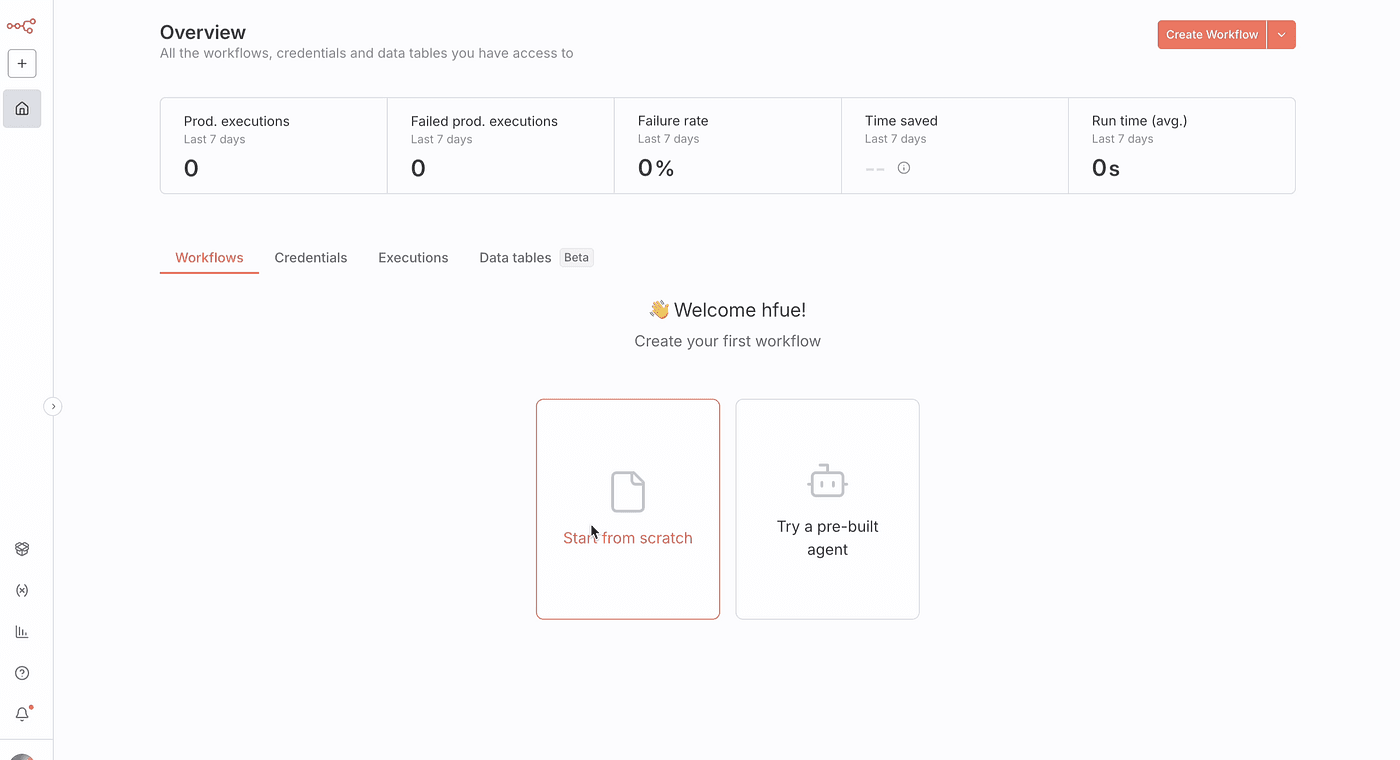
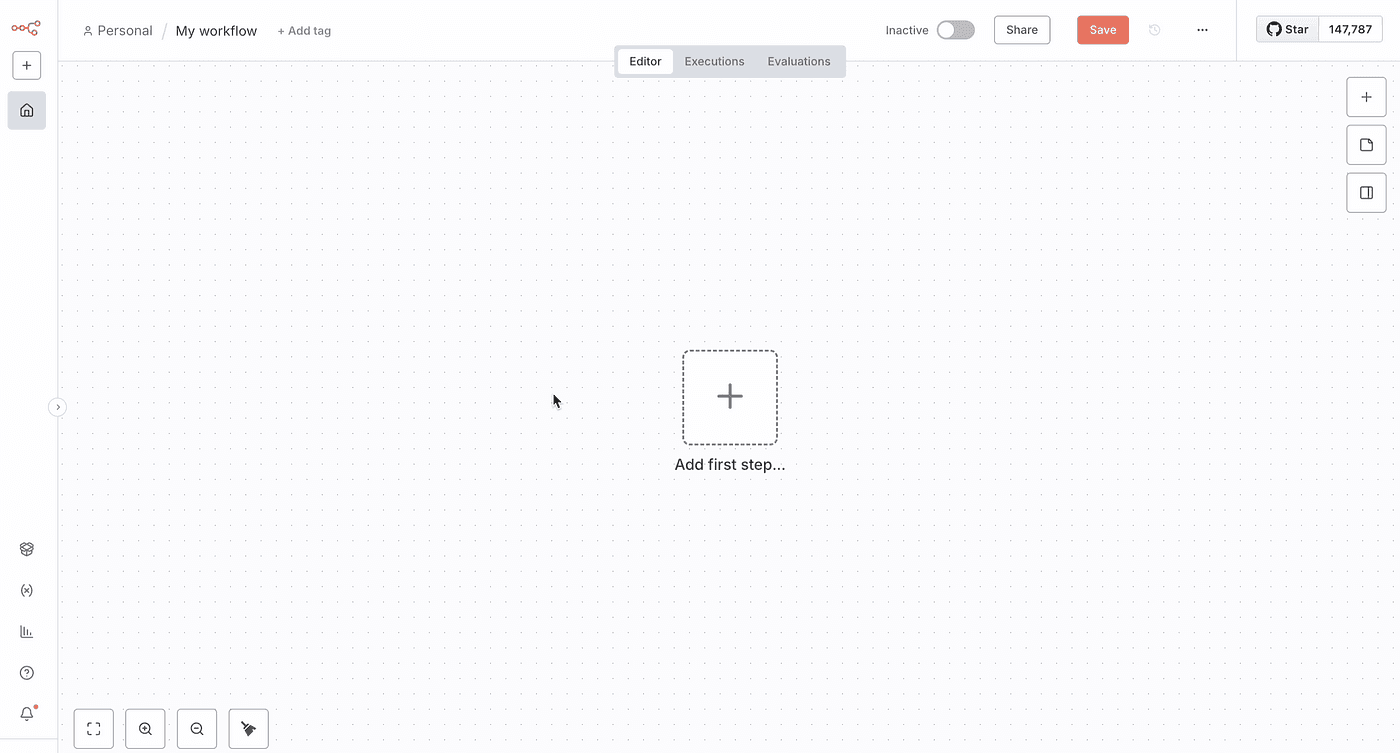
After registration, you’ll enter the n8n editor interface,
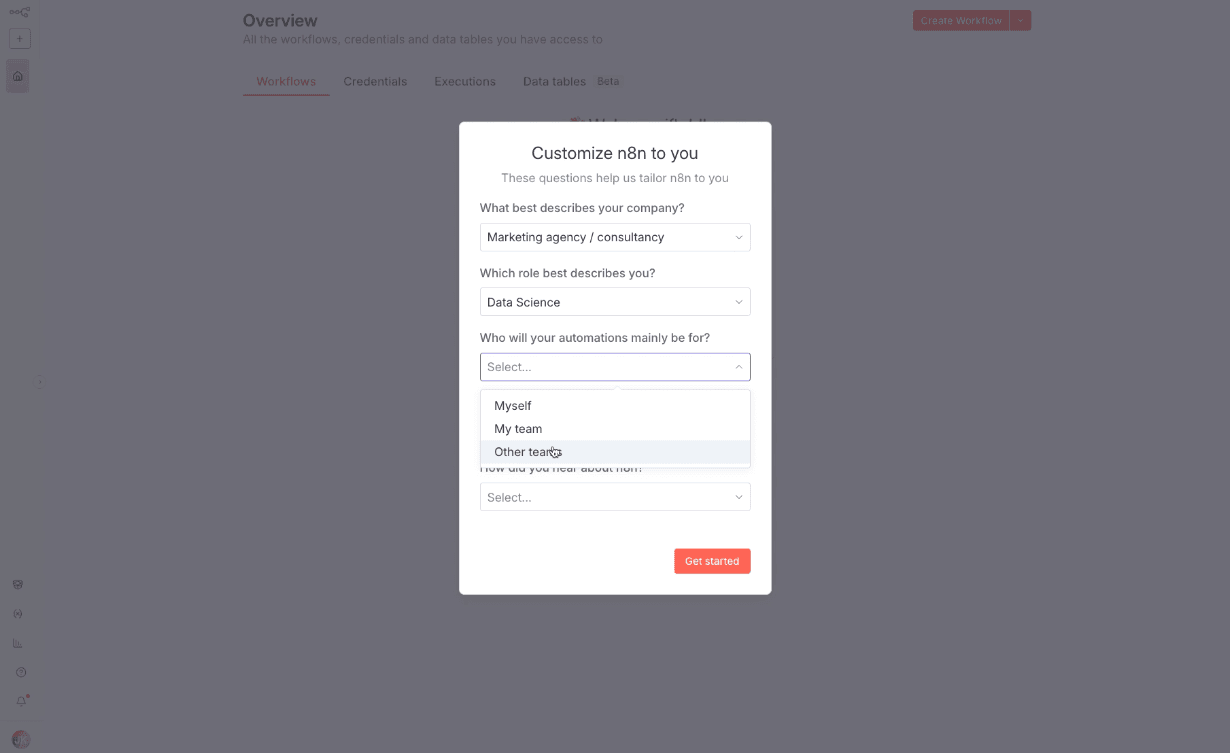
where you can start building your first workflow.
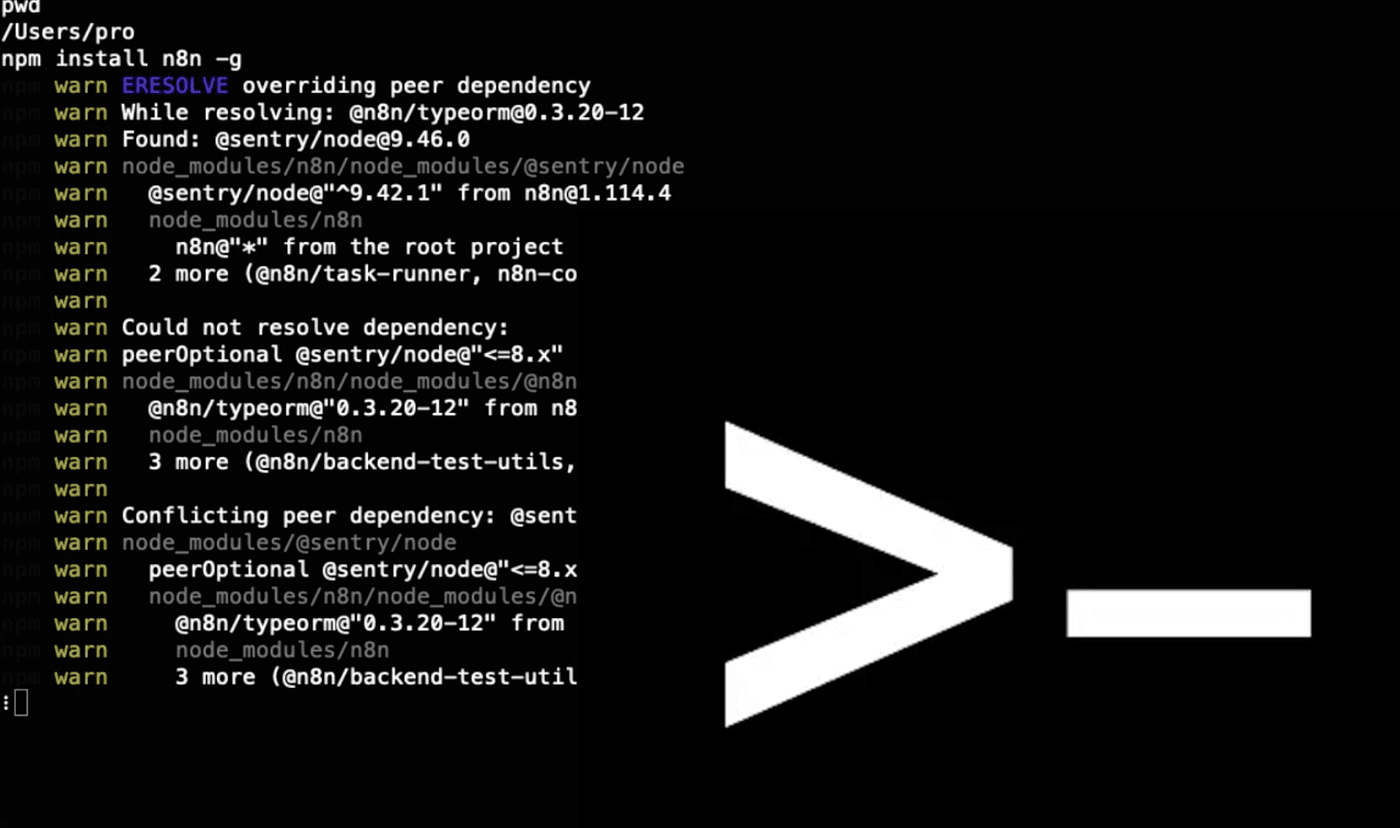
NPM
Alternatively, you can run the following command to install n8n globally:
npm install n8n -g
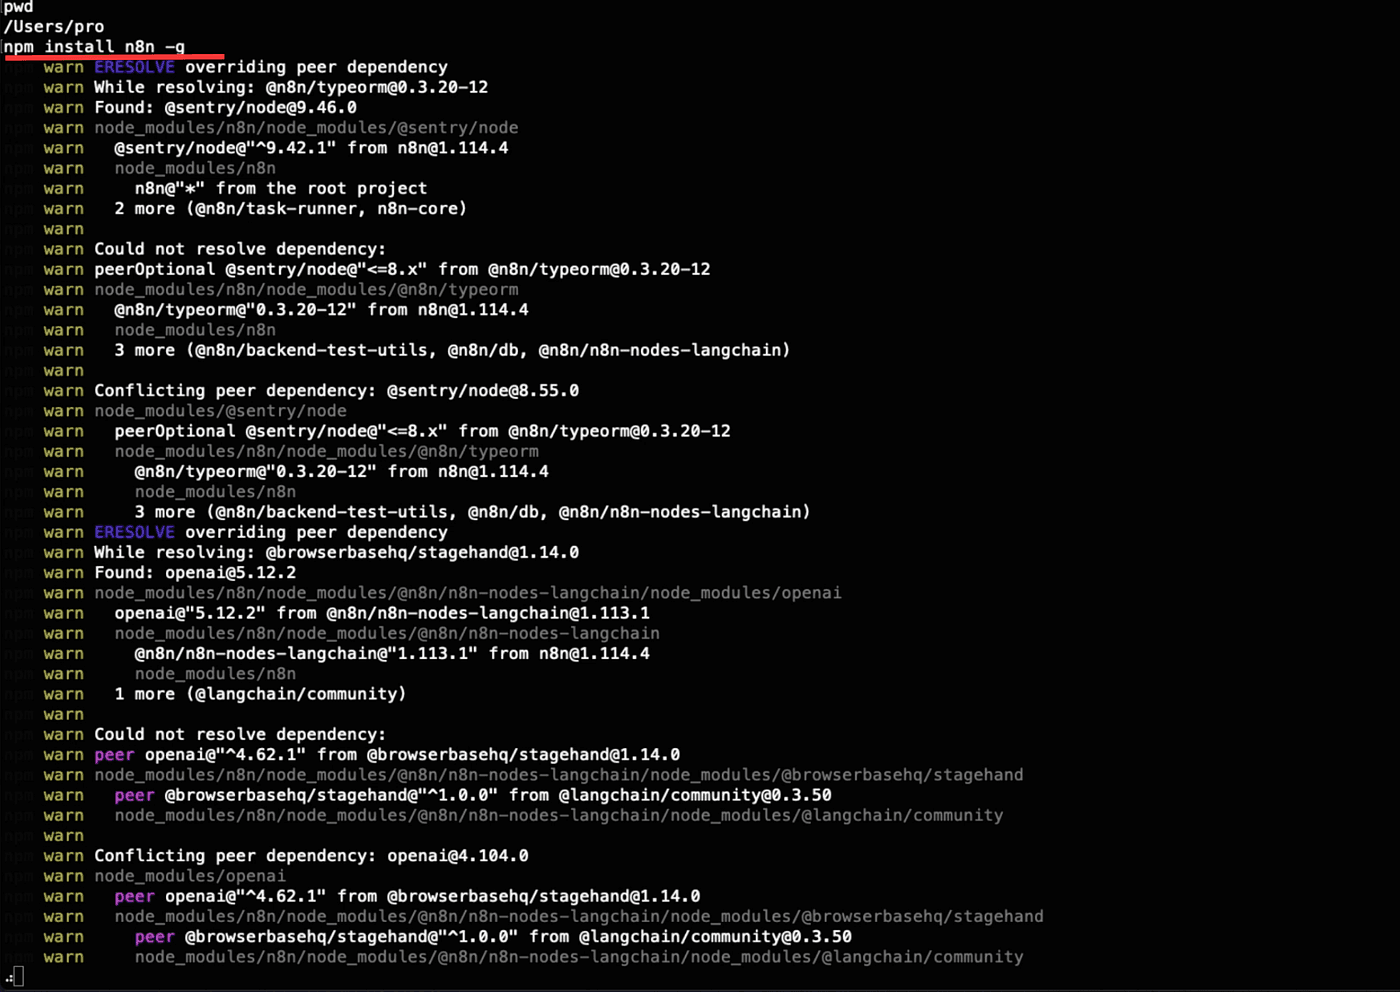
After the installation is complete,
start your local n8n service by running:
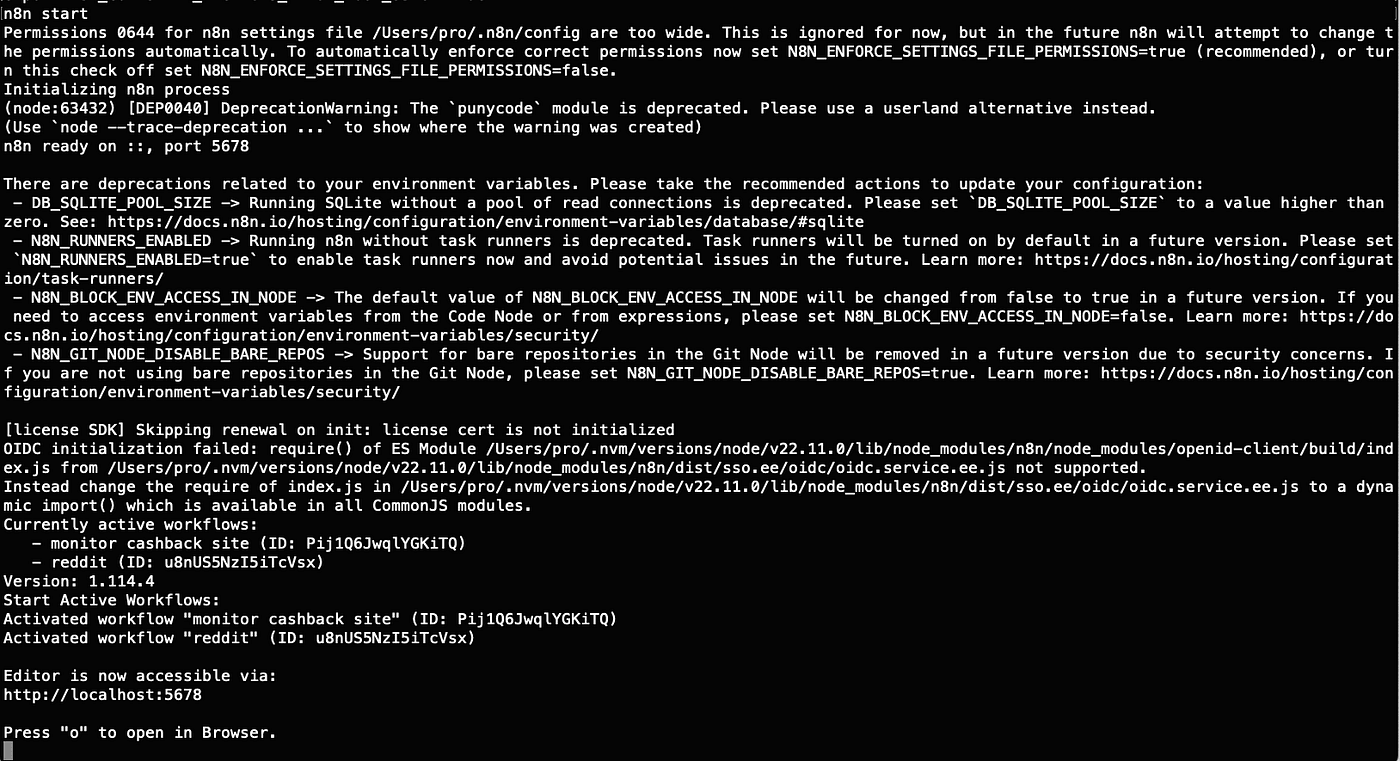
n8n start
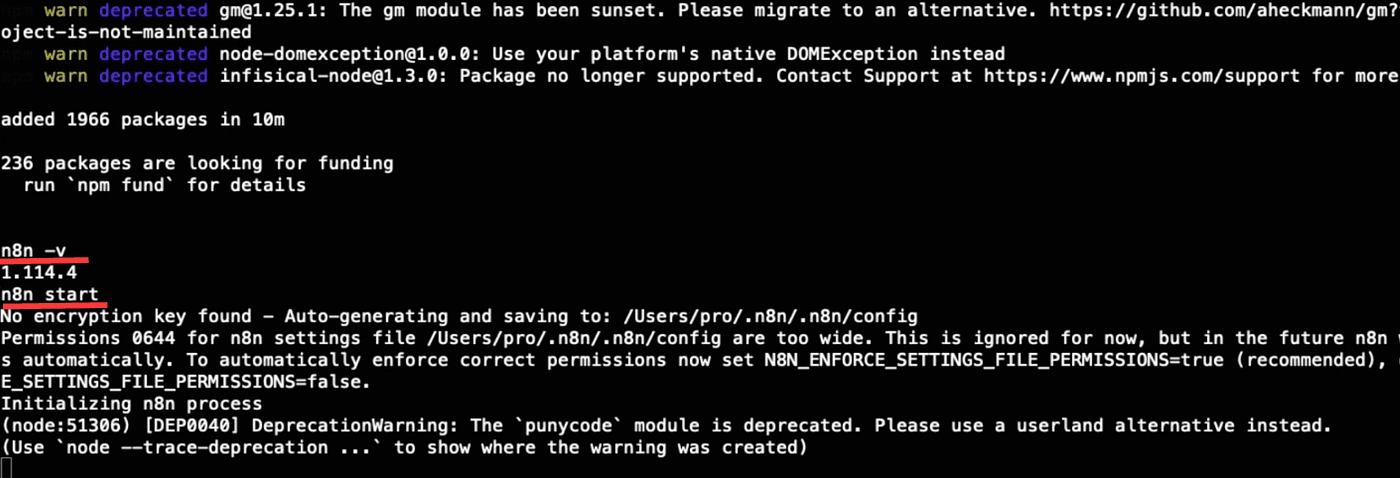
Just like before, once it runs successfully,
you’ll see a local access URL: http://localhost:5678
Follow the prompt and press “o” to open it in your browser.
That’s it — your local n8n environment is now ready.
Method 2: Install n8n with Docker
Now let’s move to the second method — installing n8n using Docker.
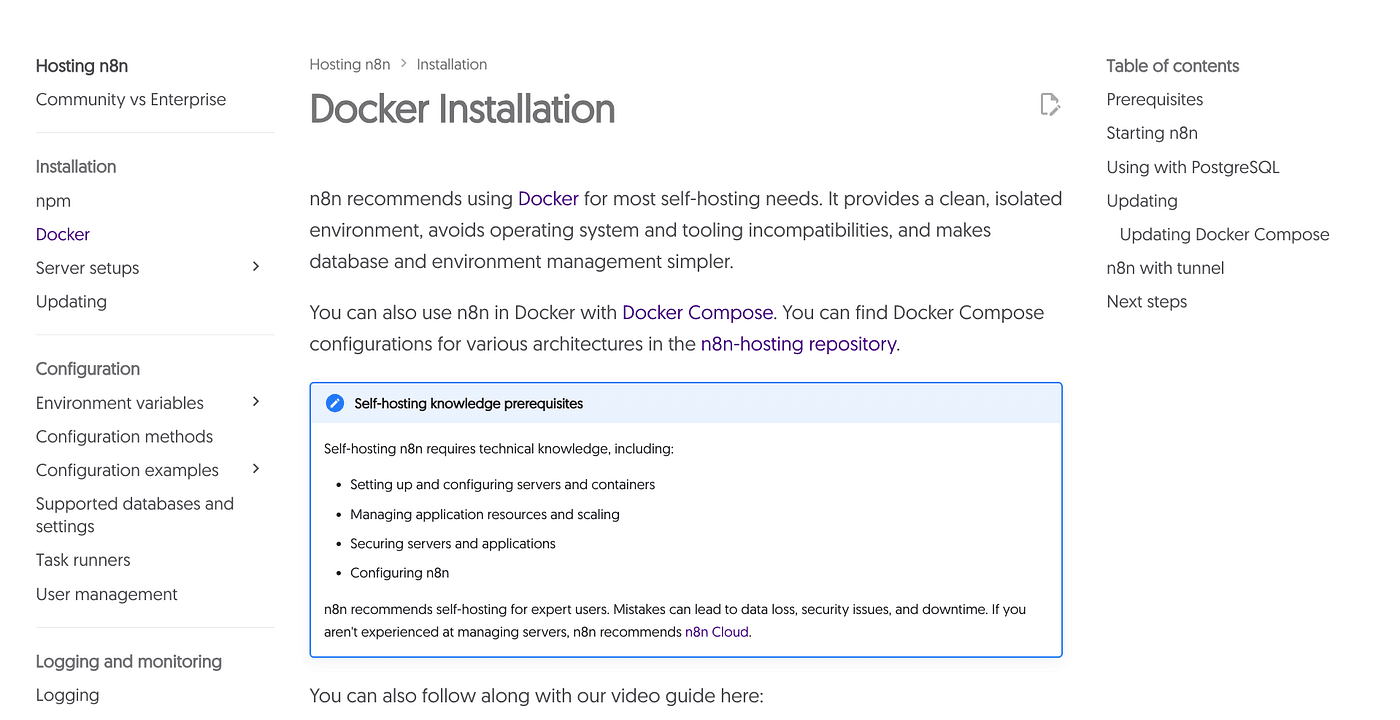
Click into the Docker installation tutorial
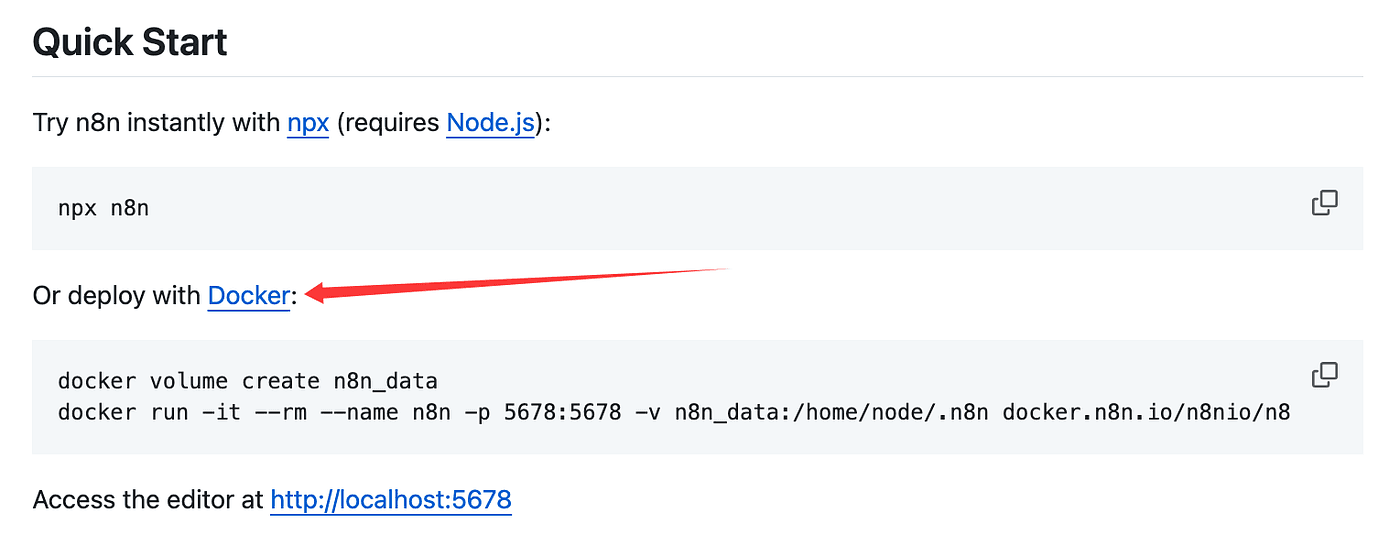
on the official n8n documentation page.
Before we begin, let’s quickly explain — what is Docker?
Let’s search for it using AI, just like before.
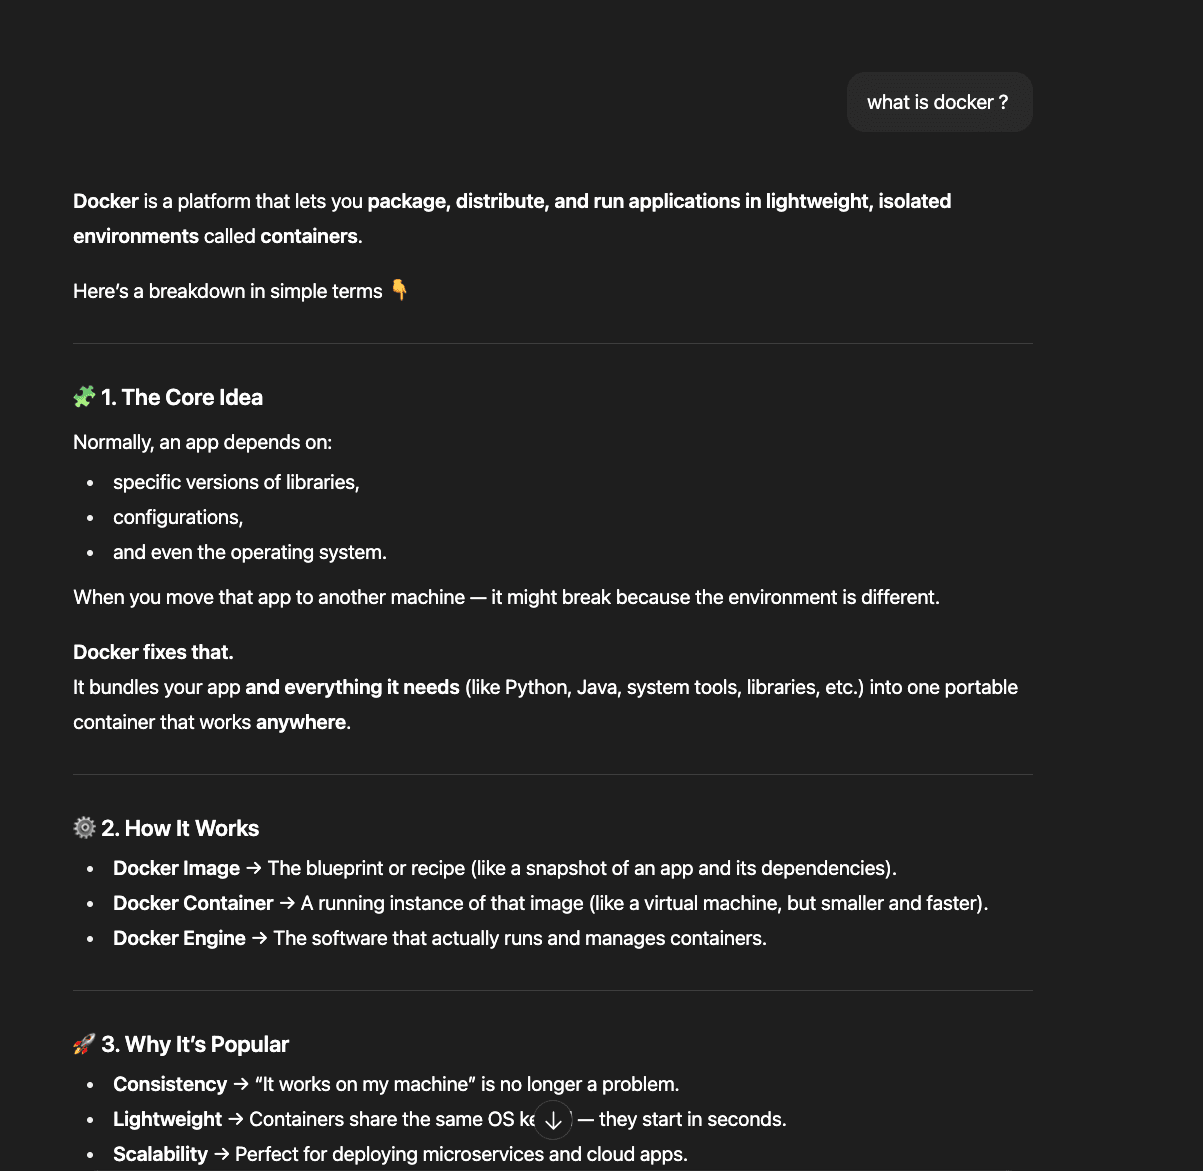
So, Docker works like a lightweight virtual machine.
It’s an application that includes its own runtime environment,
which means it runs independently of your operating system.
When you move a Docker-based app to another computer,
it runs exactly the same — no need to reinstall or reconfigure the environment.
Pretty convenient, right?
That’s why we’re going to install n8n inside Docker —
so it can be easily migrated and run on any machine.

Before installing Docker, let’s take a quick look at the prerequisites.
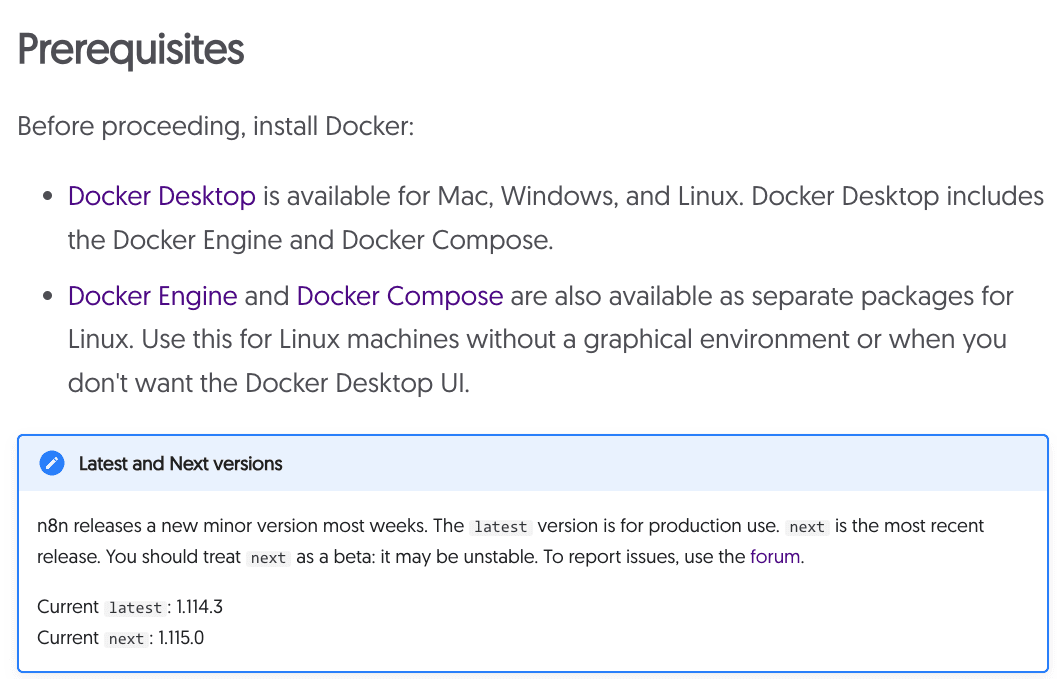
Docker Desktop is available for Mac, Windows, and Linux,
so we can simply choose the version that matches our system.
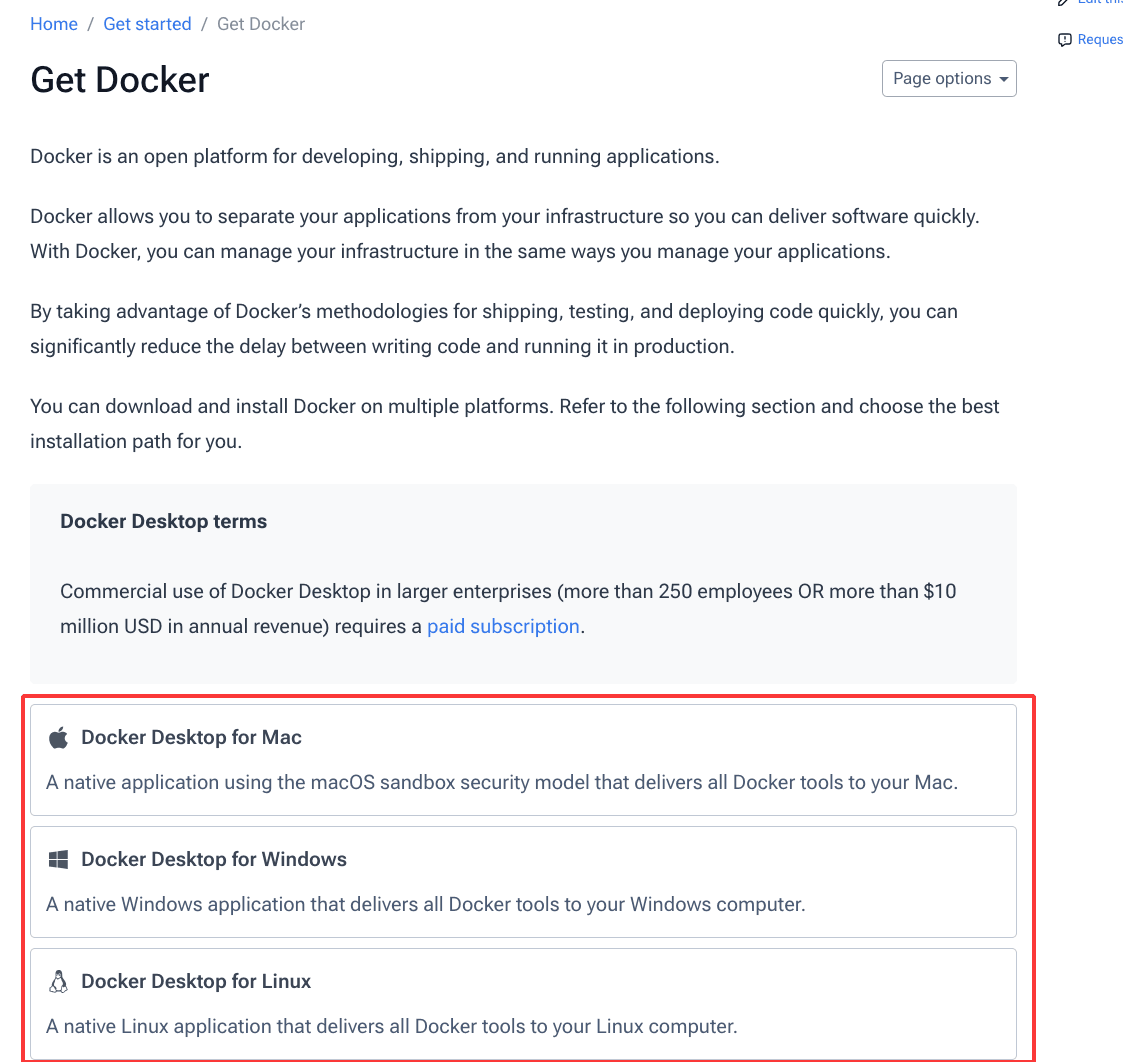
Select the version for your operating system —
Mac, Windows, or Linux

— and download it.
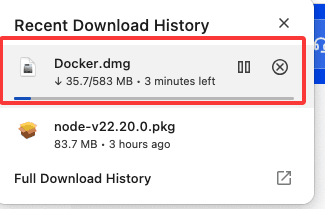
Once the download is complete,
go ahead and install Docker Desktop on your computer.
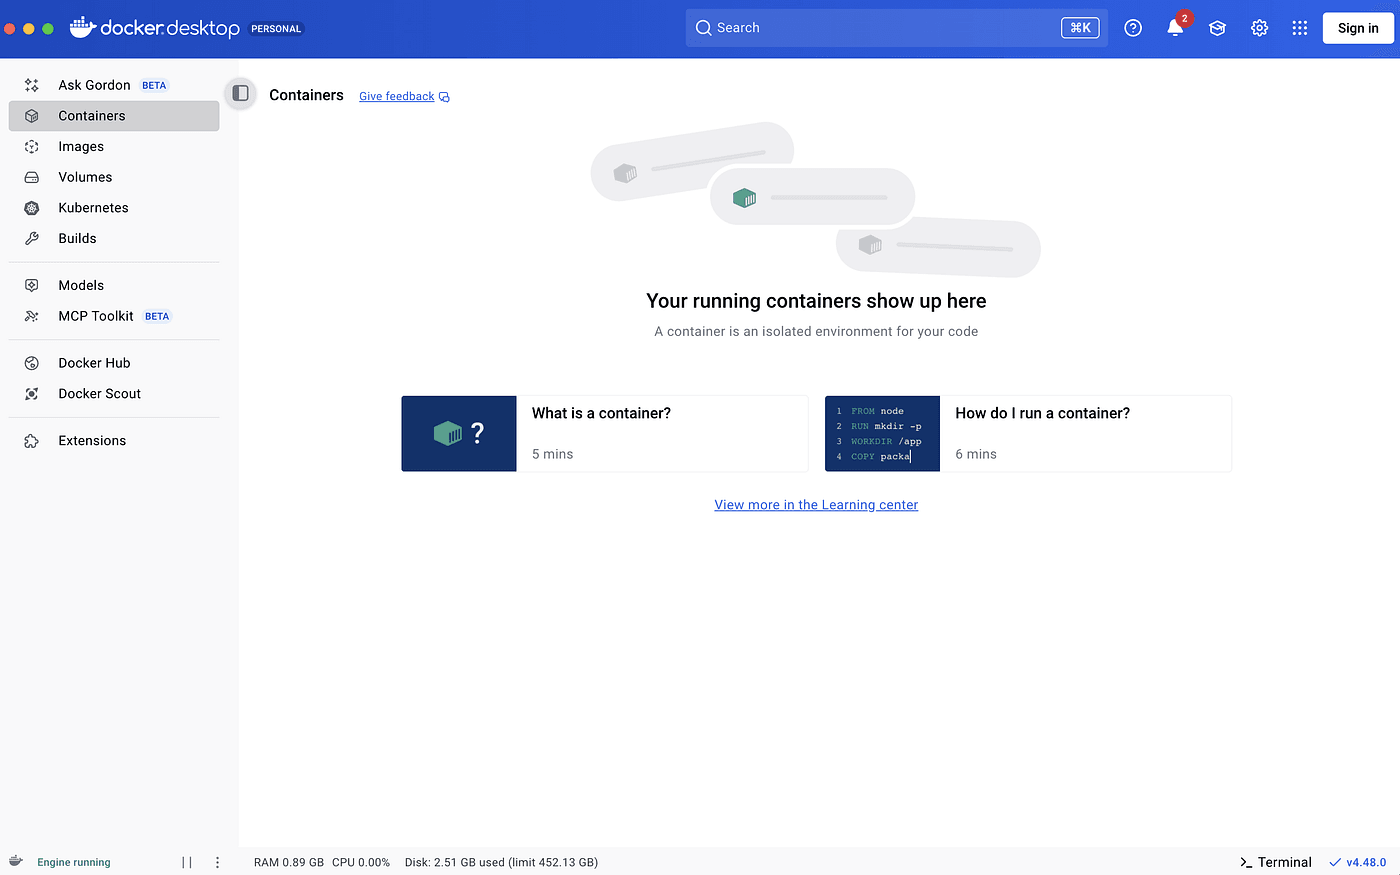
Once the installation is complete,
open Docker Desktop and make sure it’s running.
Next, search for n8n in the search bar.
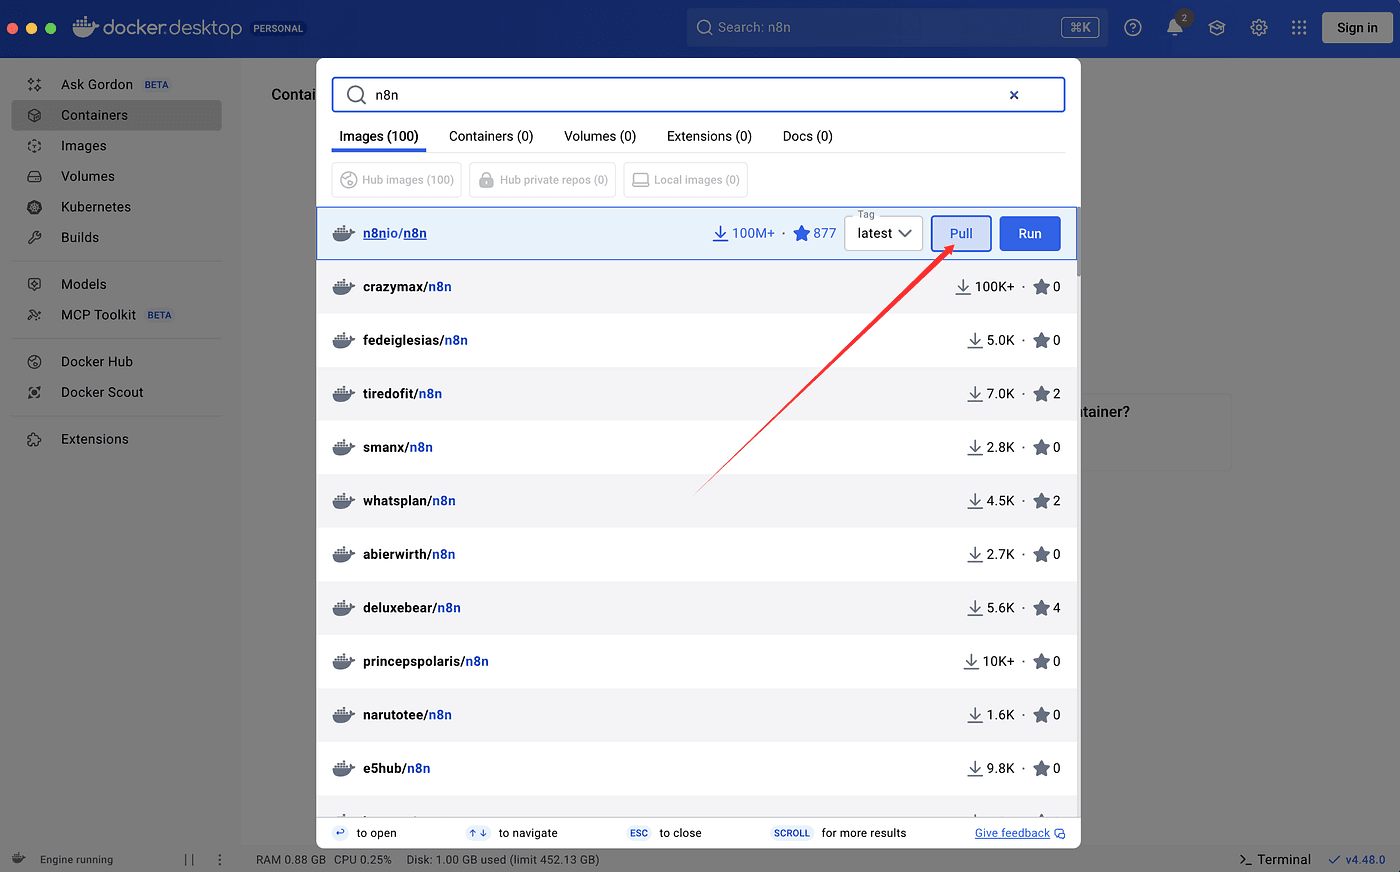
Click Pull to download the n8n Docker image to your local machine.
The image size is around 2GB,
so give it about 10 minutes to finish downloading.
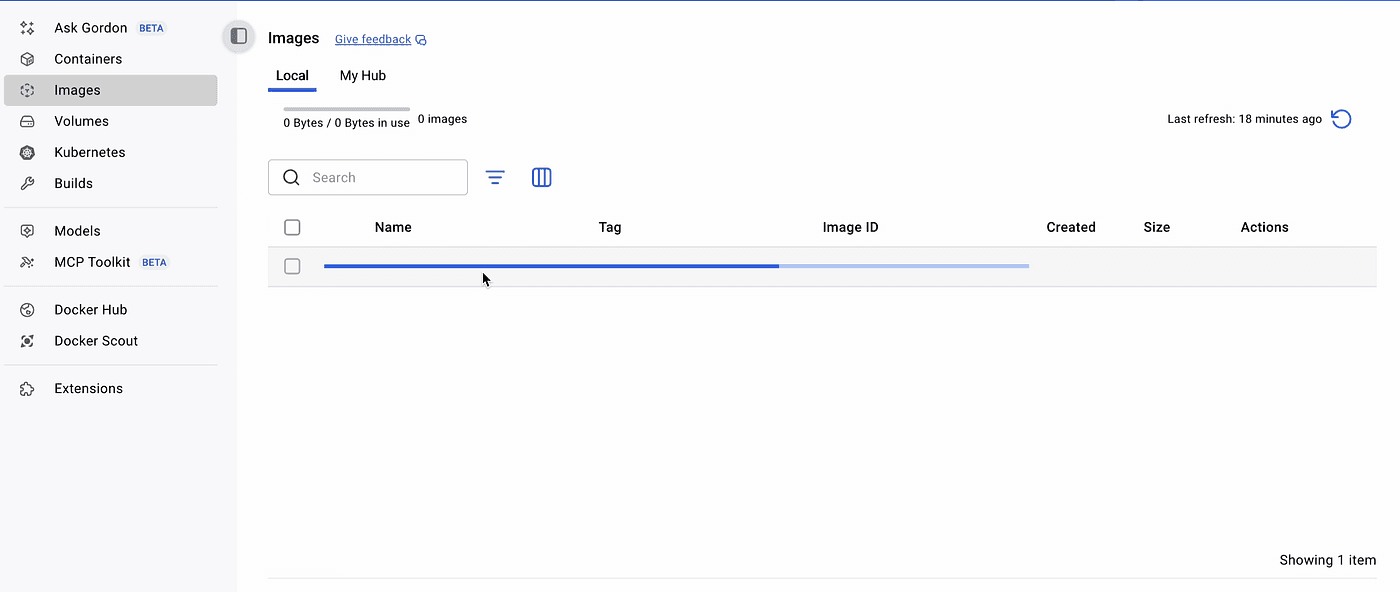
After the image has been pulled successfully,
it’s time to start n8n.

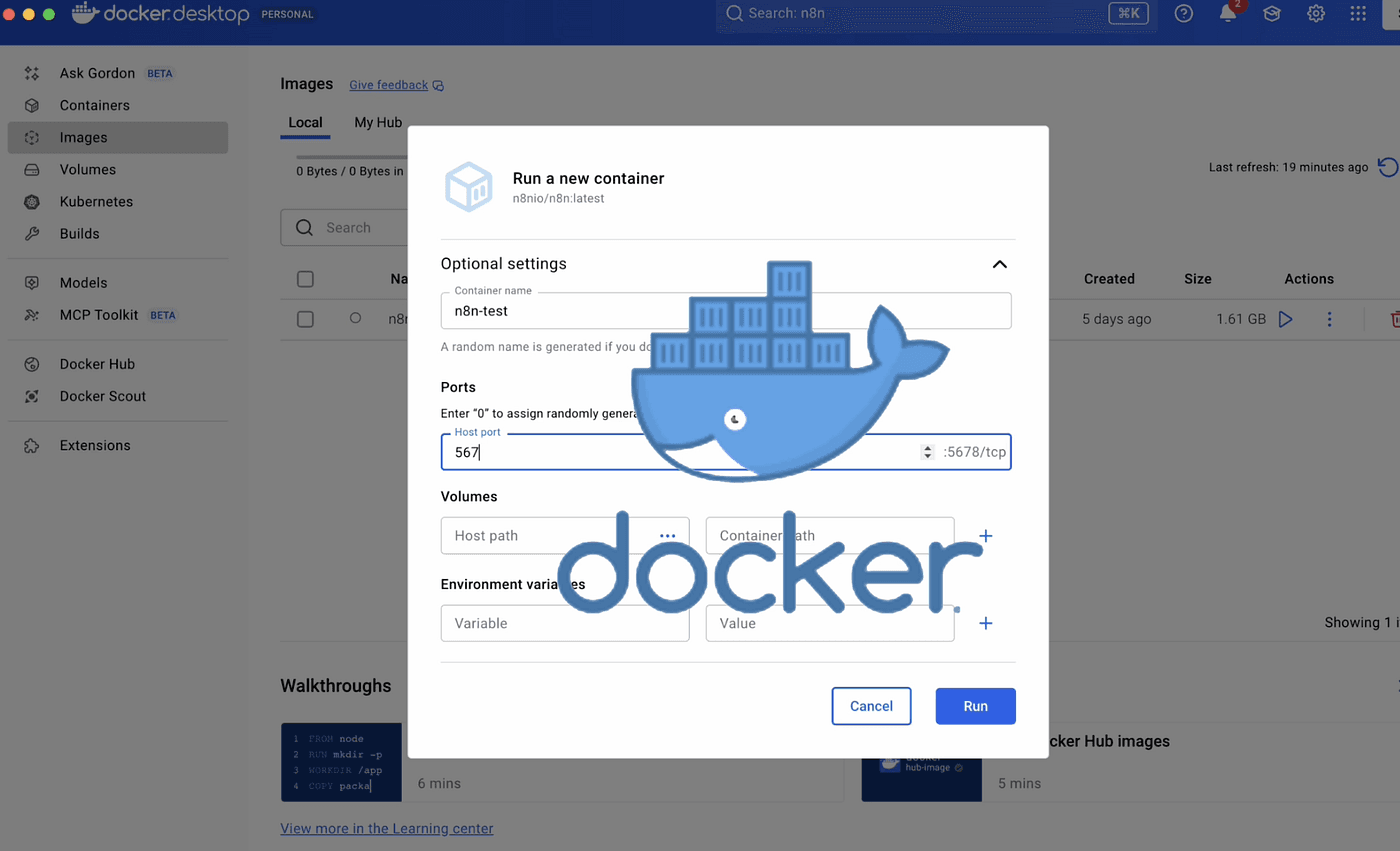
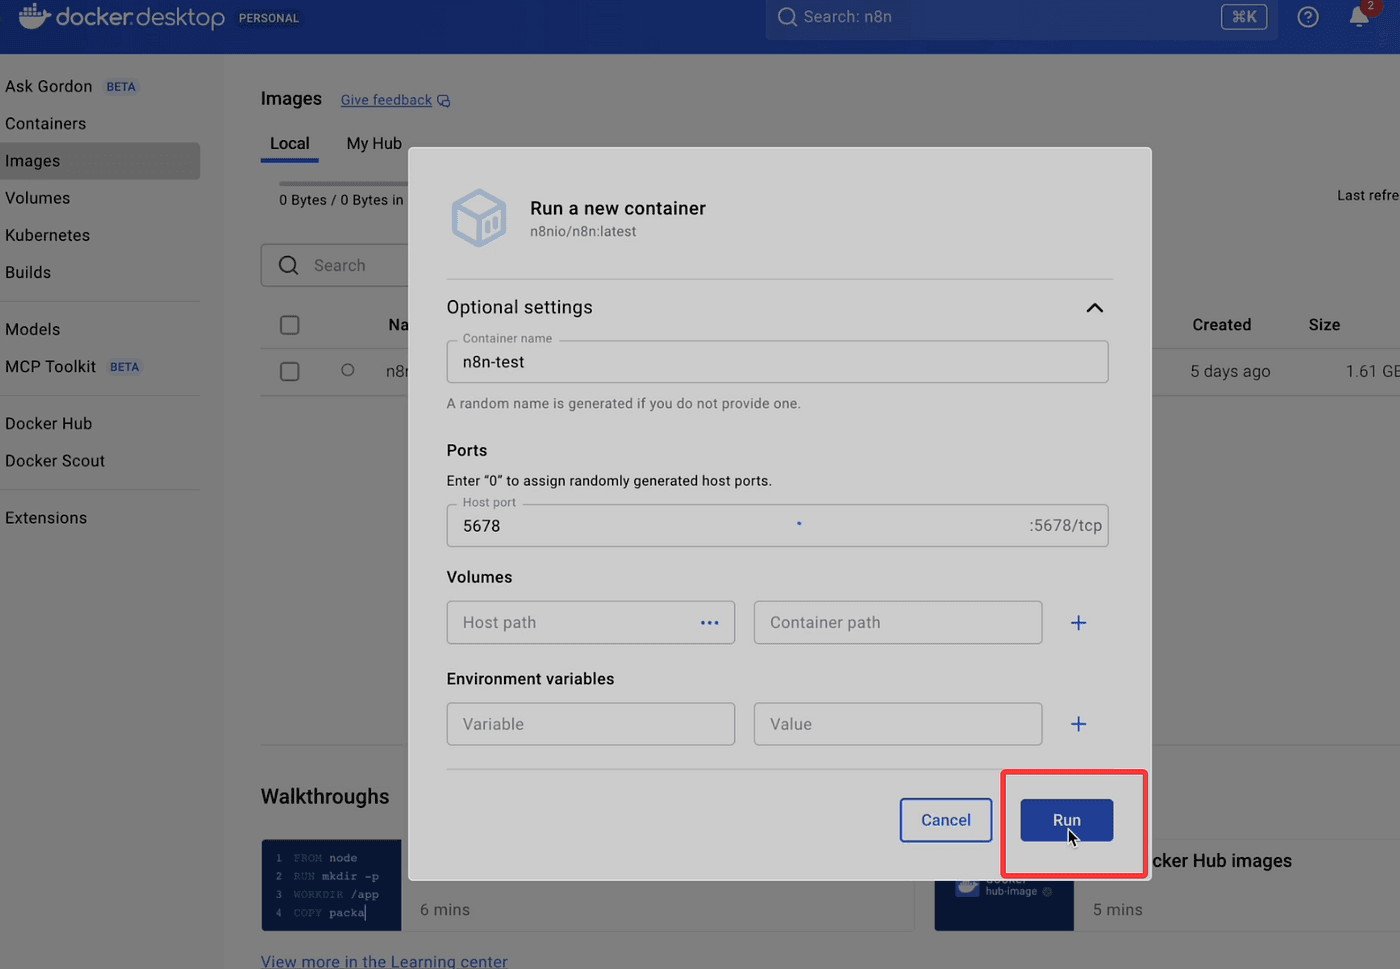
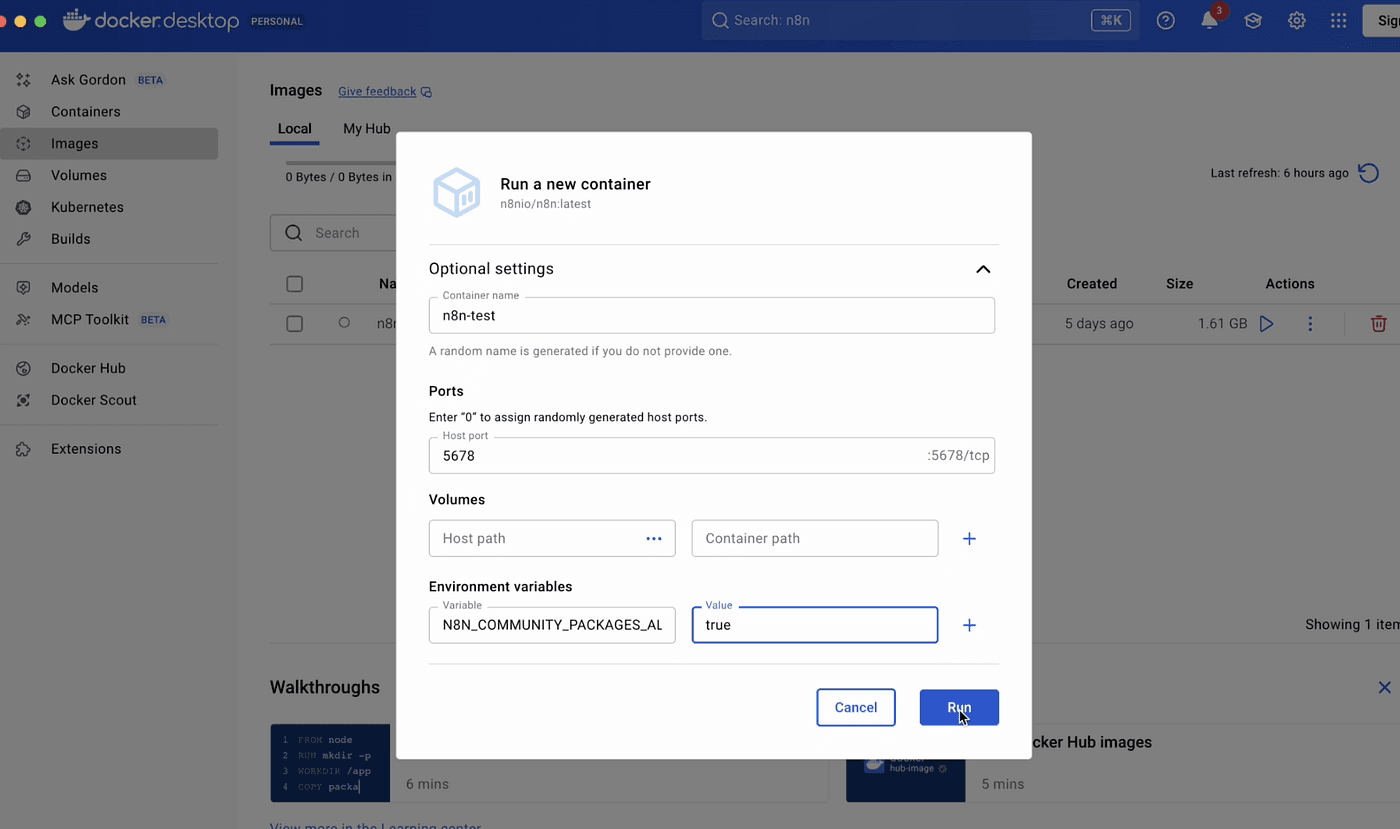
Go to the Images tab, find the n8n image, and click Run.
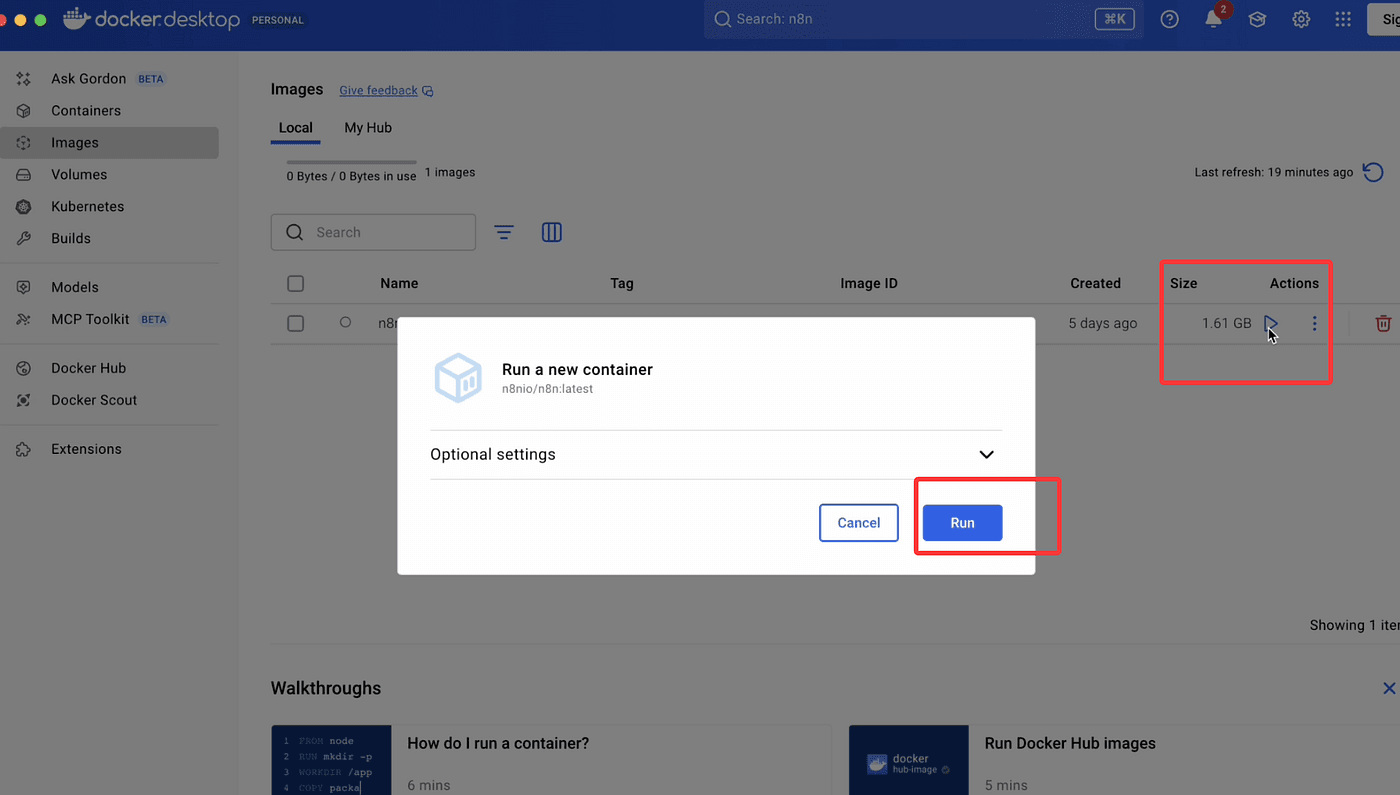
Now, fill in the basic container settings:
- Container name: any name you like
- Port: set it to 5678 by default
- You can leave other fields empty for now.
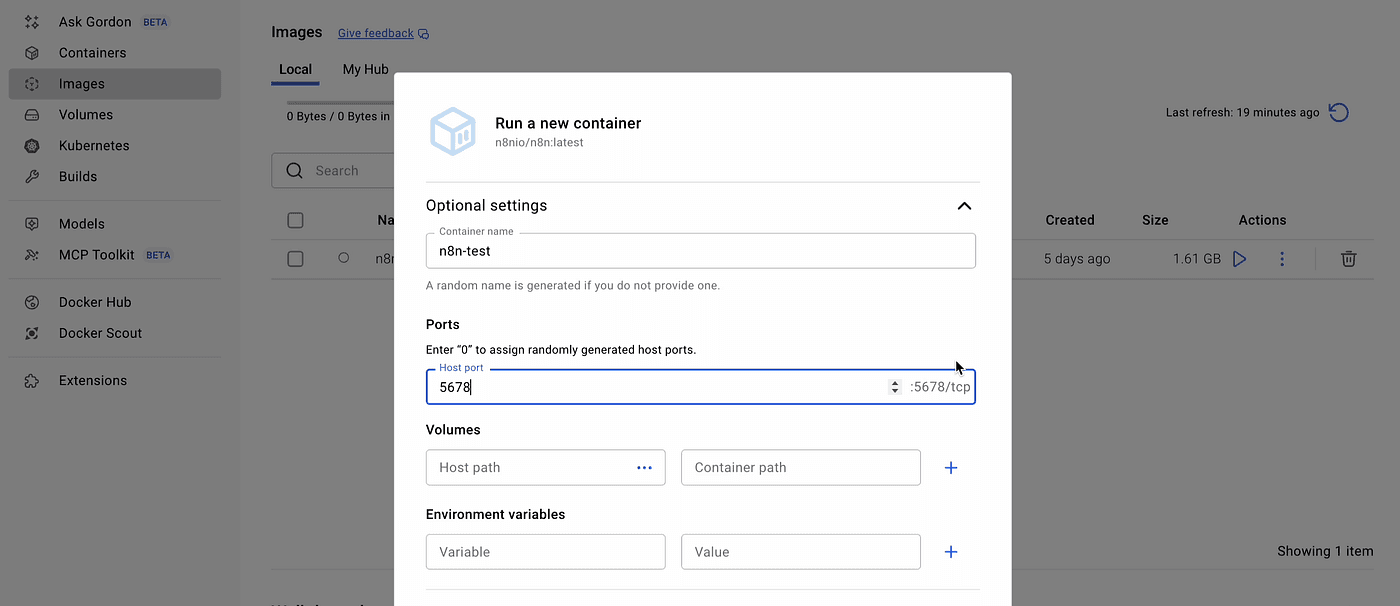
Then click Run to start the container.
Once it’s running successfully,
you’ll see the same local URL as before: http://localhost:5678
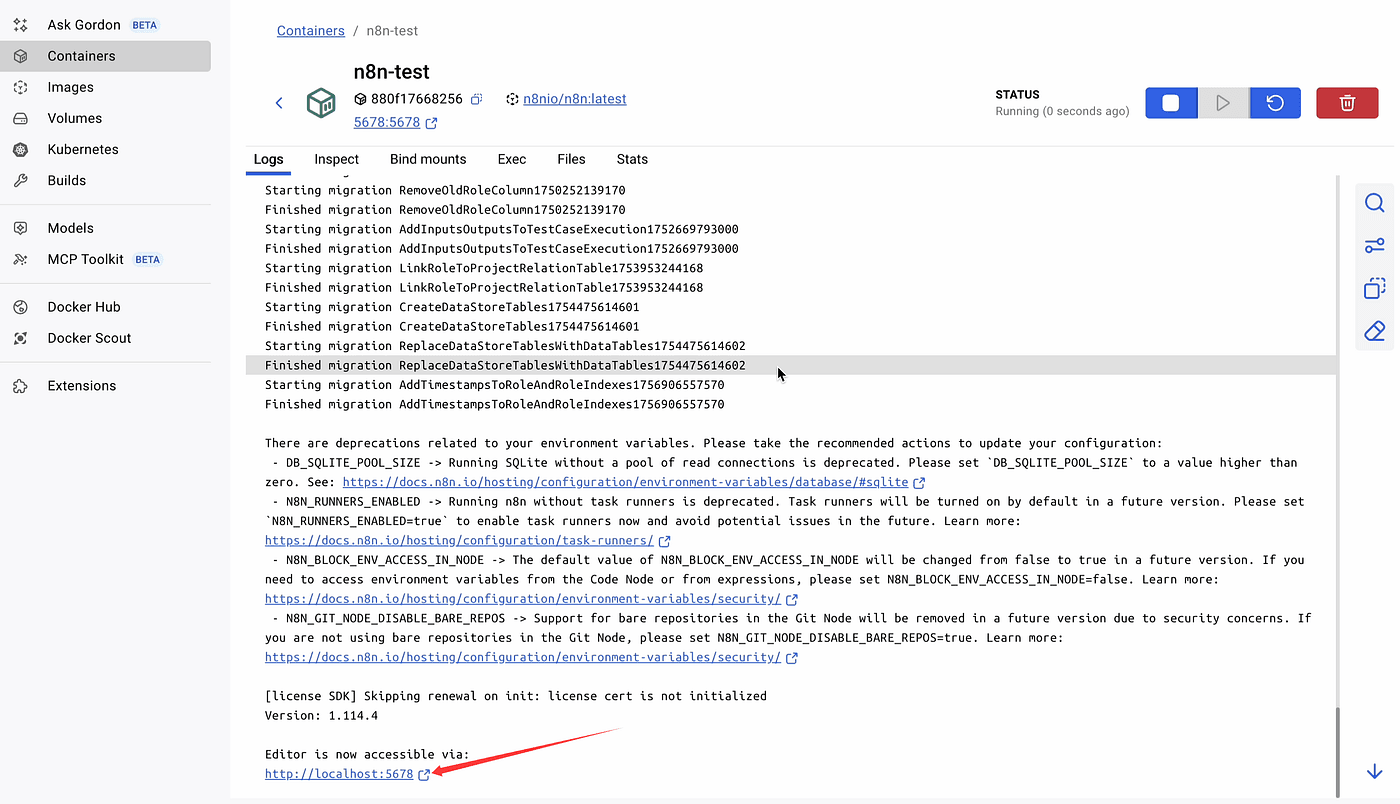
Open this address in your browser,
and you’ll be taken to the n8n setup page.
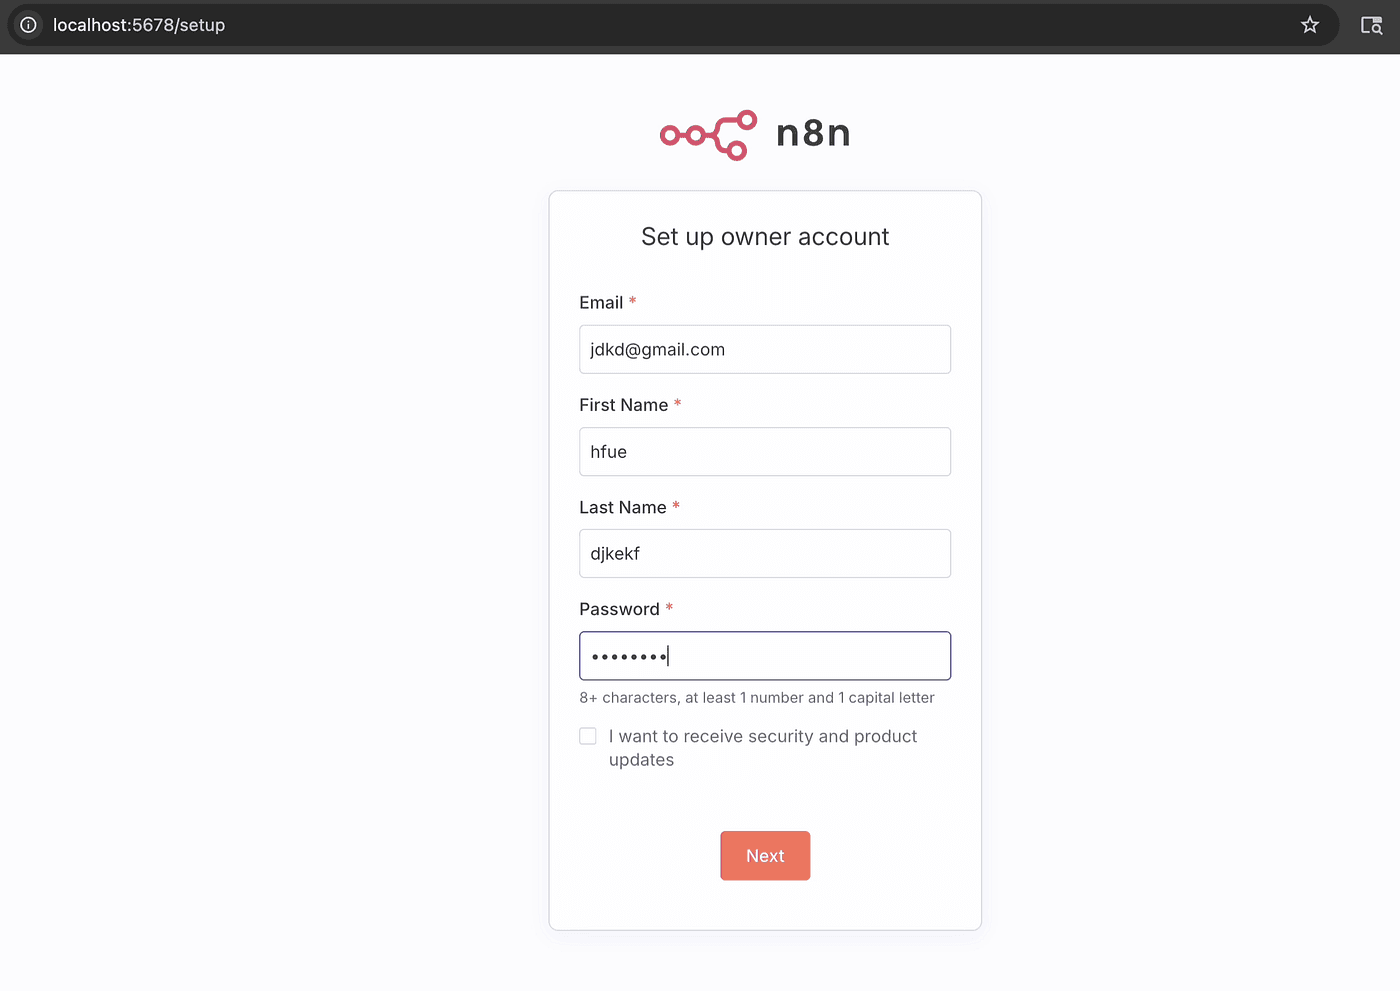
Follow the on-screen steps to register your account —
enter your username, email, and password.
After registration,
you’ll enter the n8n editor environment,
where you can start building and managing your automation workflows.
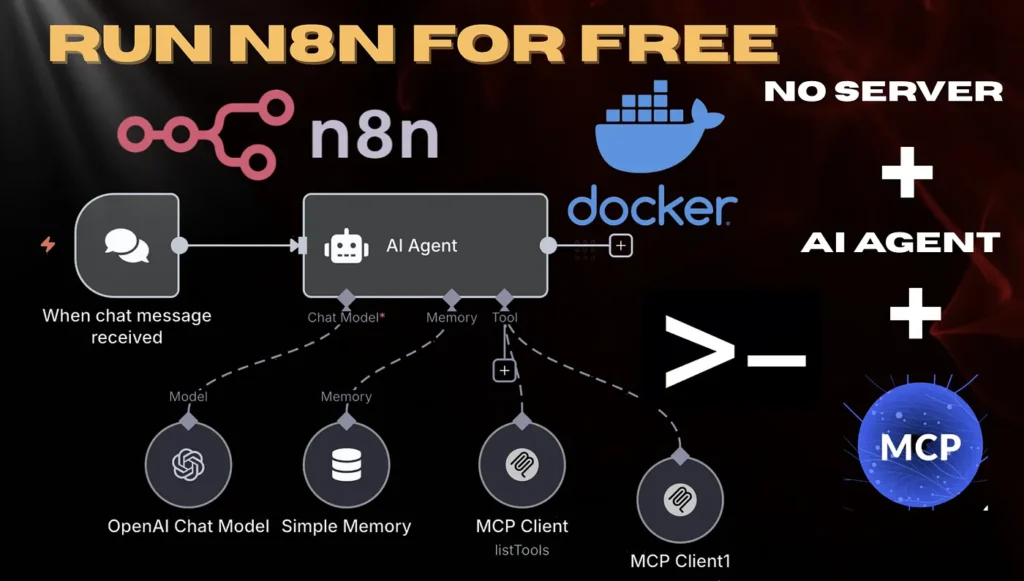
MCP Setup
Once the environment is ready, we’ll use n8n to build an AI Agent + MCP workflow and see how n8n helps us work faster and smarter.
Most of you are already familiar with the concept of AI Agent.

In n8n, it’s already integrated as a dedicated node.
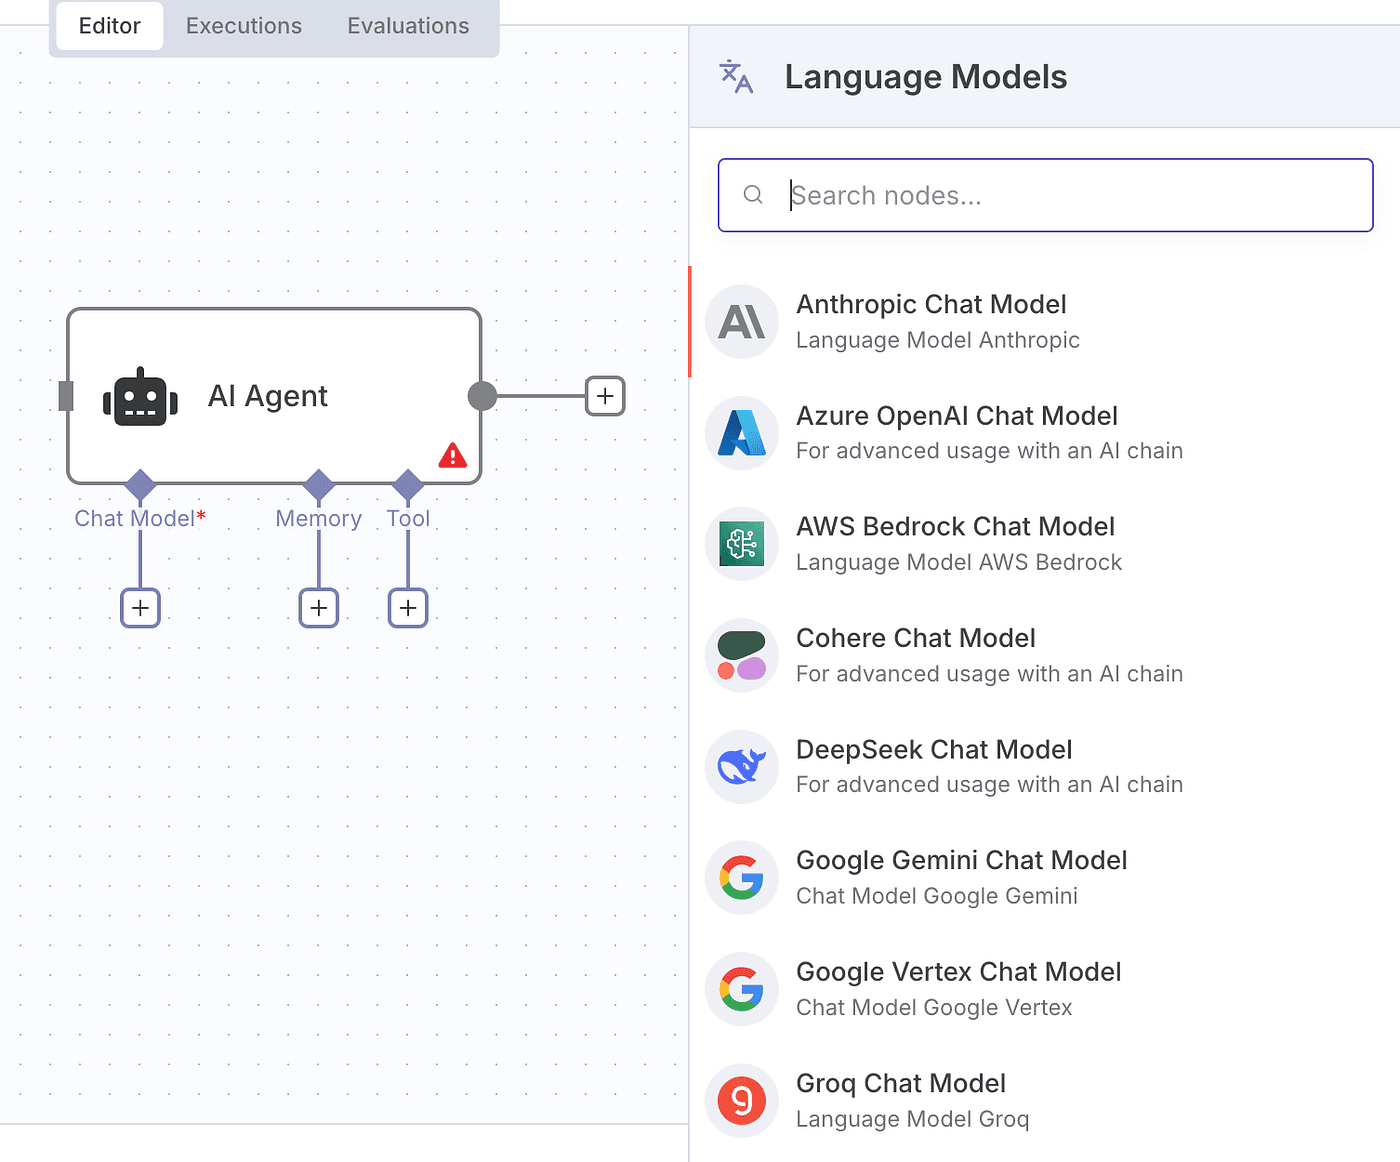
The AI Agent consists of three parts: Chat Model, Memory, and Tool.
Chat Model refers to the large language model itself, such as OpenAI, Claude, Groq, DeepSeek, or Gemini.
Memory gives the AI its ability to remember important parts of the conversation.
It helps the model understand context and respond more naturally.

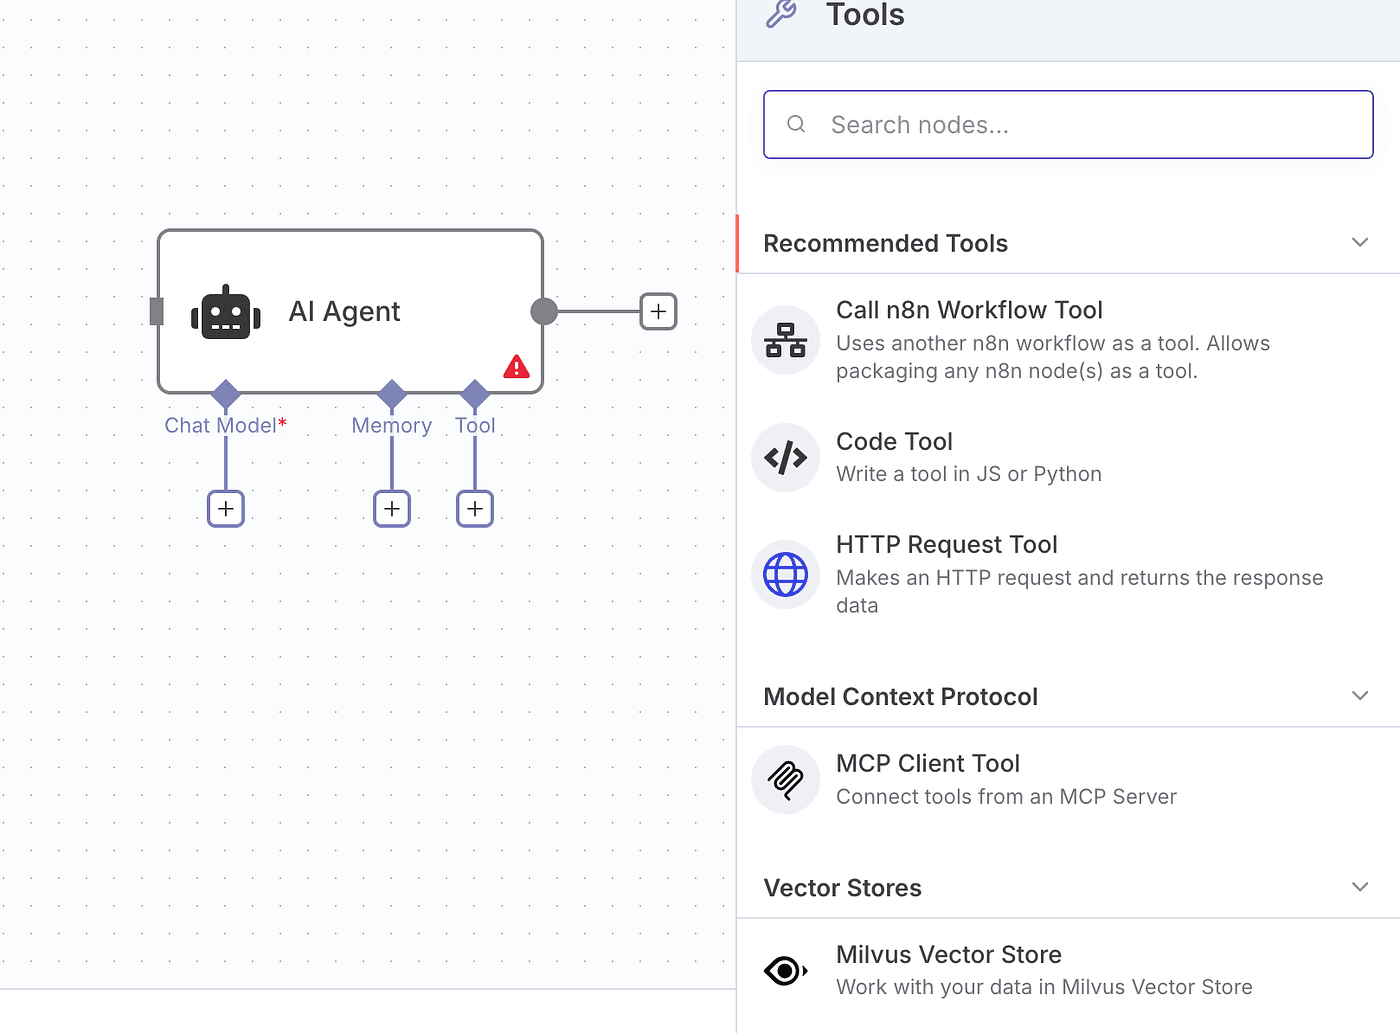
Tool refers to external tools that the AI can call based on user instructions.
This is where MCP comes in.
So, what is MCP?
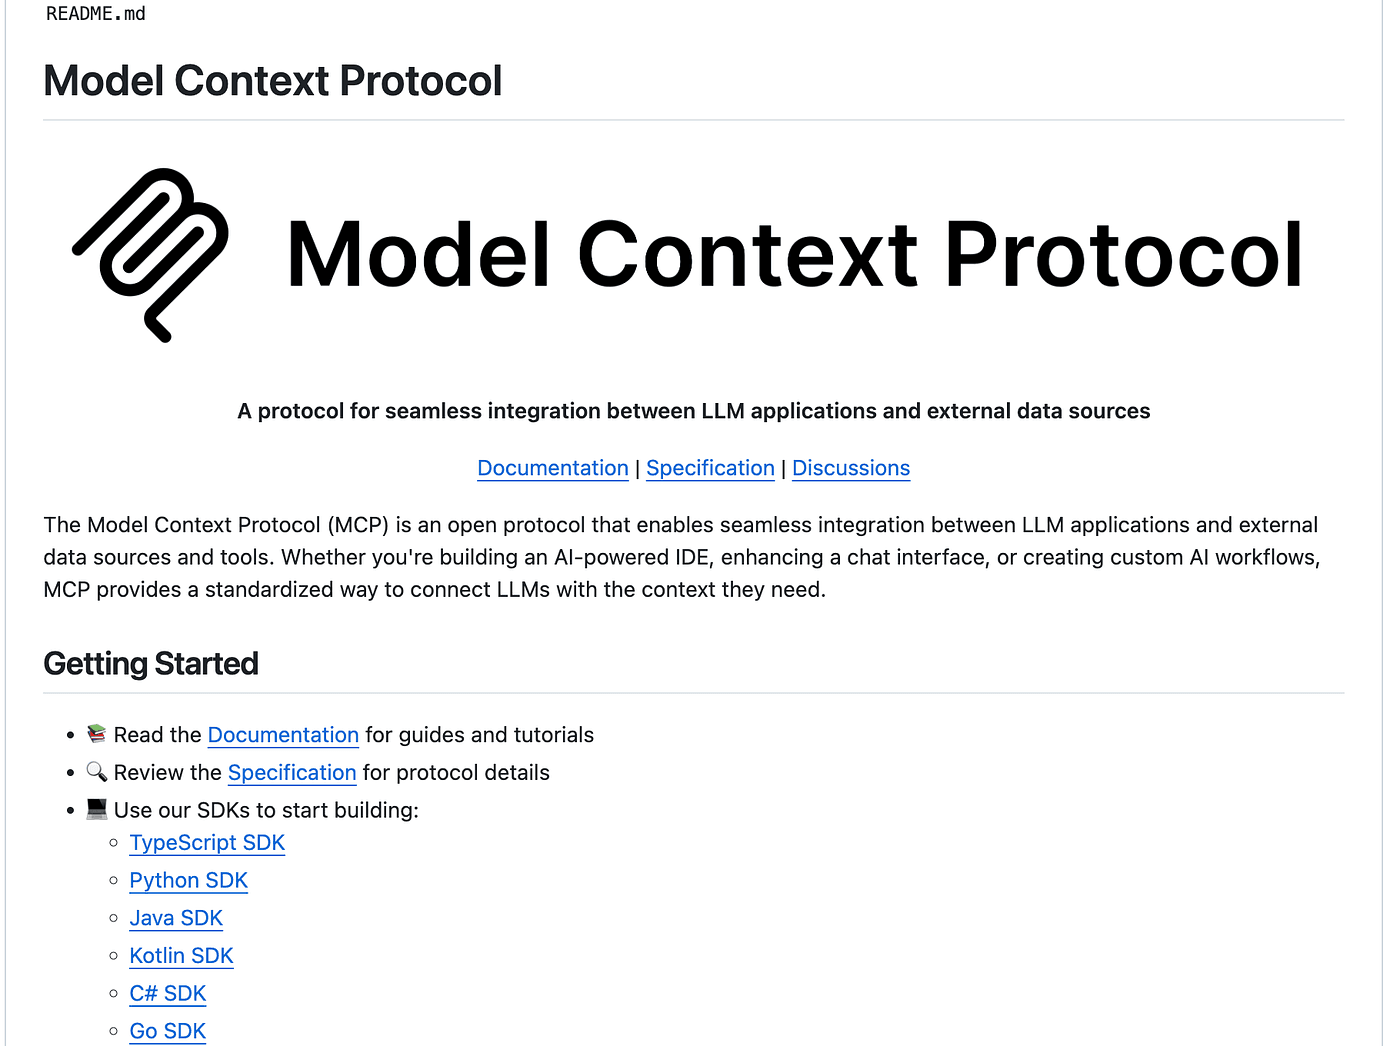
The Model Context Protocol, or MCP, is an open protocol that connects LLM applications with external data sources and tools.
In simple terms, it acts as a bridge between large language models and external tools.
With MCP, your commands don’t just control the model — they also let the model use tools more precisely to complete tasks.
Now, let’s try combining AI Agent and MCP in action.
First, add a Chat Trigger node.
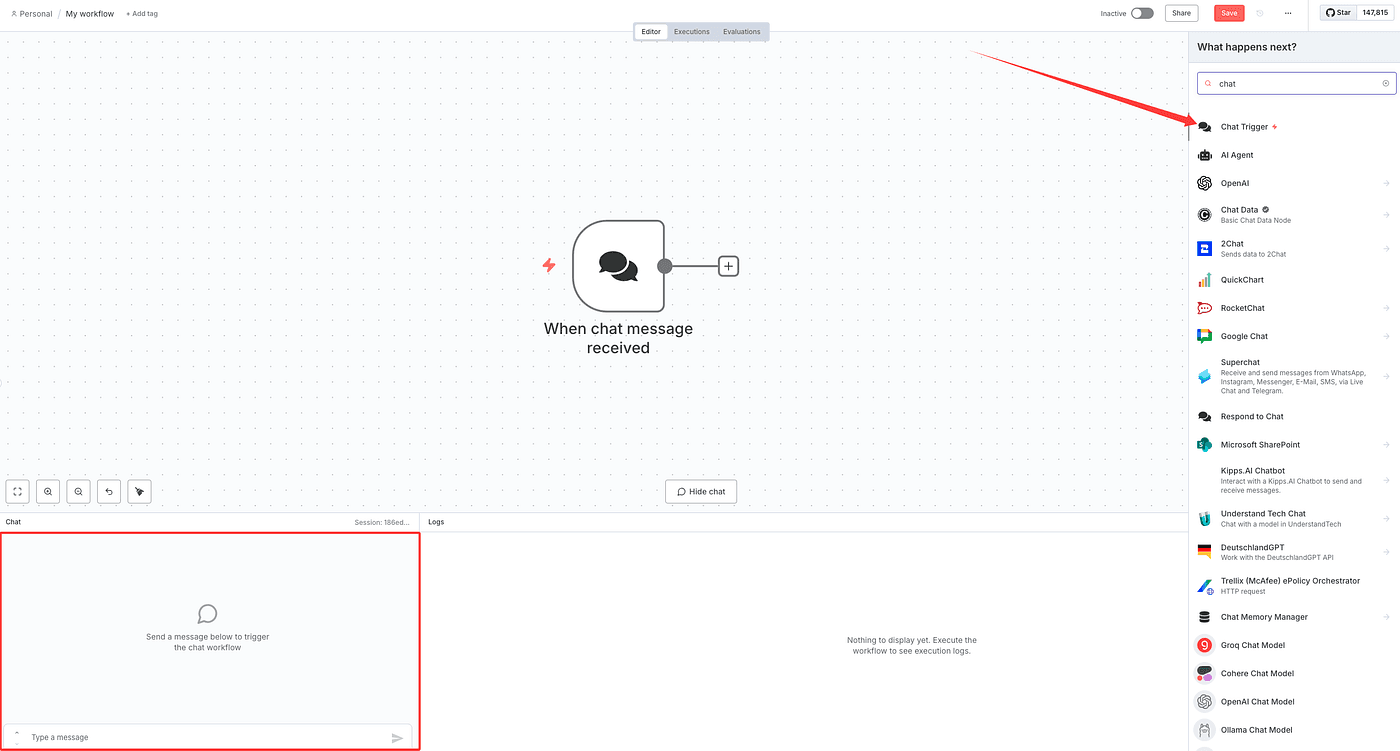
This node is used for user input.
When you type something and press Enter, it triggers automatically.

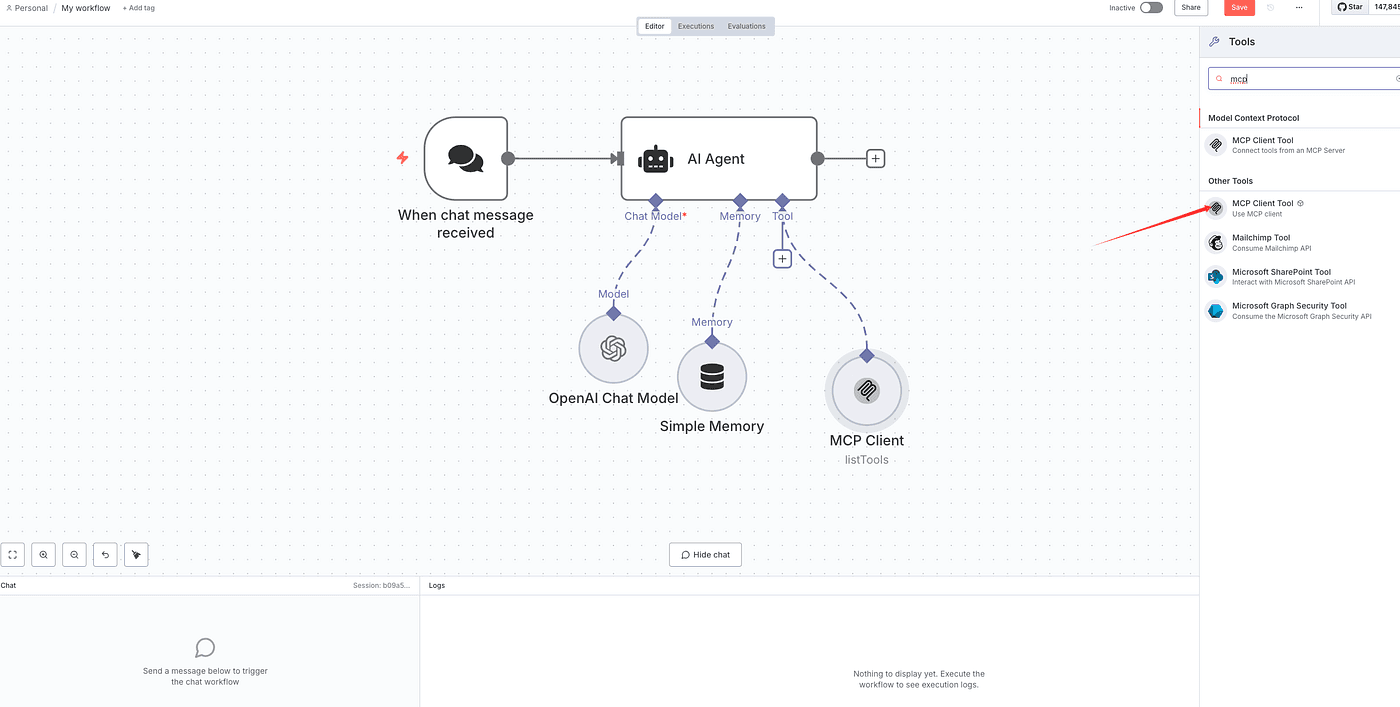
Next, add the core node — AI Agent.
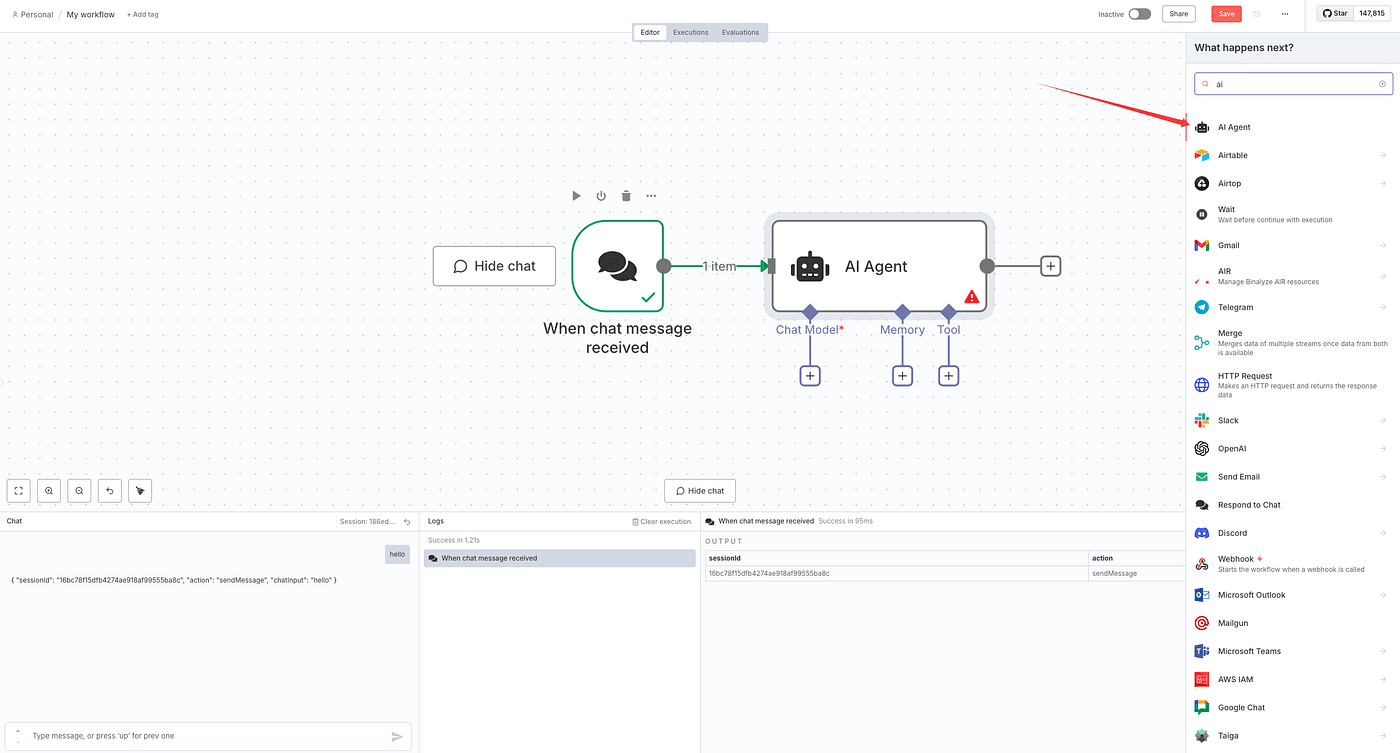
We’ll configure Chat Model, Memory, and Tool inside it.
Start with Chat Model.
Just like in the previous article, you need to configure the model’s API key.
Here, I’ll use OpenAI as an example.
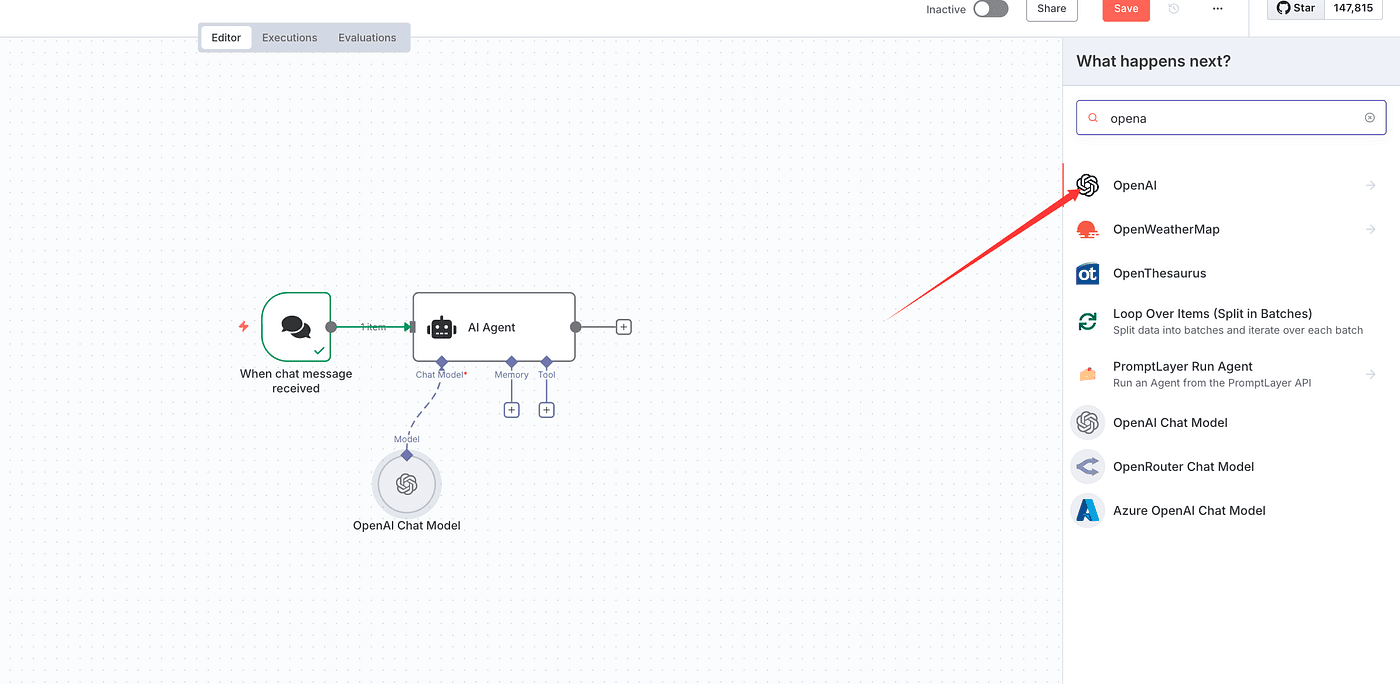
Add your OpenAI API key in the n8n credentials section for this node.

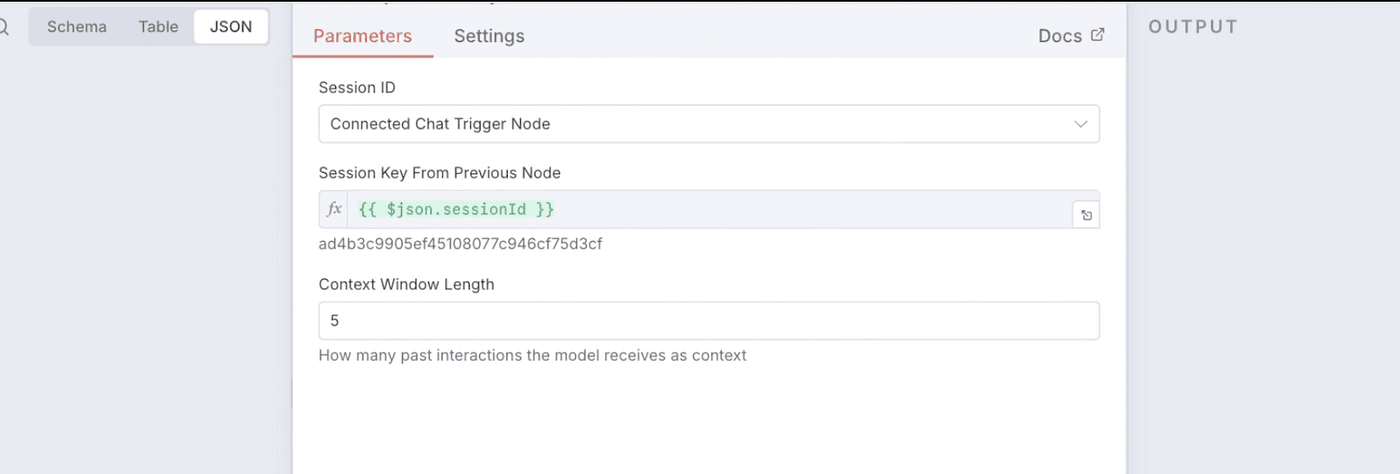
Then set up Memory.
We’ll use the simplest Simple Memory node,
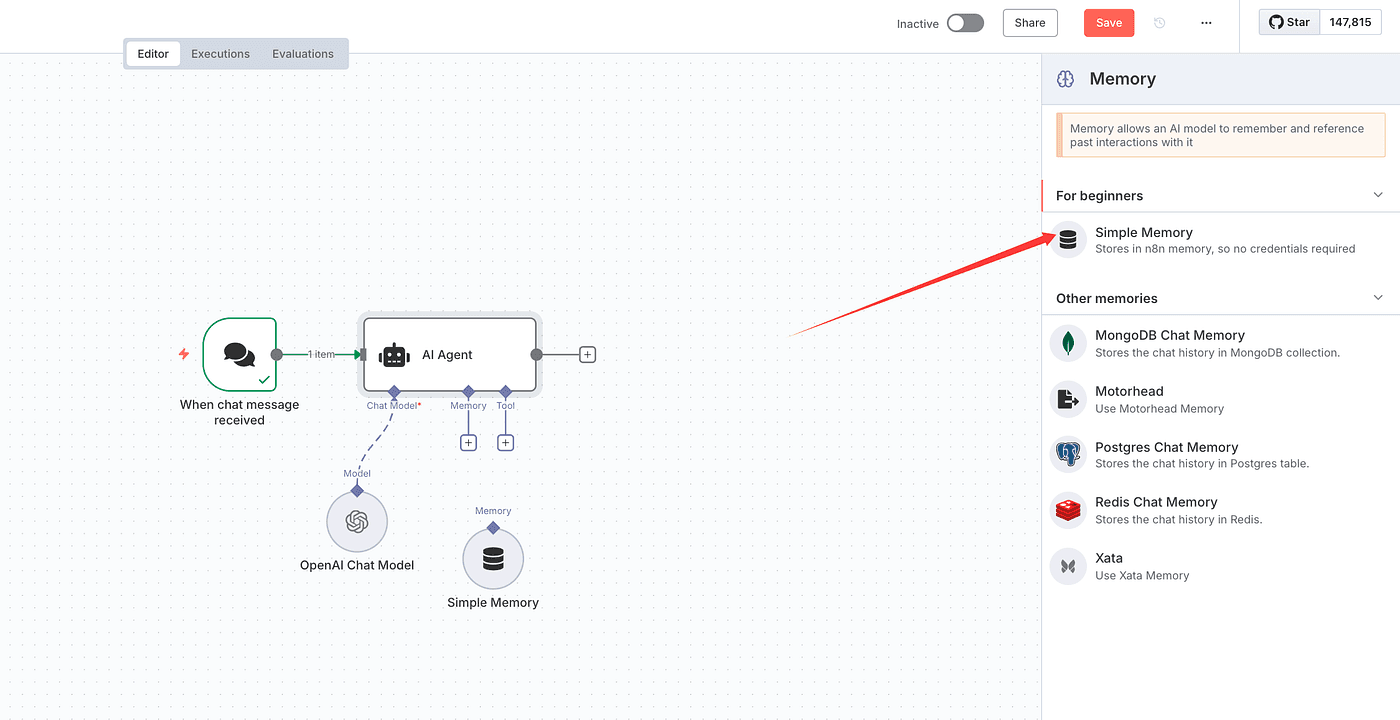
keeping all settings as default.
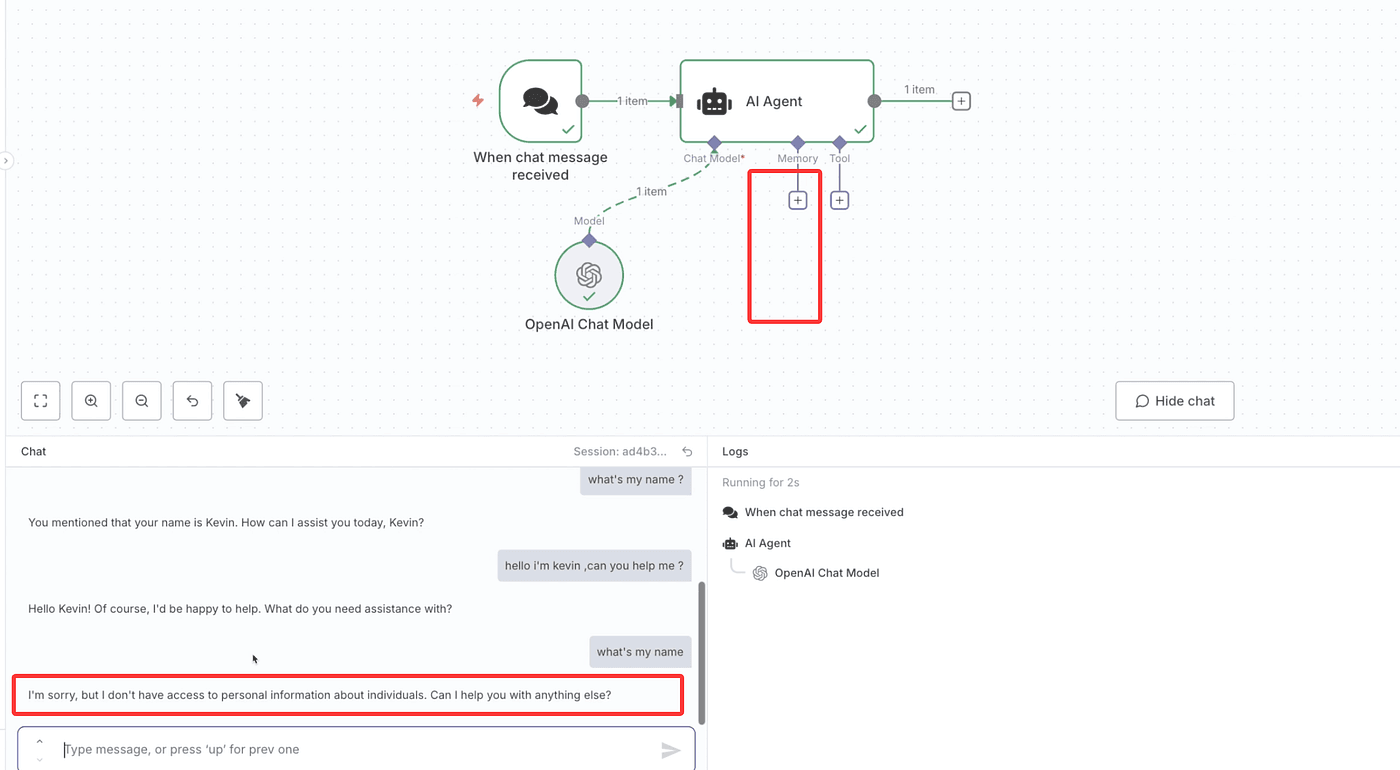
Before adding MCP, let’s test what we have so far.

When a user enters a command, the model replies normally.
Notice that it remembers previous messages — that’s because of Memory.
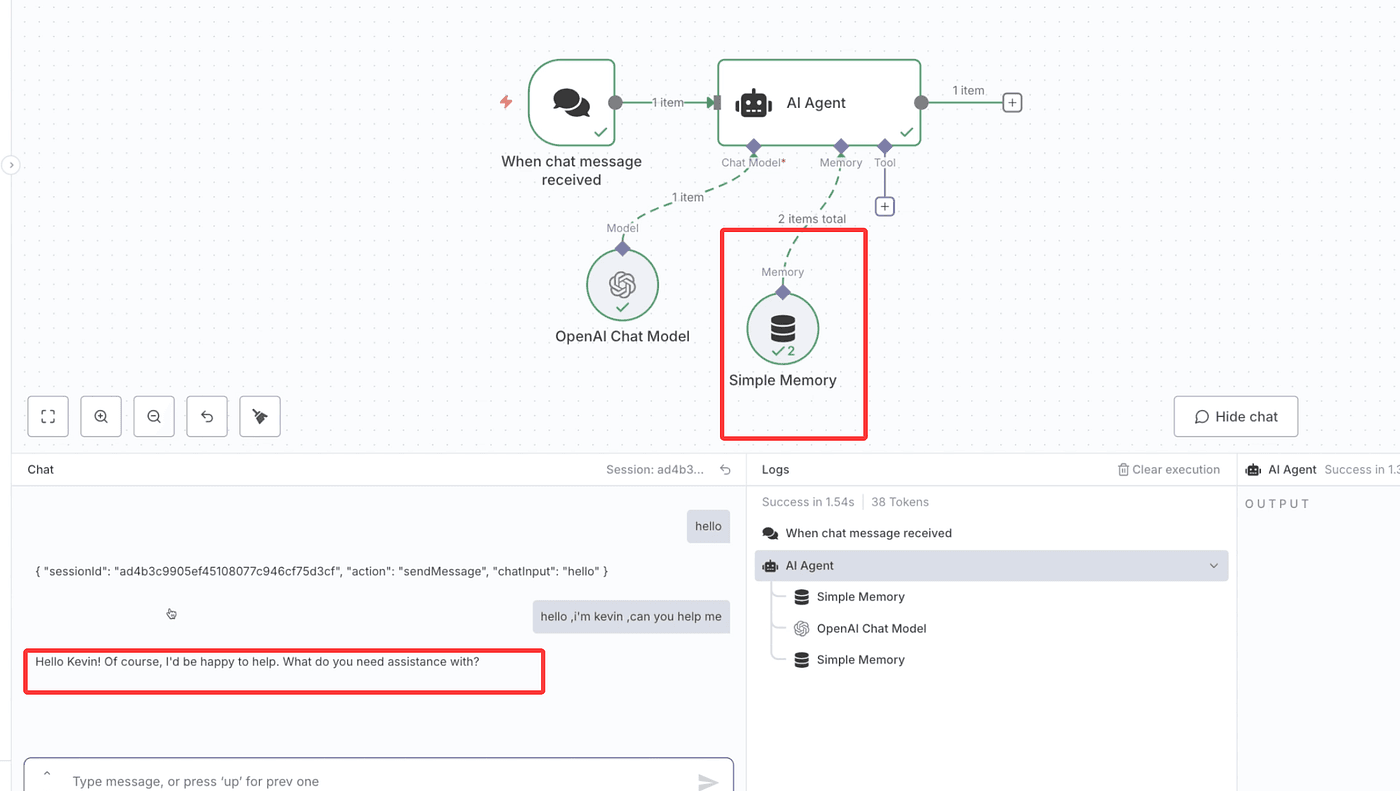
If you remove Memory, the model will only respond to one question at a time.
Try it — once memory is gone, the model instantly forgets who you are.
Now let’s configure the Tool part.
Go back to the Model Context Protocol GitHub project and open the “servers” section.

Here’s an important point:
in the MCP structure, the large language model works as the client,
and the external tools act as the servers.
Inside the servers section, you’ll find tools like AWS, Brave Search, GitHub, Google Drive, PostgreSQL, Slack, and SQLite.
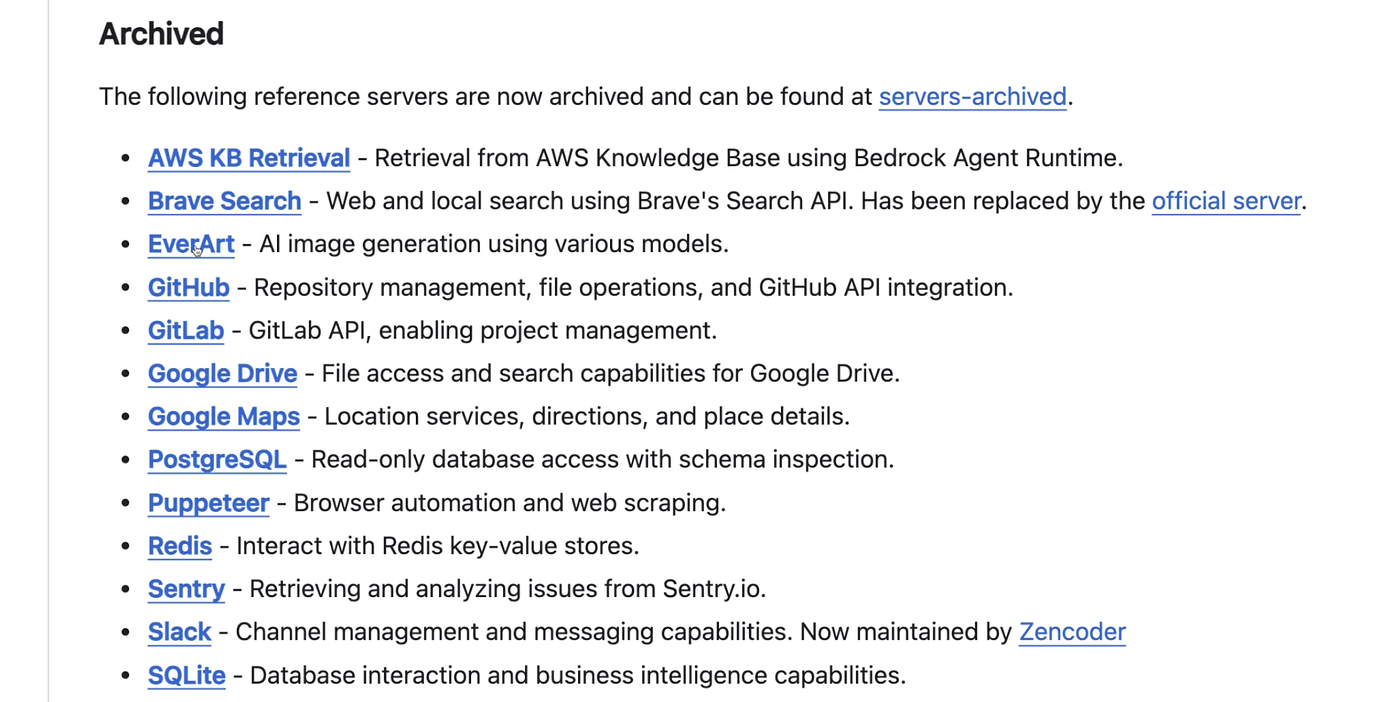
All of these support MCP and can be connected directly to the AI Agent.
And there are many more — developers around the world keep contributing new MCP servers,
so the ecosystem is growing quickly.
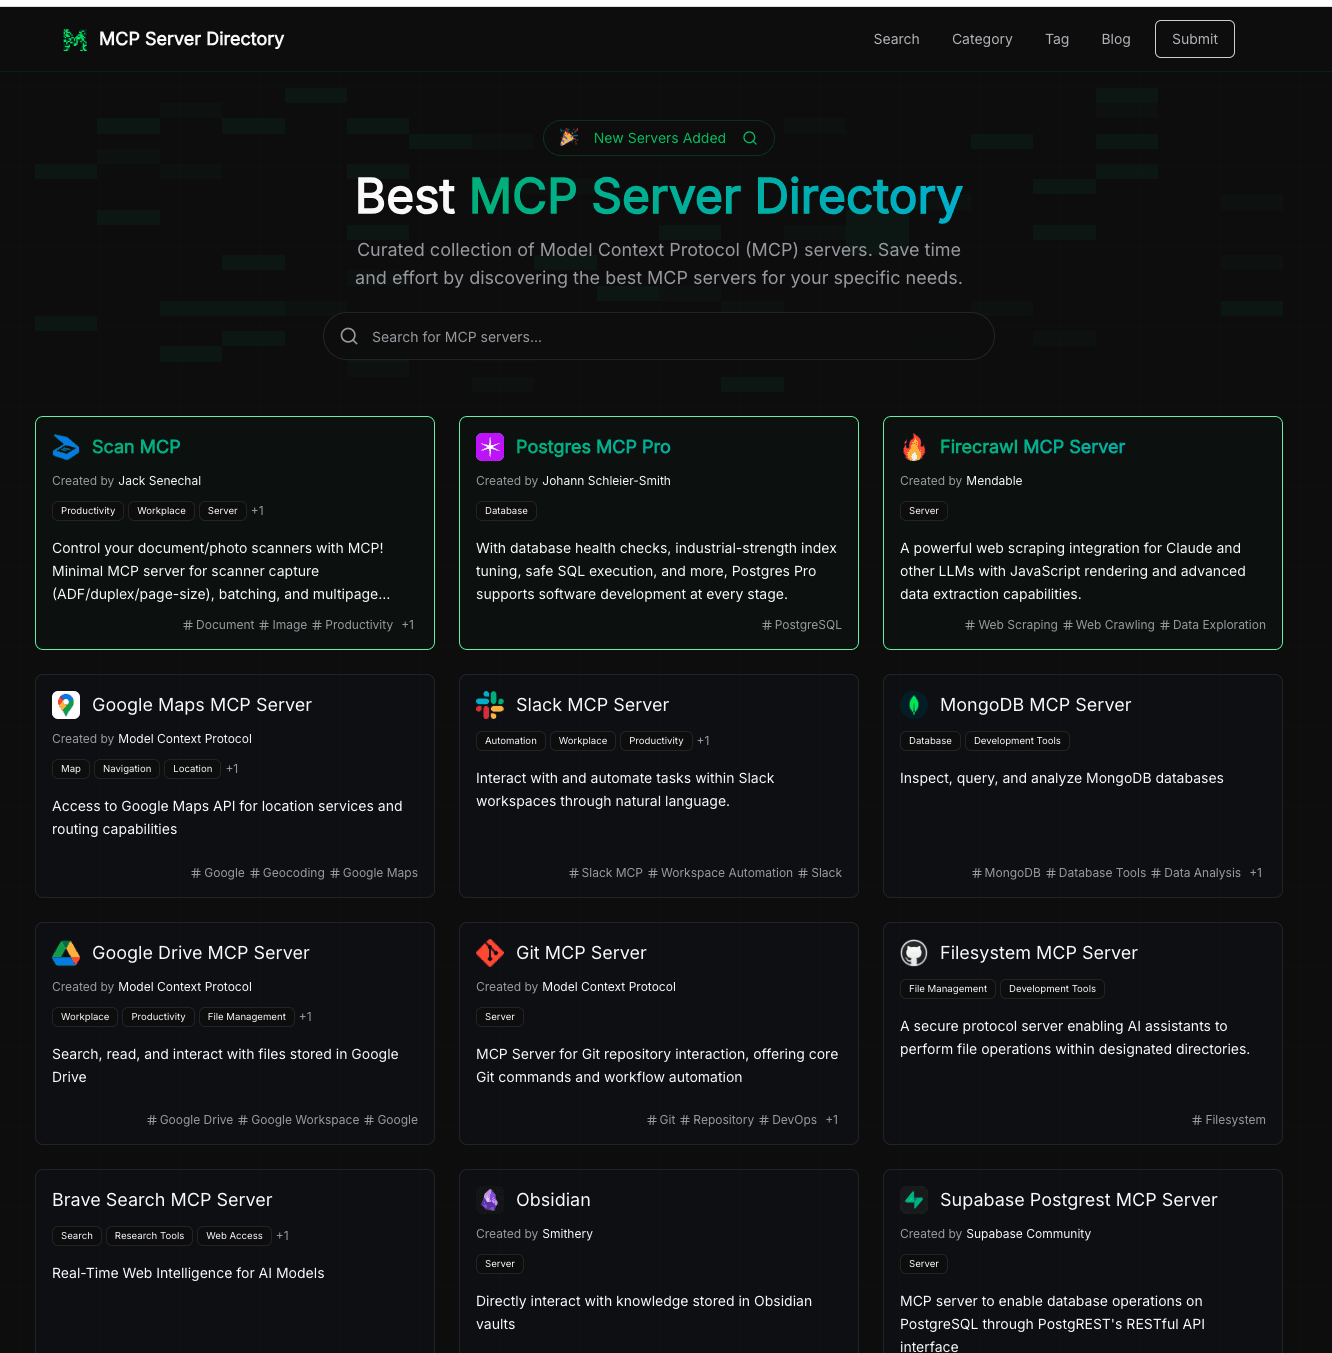
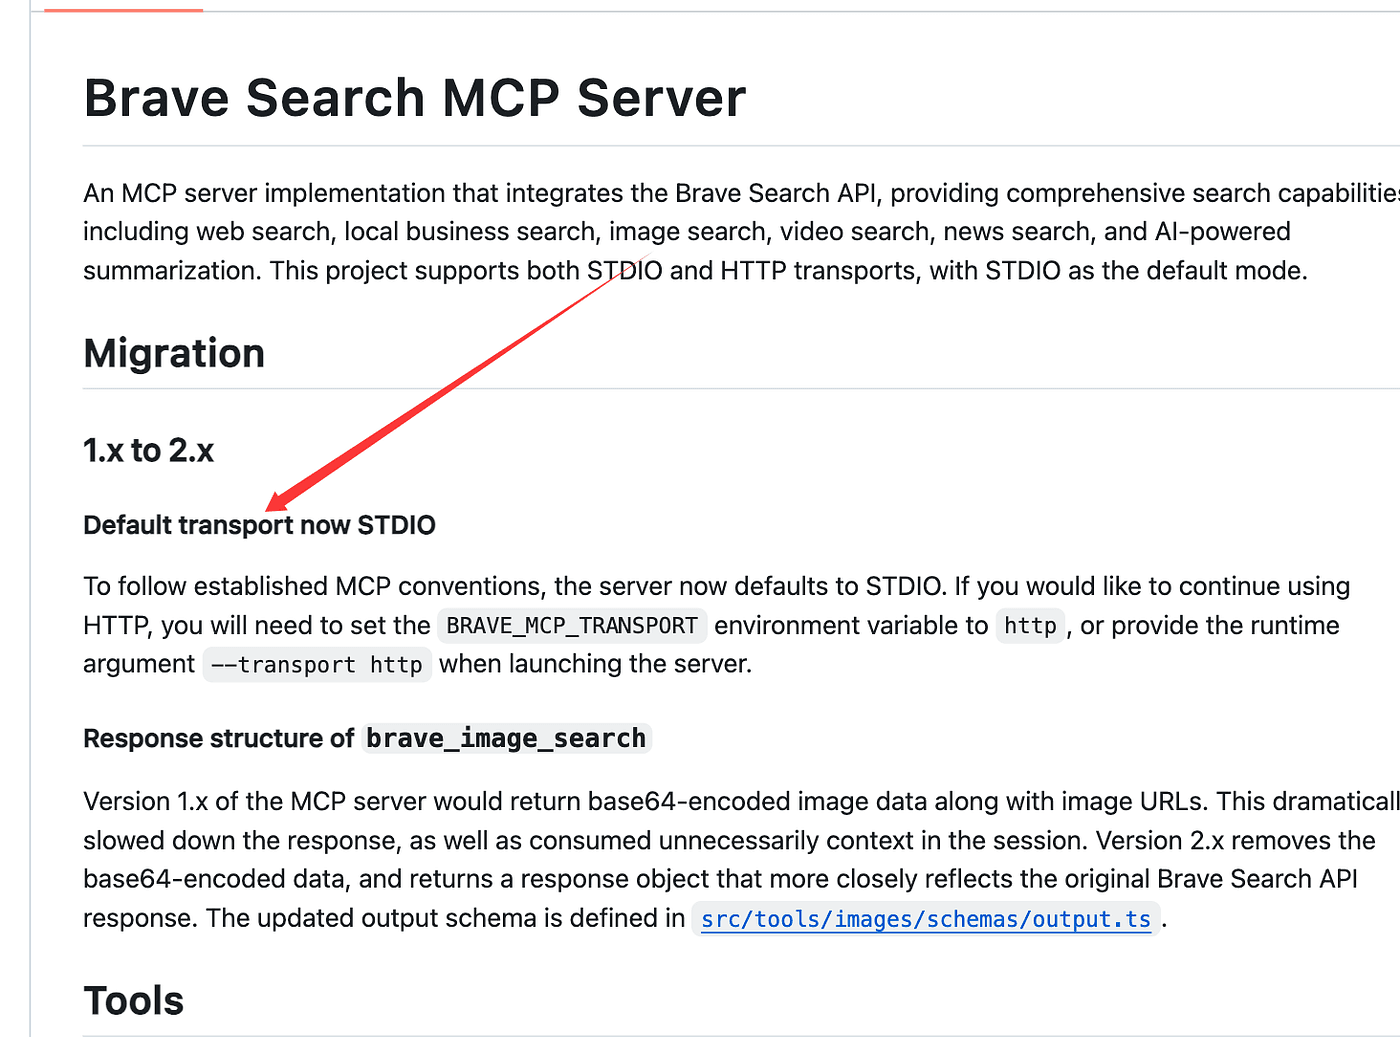
In this tutorial, we’ll use Brave Search as an example.
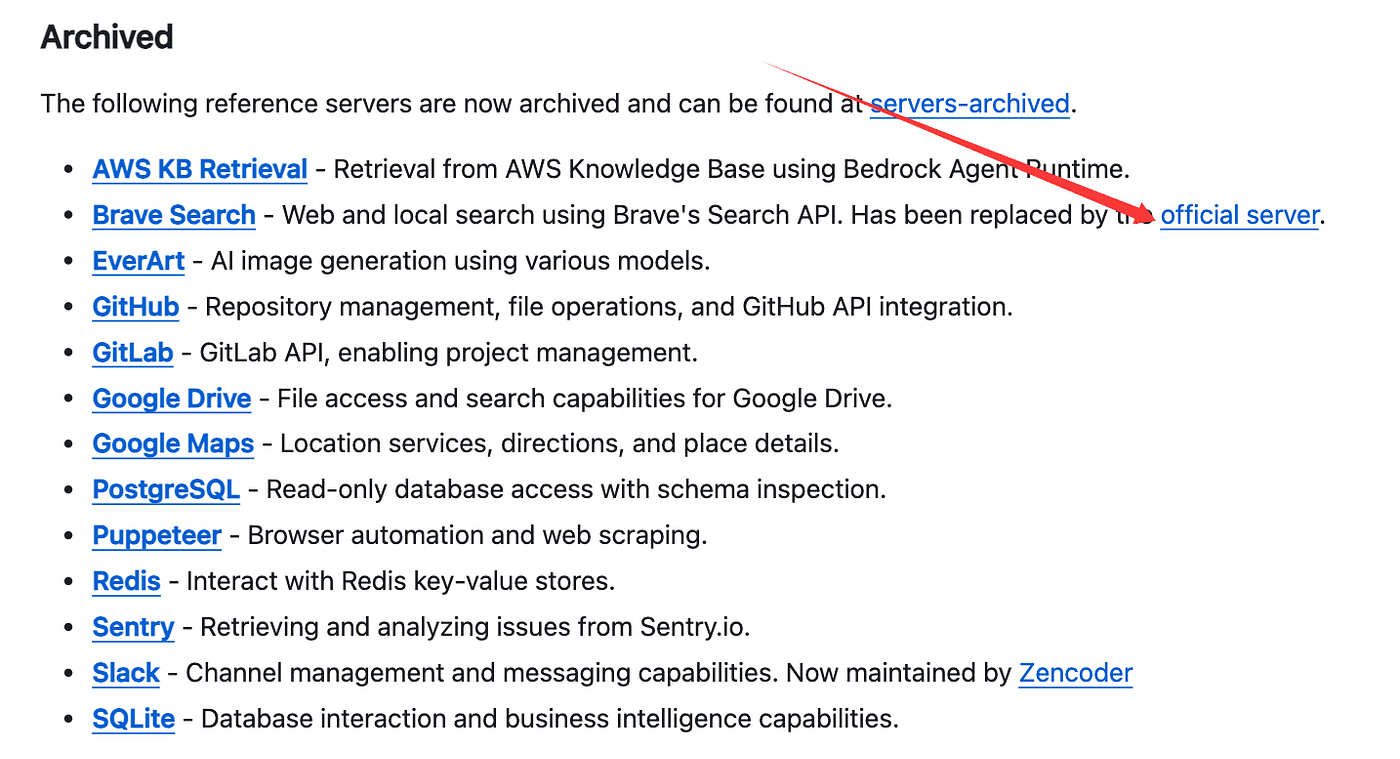
Brave works like a search engine.
It supports web search, local business search, image search, video search, news search, and even AI-powered summaries.

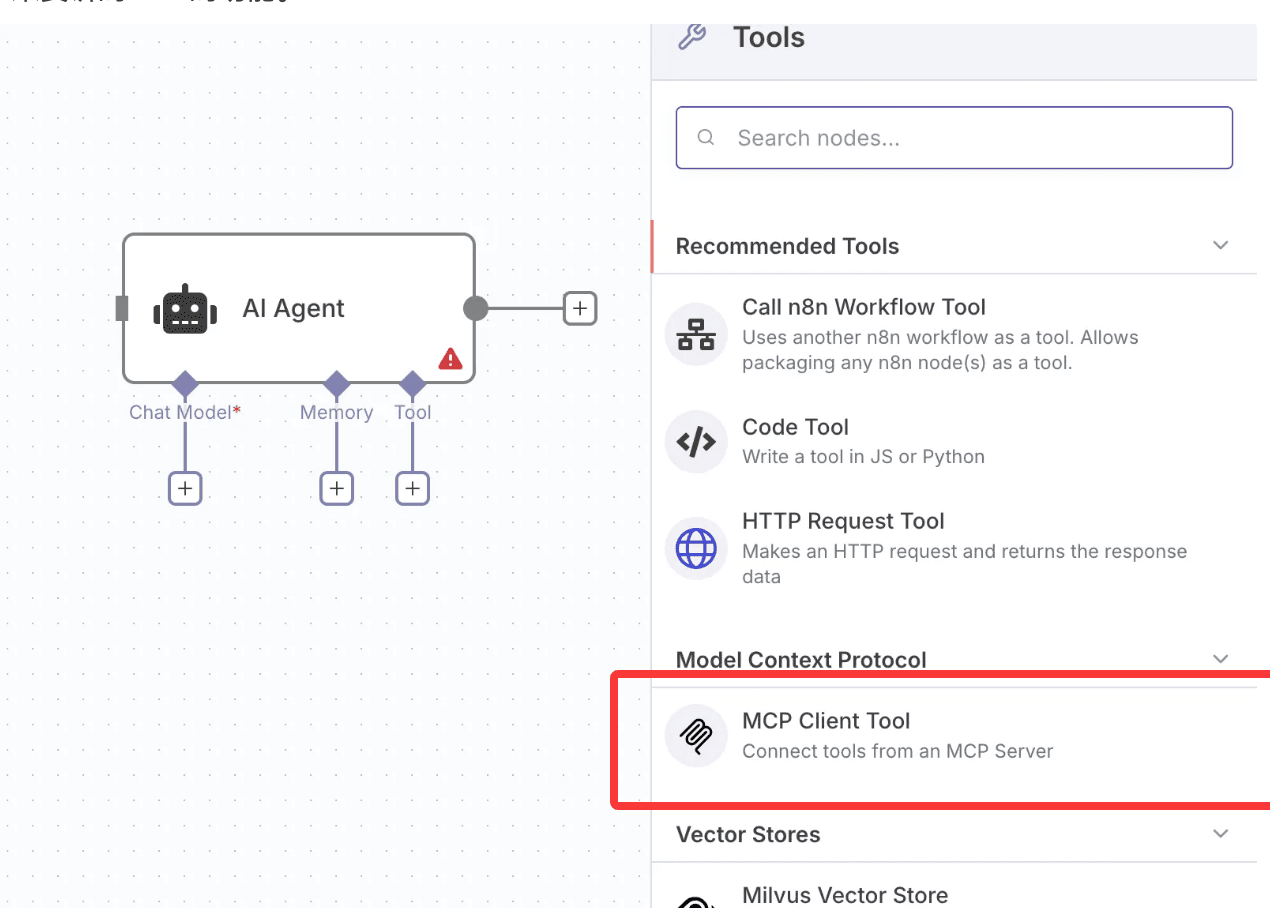
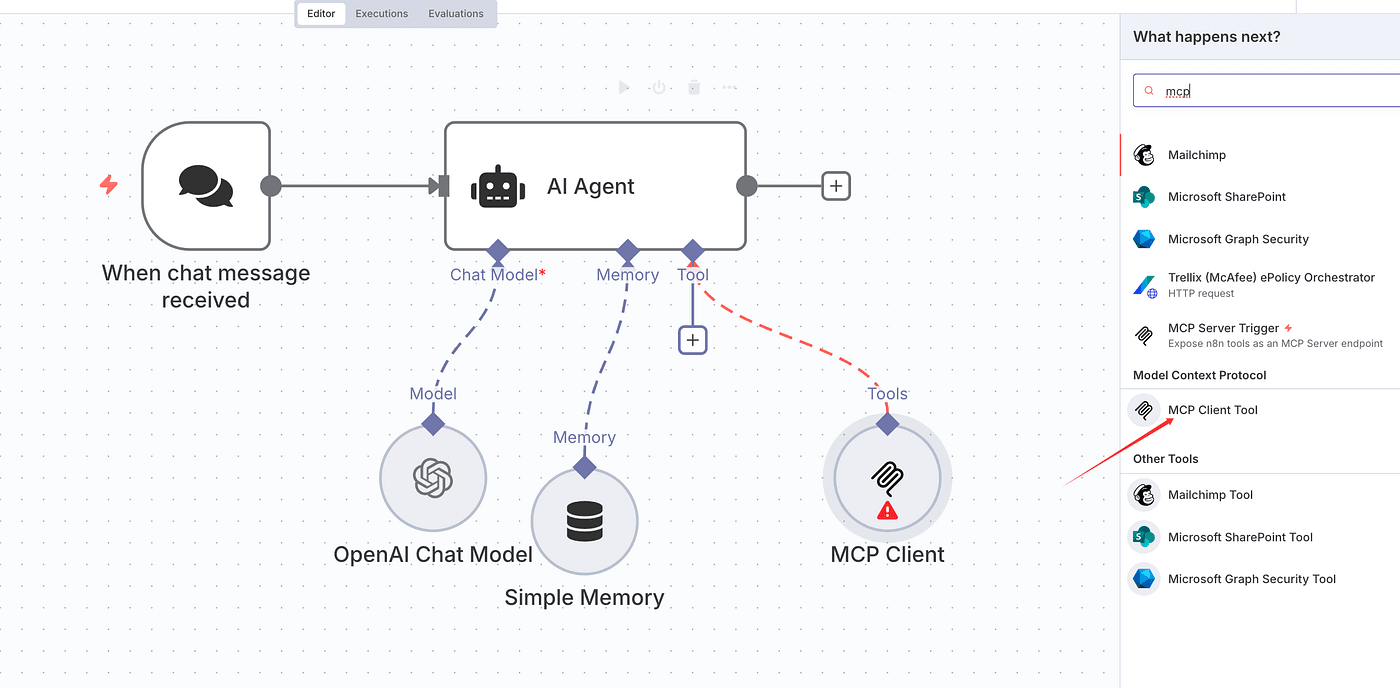
Now let’s go back to n8n and look for the MCP-related nodes.
In the search bar, type “mcp” and add the MCP Client Tool node.
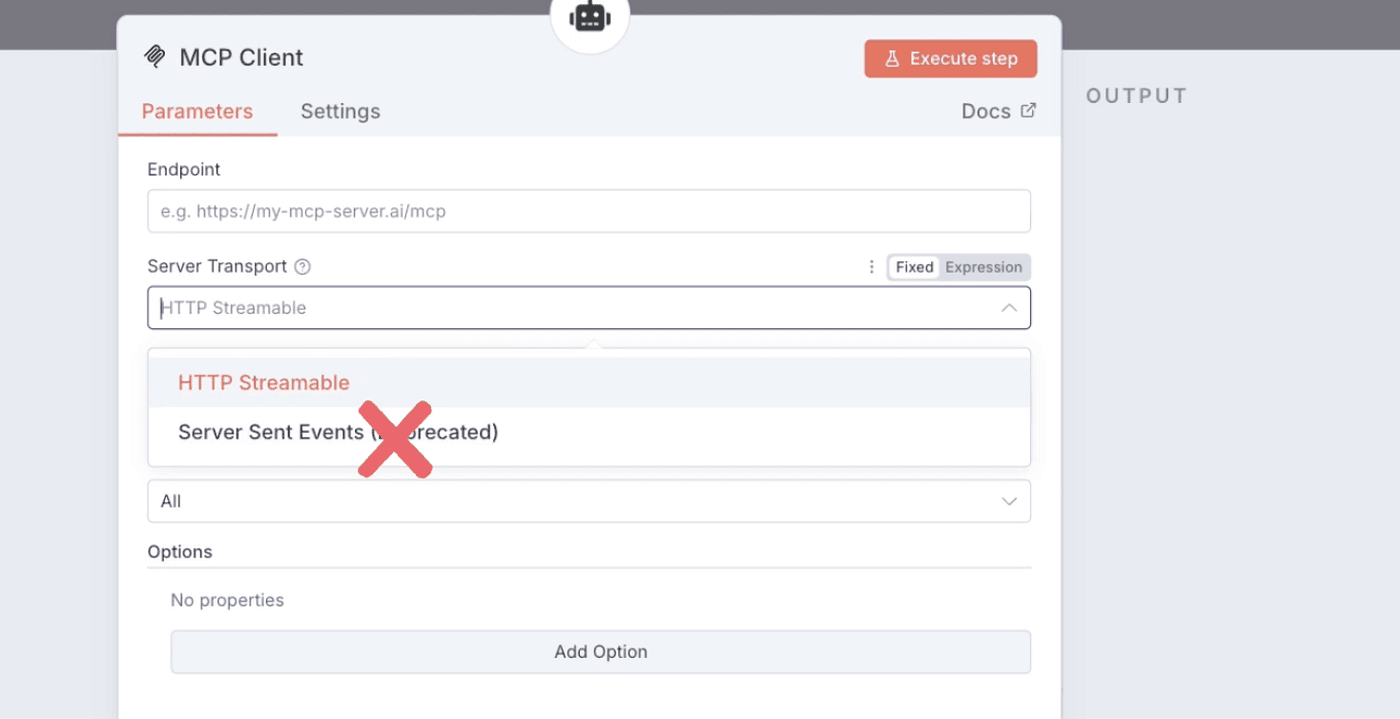
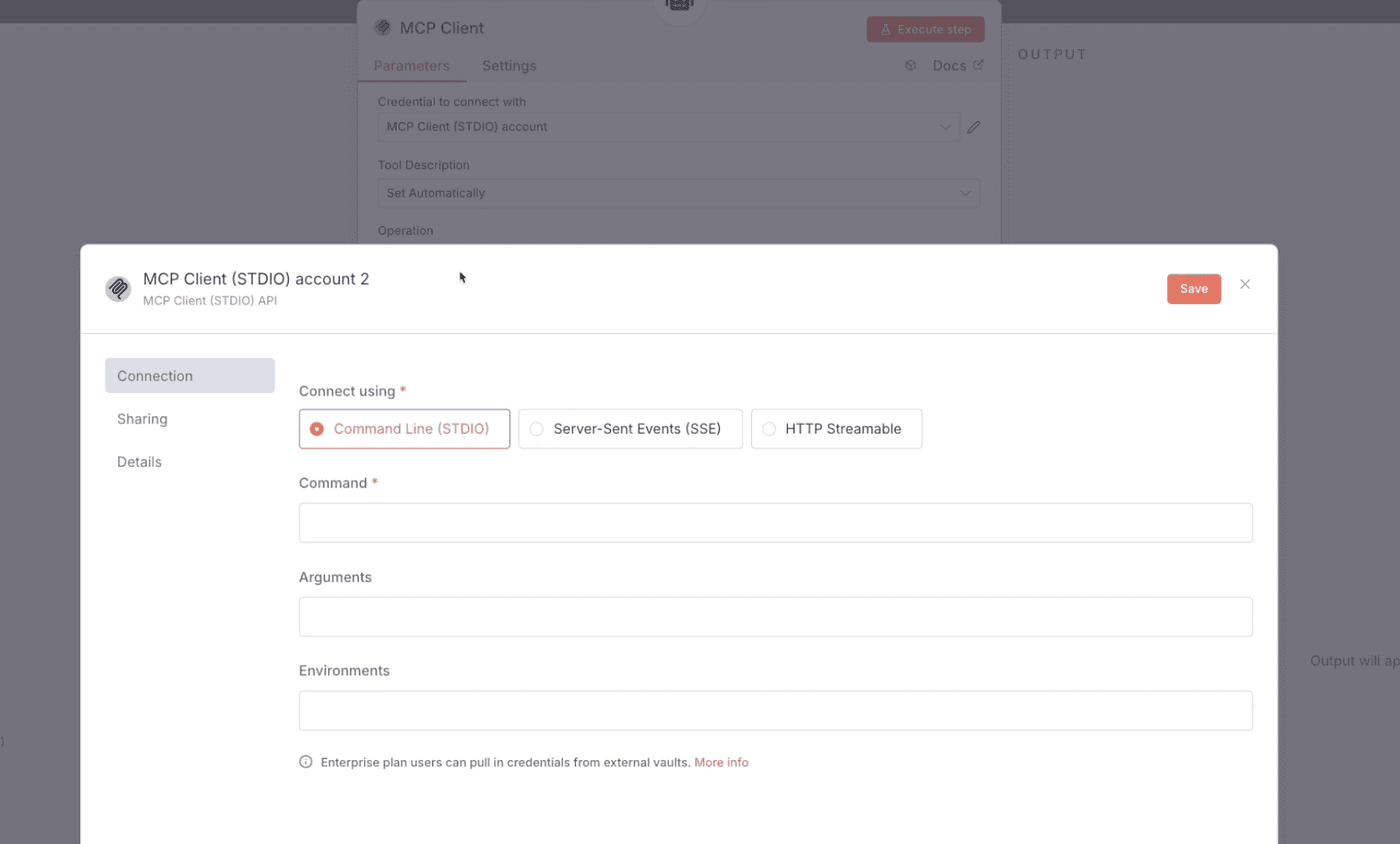
After adding the MCP Client Tool node, you’ll notice that the current MCP Client in n8n supports two connection types:
one is HTTP Streamable, and the other is Server Sent Events.
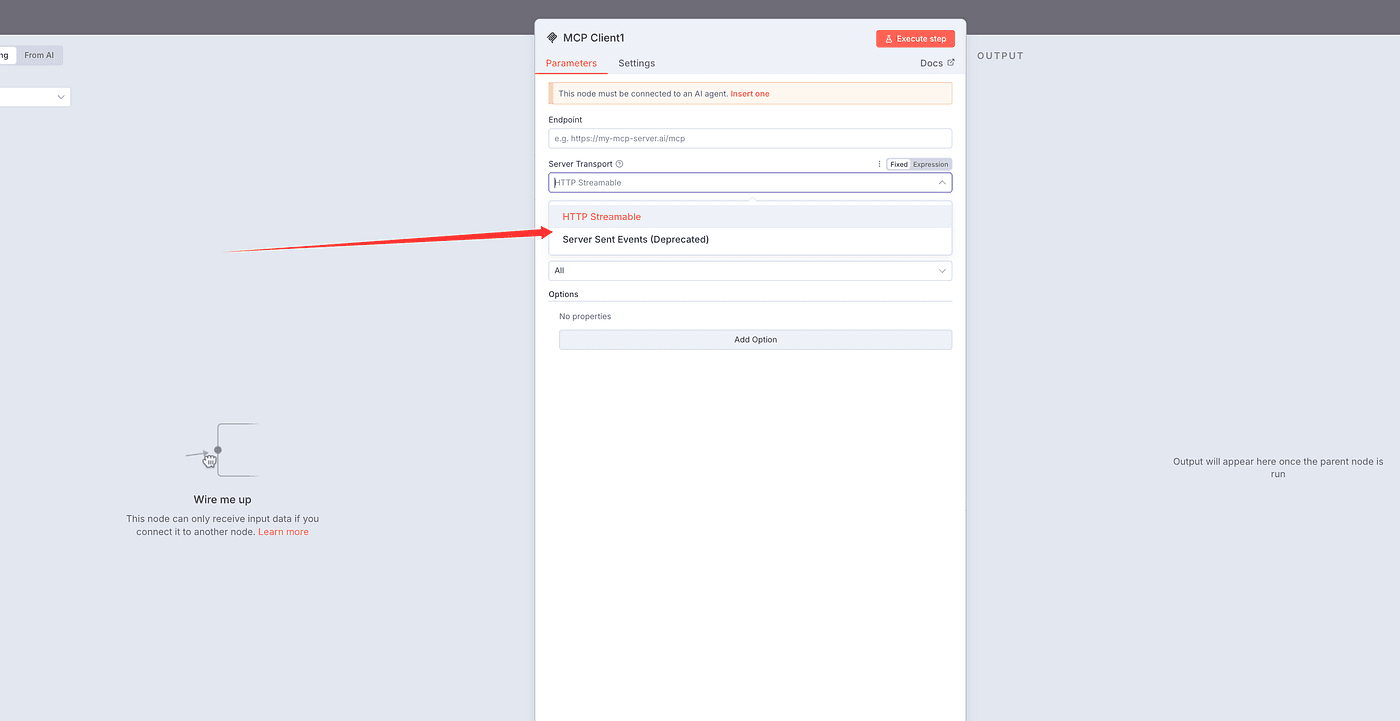
However, the Server Sent Events option is already deprecated.
We then return to the Brave Search GitHub project and find that Brave Search has now been upgraded to version 2.0.
In version 2.0, the default supported protocol has changed to STDIO.
So, after some research and testing, we found a useful GitHub project:
👉 link
This project allows us to add support for MCP Clients in n8n
by installing it as a community node,
and it fully supports the STDIO connection type.
Perfect — this means we can integrate MCP successfully.
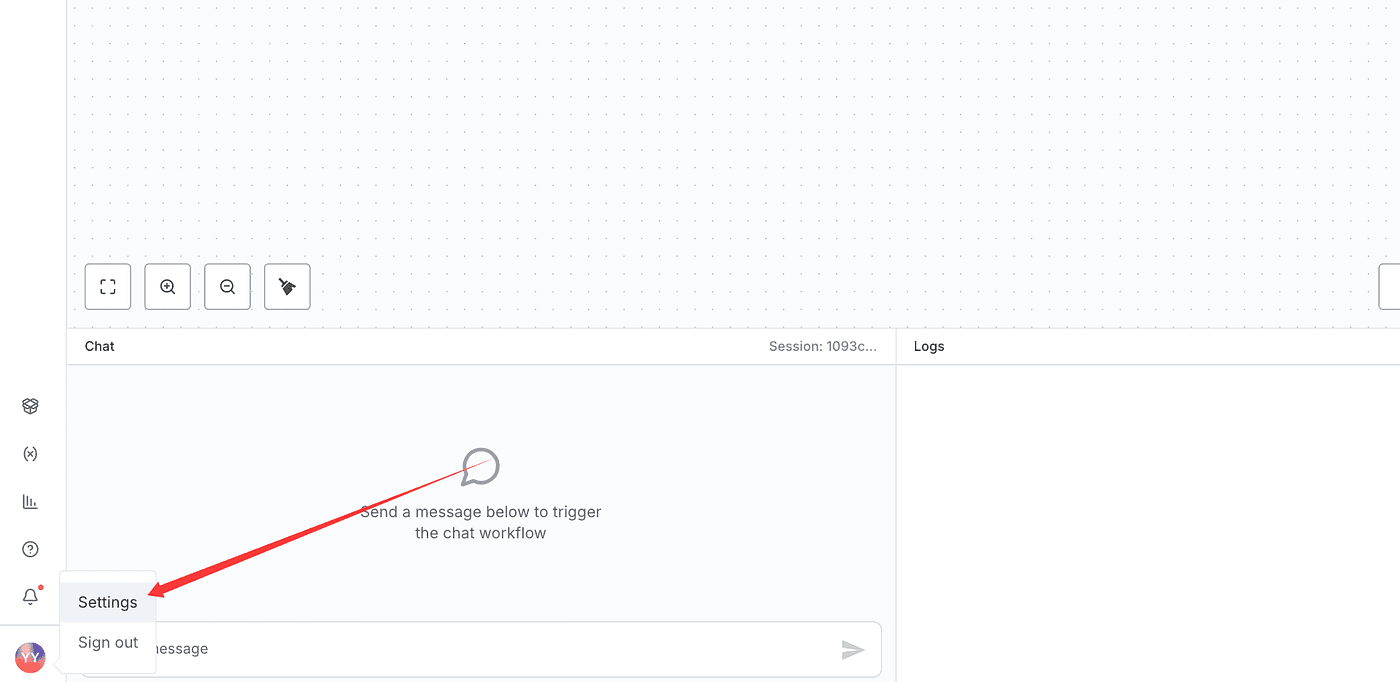
Go back to your n8n service and open the Settings panel at the bottom left corner.
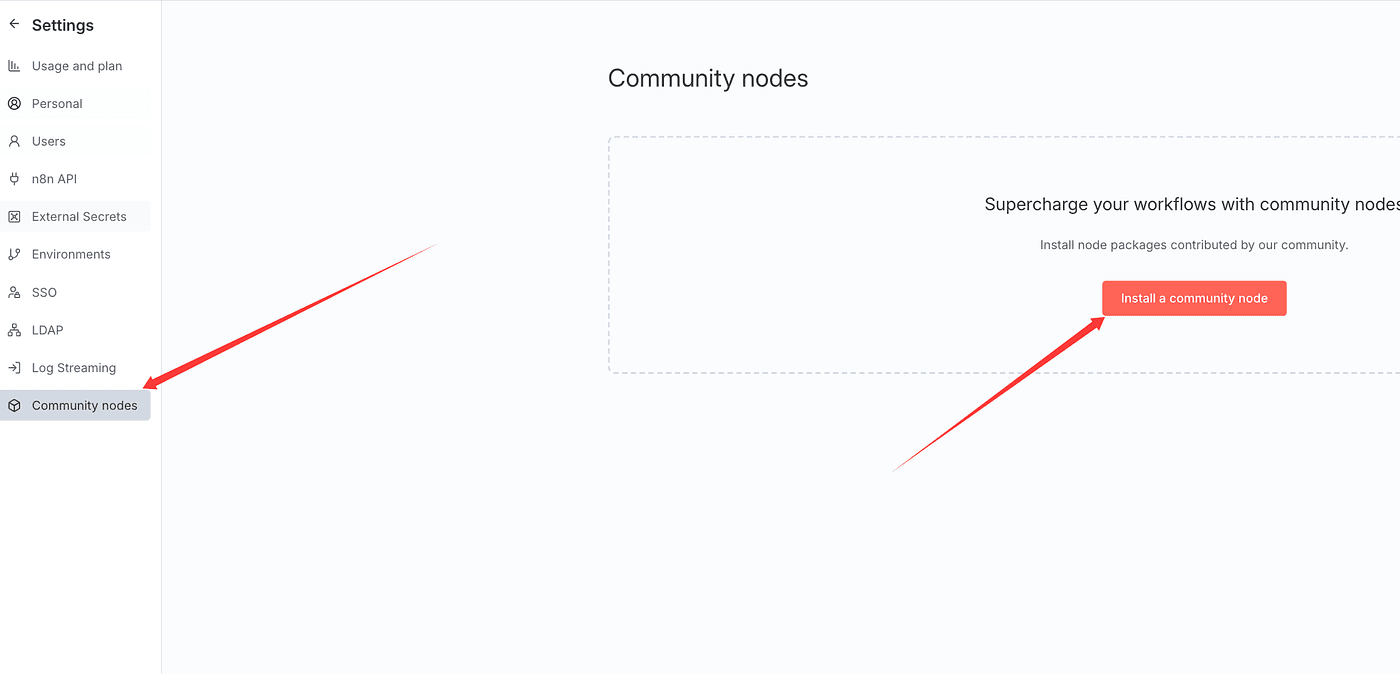
Click on Community Nodes, then click Install a community node.
Enter the package name n8n-nodes-mcp,
check the box, and click Install.

Once the installation is complete,
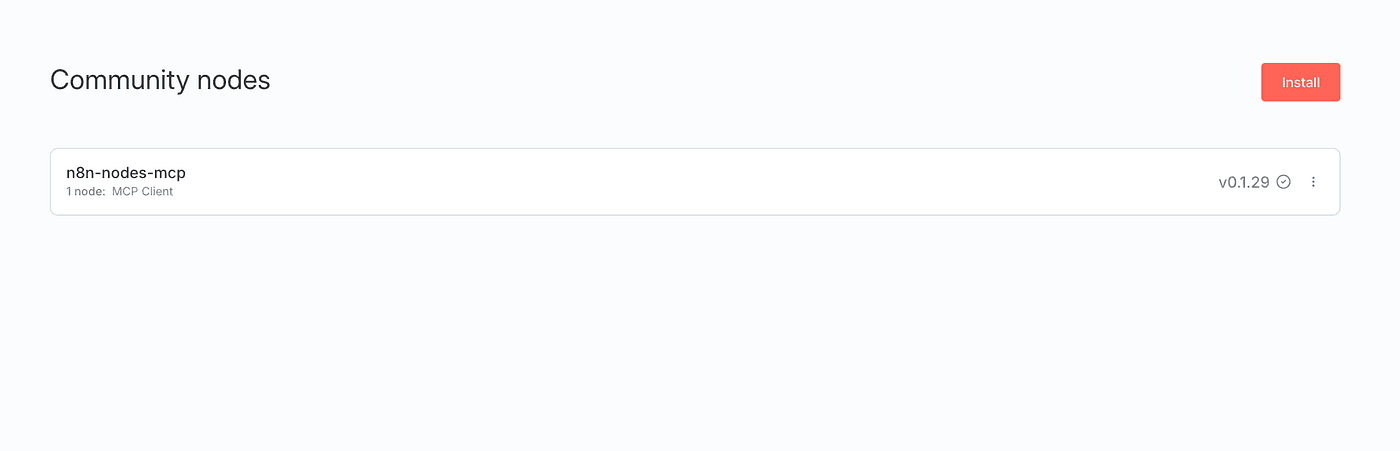
go back to your workflow.
Search for “mcp” again and add the newly installed MCP Client node —
you’ll see its description as “Use MCP client.”
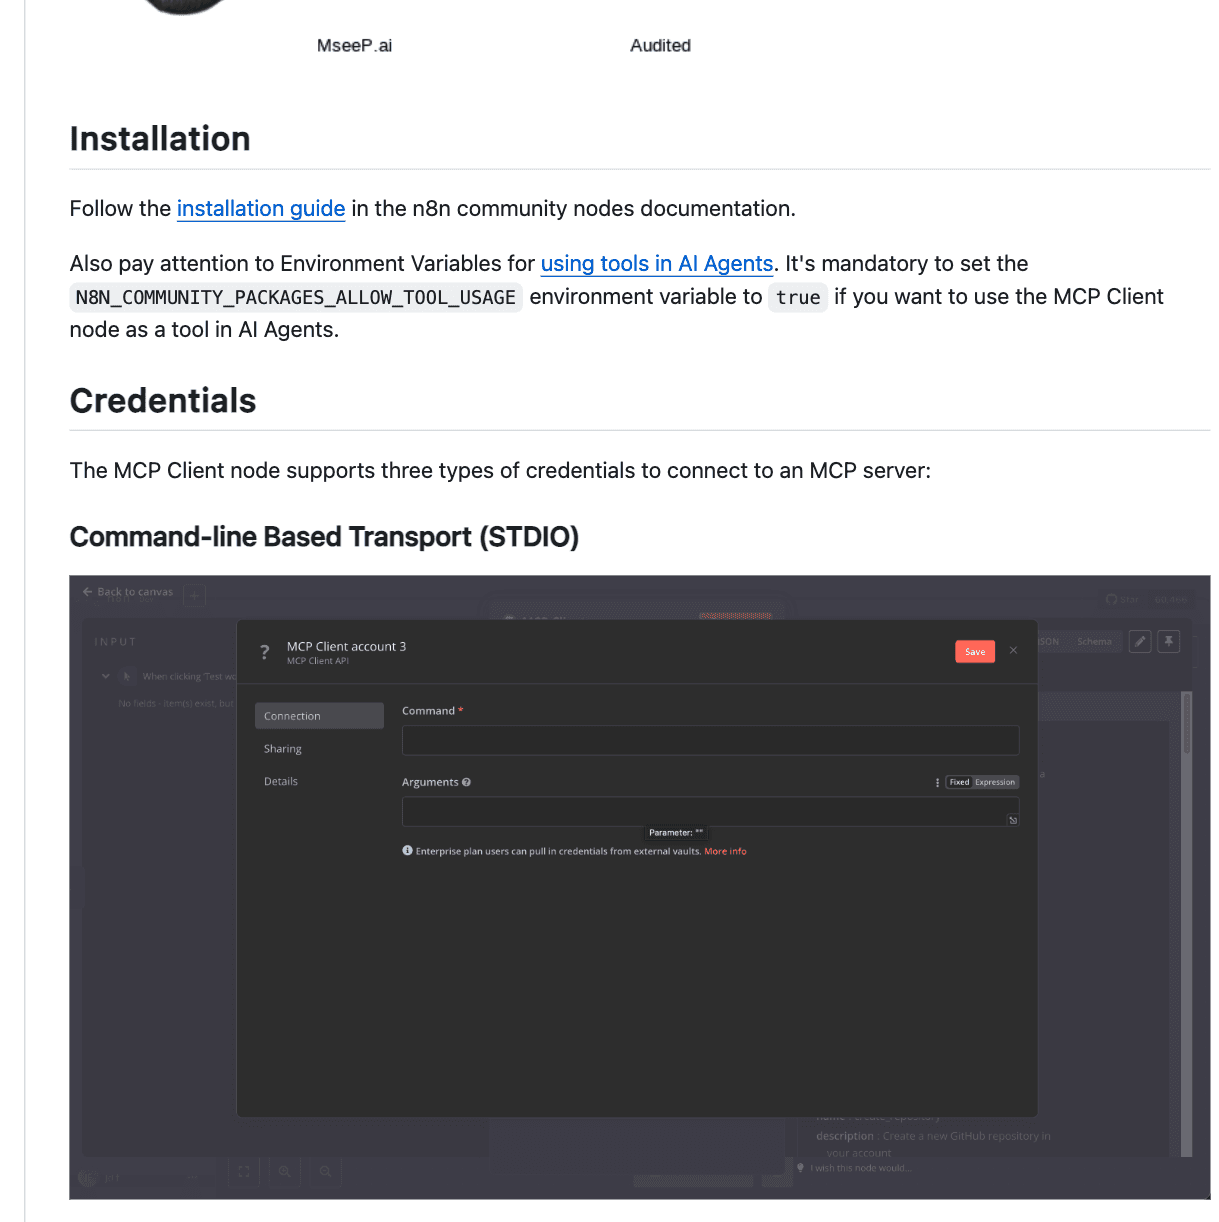
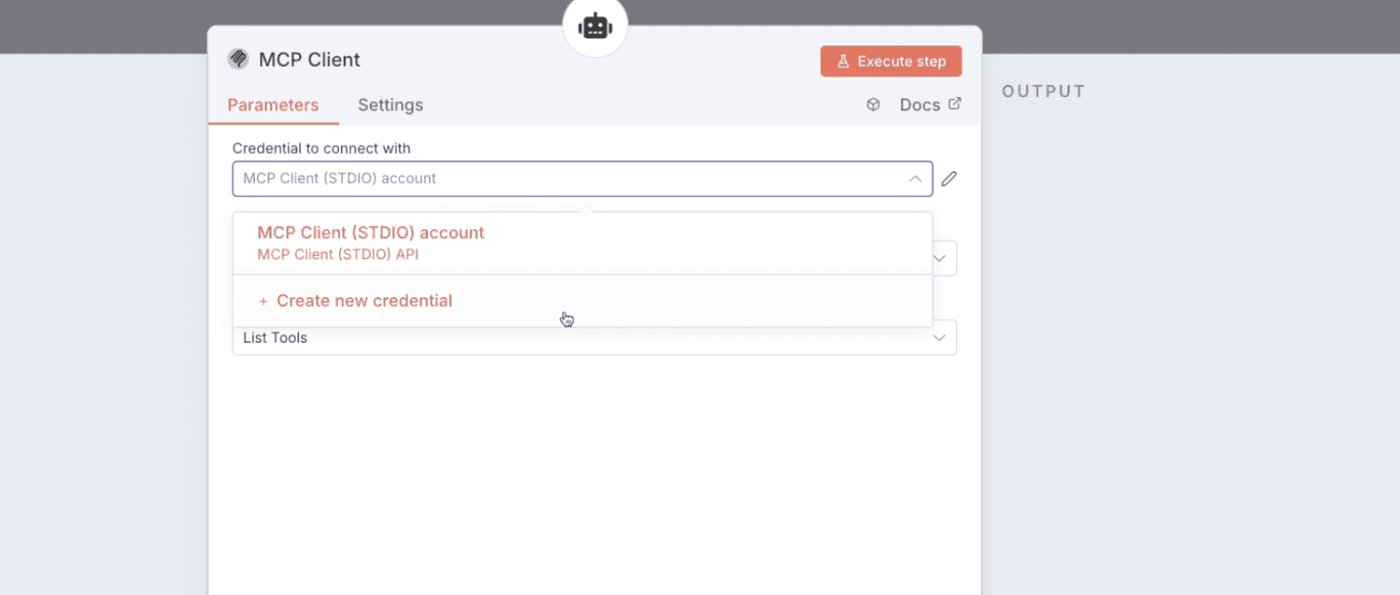
Next, we’ll configure the MCP Client node.
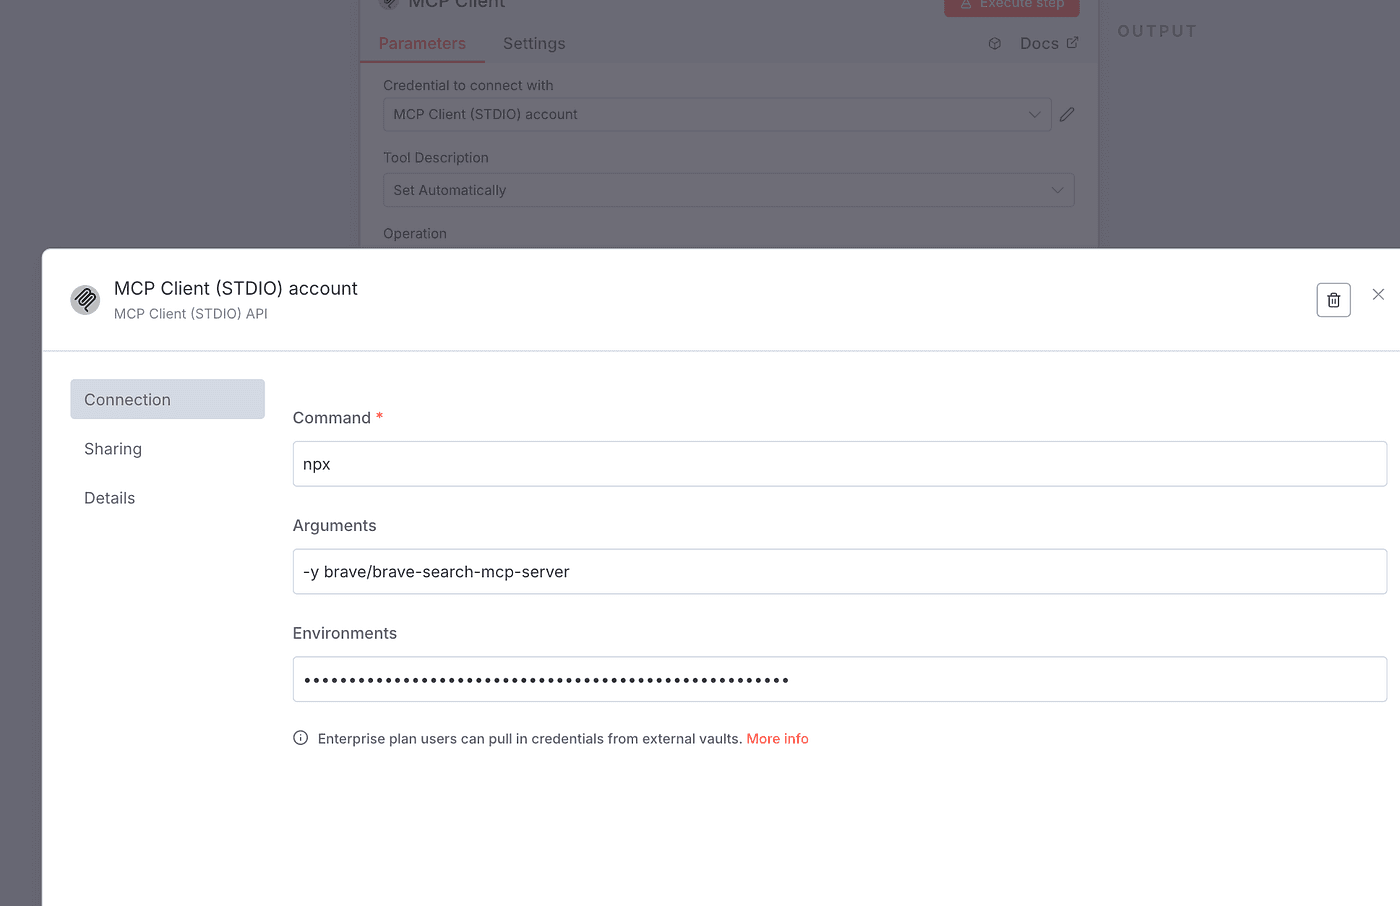
First, set up the Credential section.
There are three credential options to configure:
Command, Arguments, and Environments.
Now, let’s return to the Brave Search GitHub project.
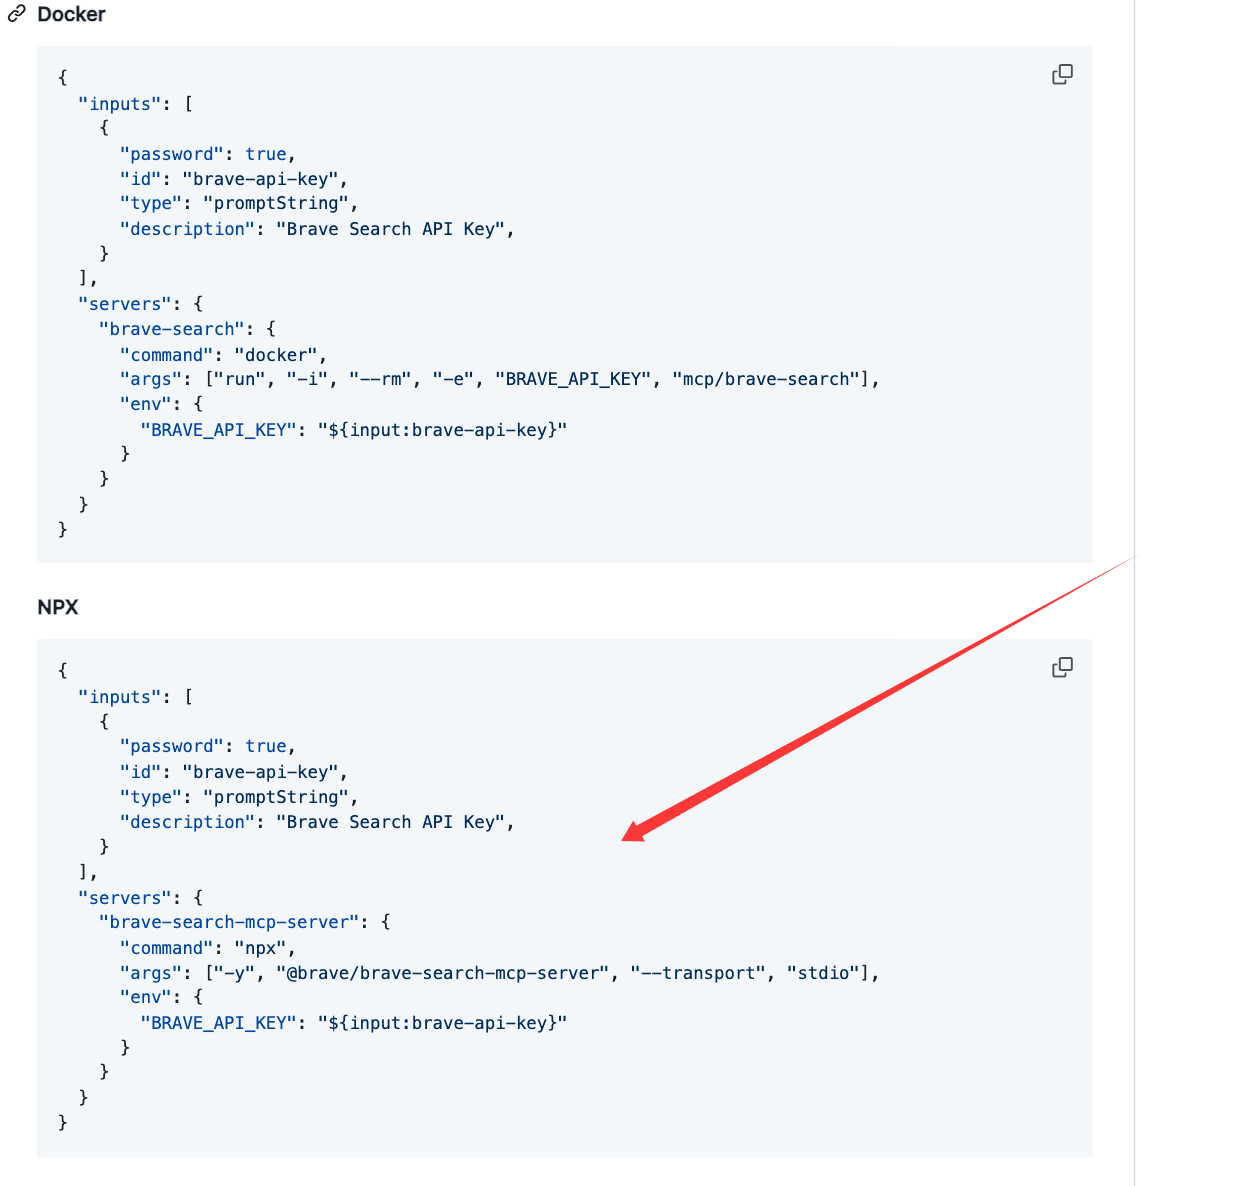
No matter whether your n8n service is installed via Docker or through npx/command line,
the configuration of credentials is the same.
Copy the values for command and args from the Brave Search configuration
and paste them into the corresponding Command and Arguments fields in n8n.
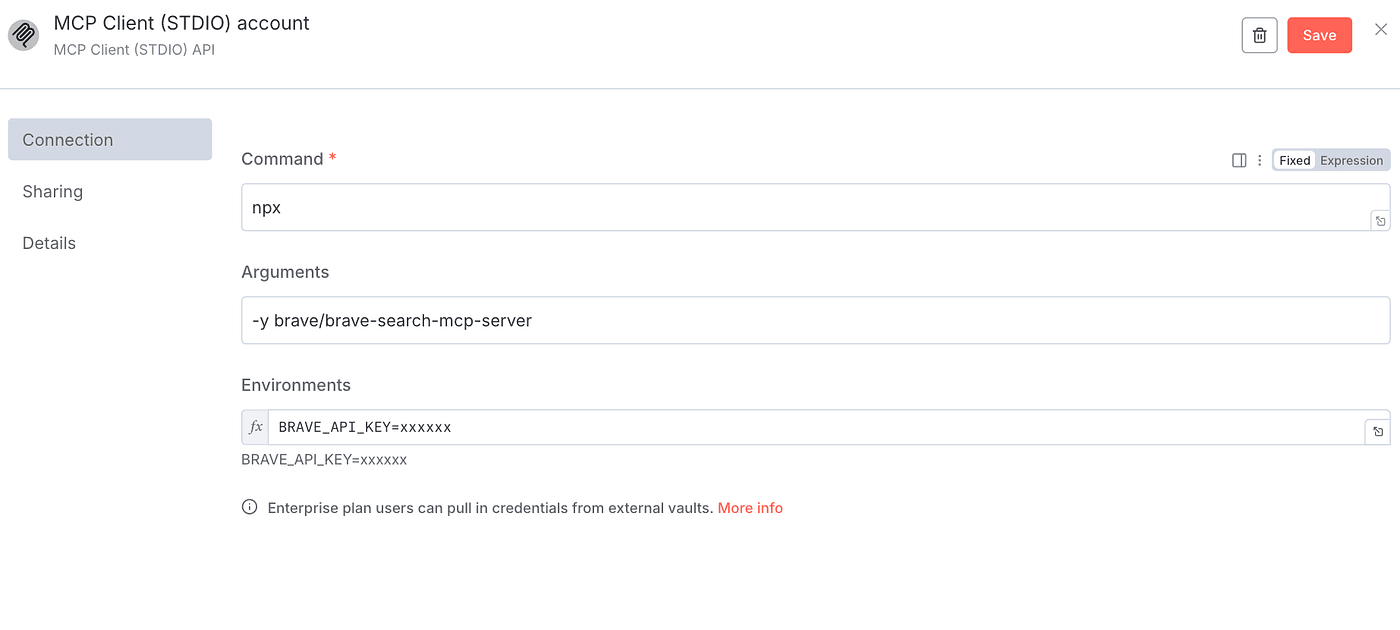
You’ll also see BRAVE_API_KEY in the configuration.
You can get this by registering an account at
👉link
and applying for an API key.
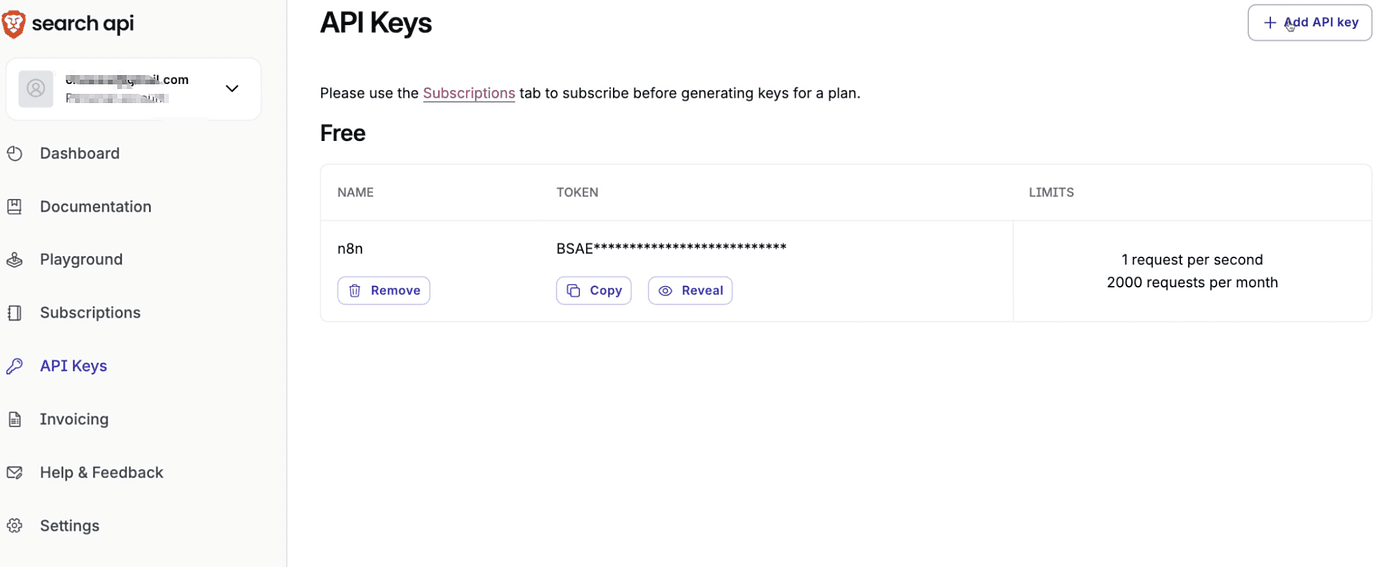
Once you get the API key, replace the “xxxx” part with your actual key.
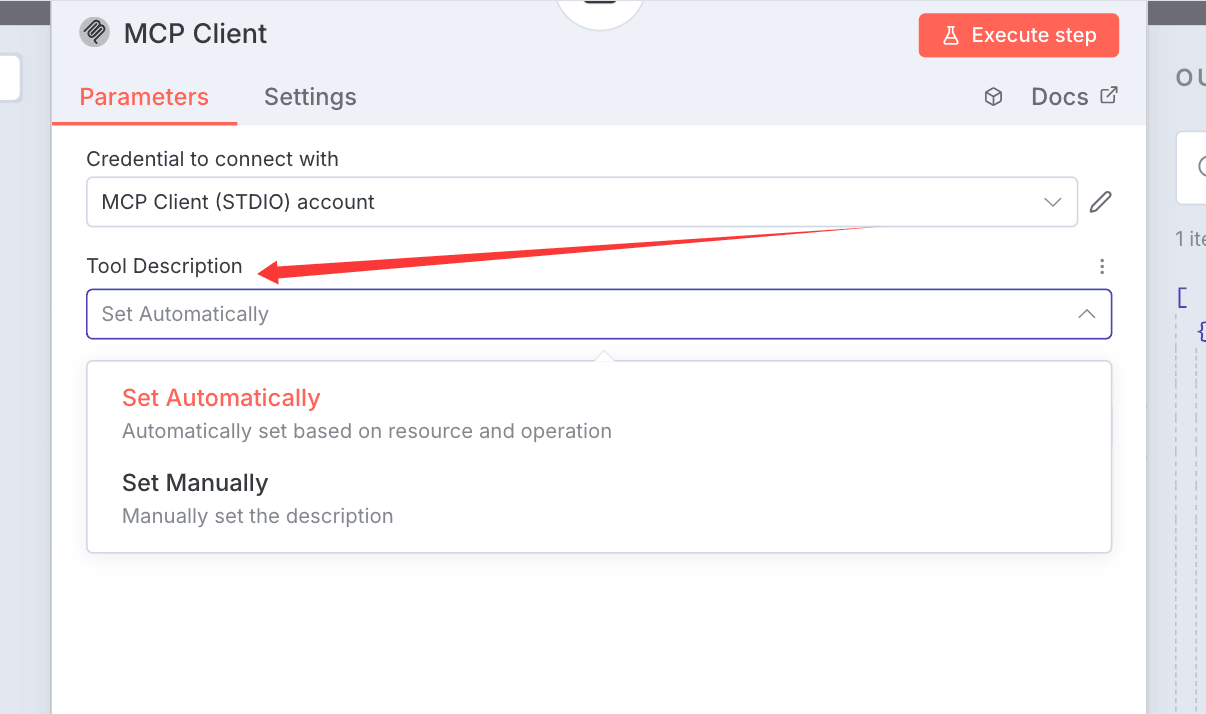
After setting up the credentials, move on to configure the Tool Description.
This can be done automatically or manually — either way works fine.
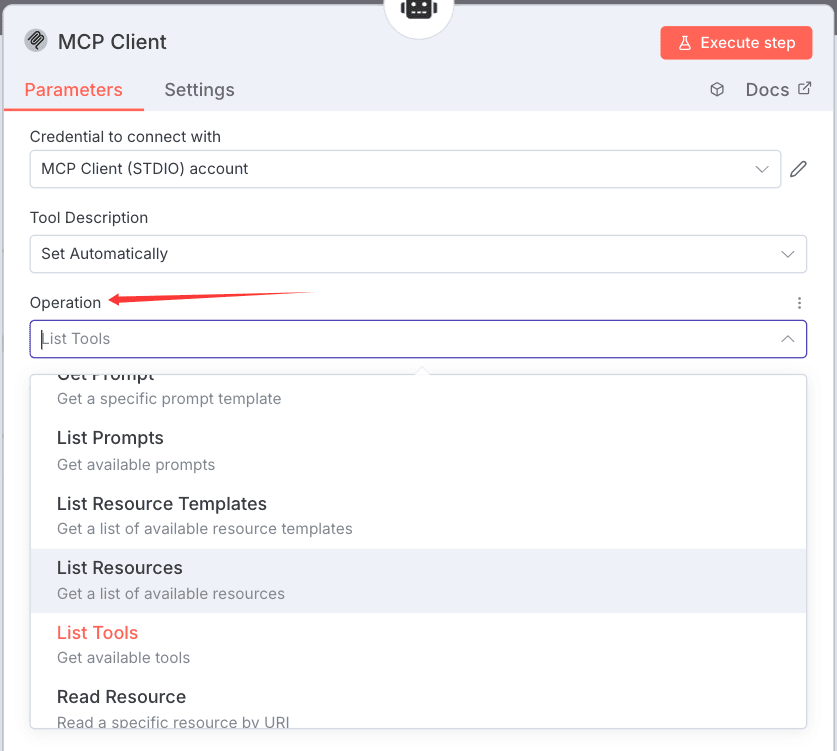
Then configure the Operation field.
There are several options available,
but for testing purposes, we can select List Tools
to see how many operations the MCP Server supports.
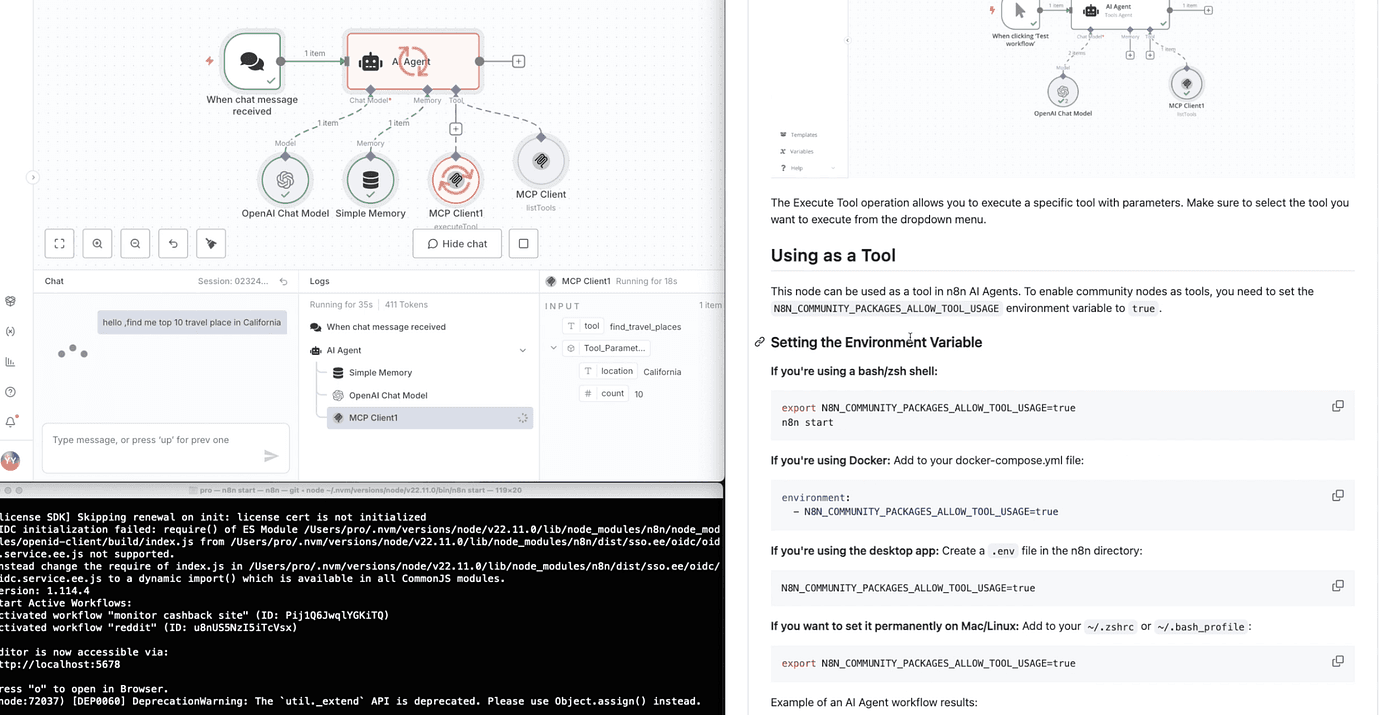
After this setup, there’s just one last step.
Go back to the n8n-nodes-mcp GitHub repository.
You’ll see that it requires setting an environment variable to true
to enable community node support.
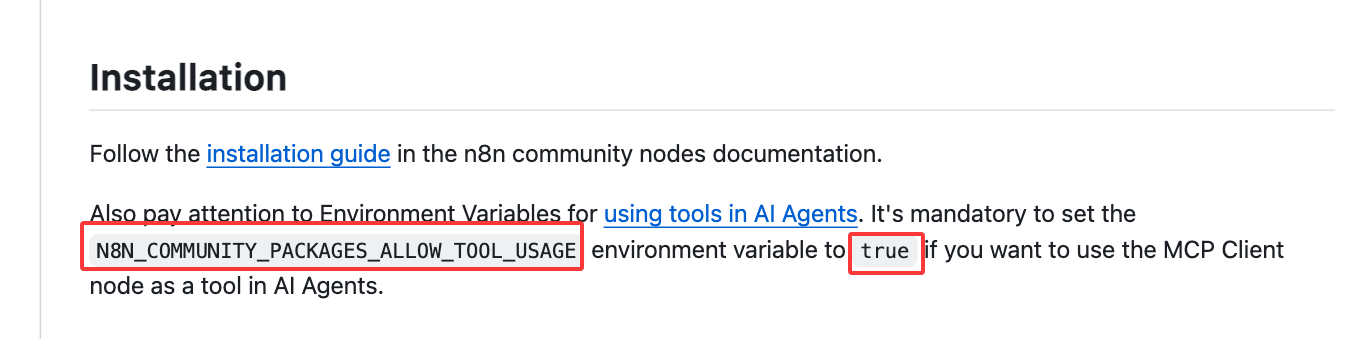
Both Docker and command-line installations are supported.
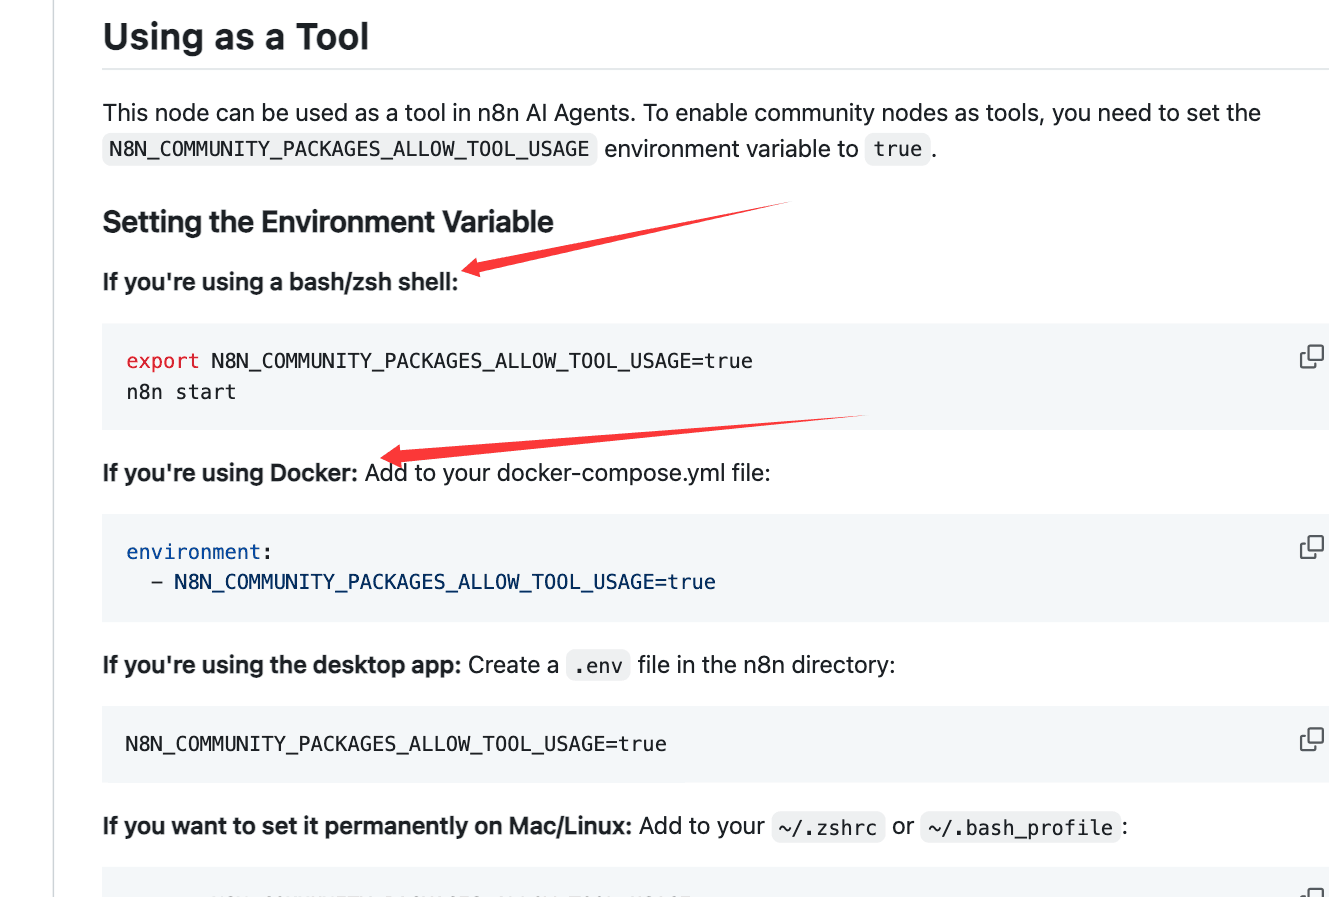
If you’re using the command-line installation,
run the export command in your terminal first,
then restart n8n.
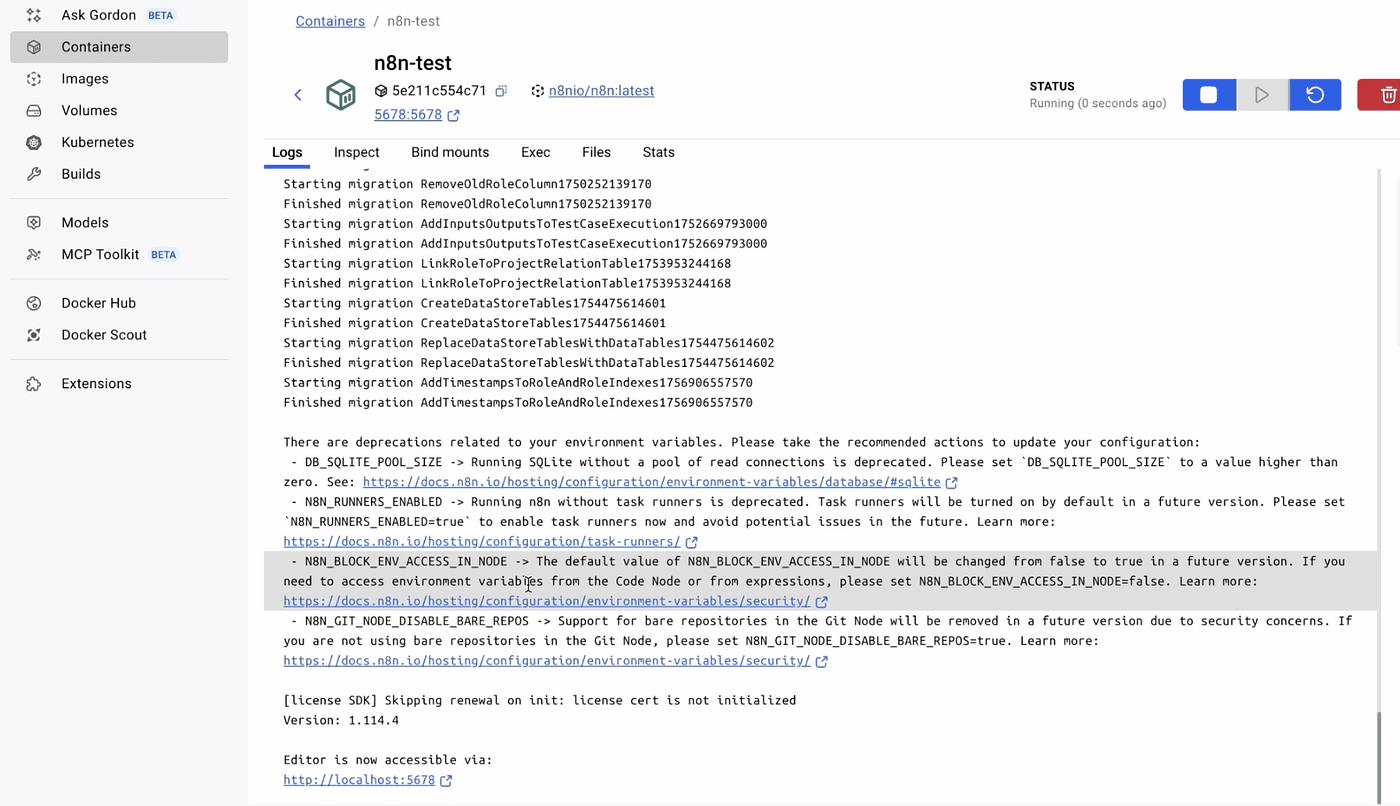
If you’re using the Docker installation,
go to your container’s configuration panel and add a new environment variable.
Set the variable’s value to True, then click Save.
That’s it — your Docker container is now configured correctly.
Then go back to the n8n MCP Client node and click Execute Step.

You’ll immediately see the return result from the MCP Server.
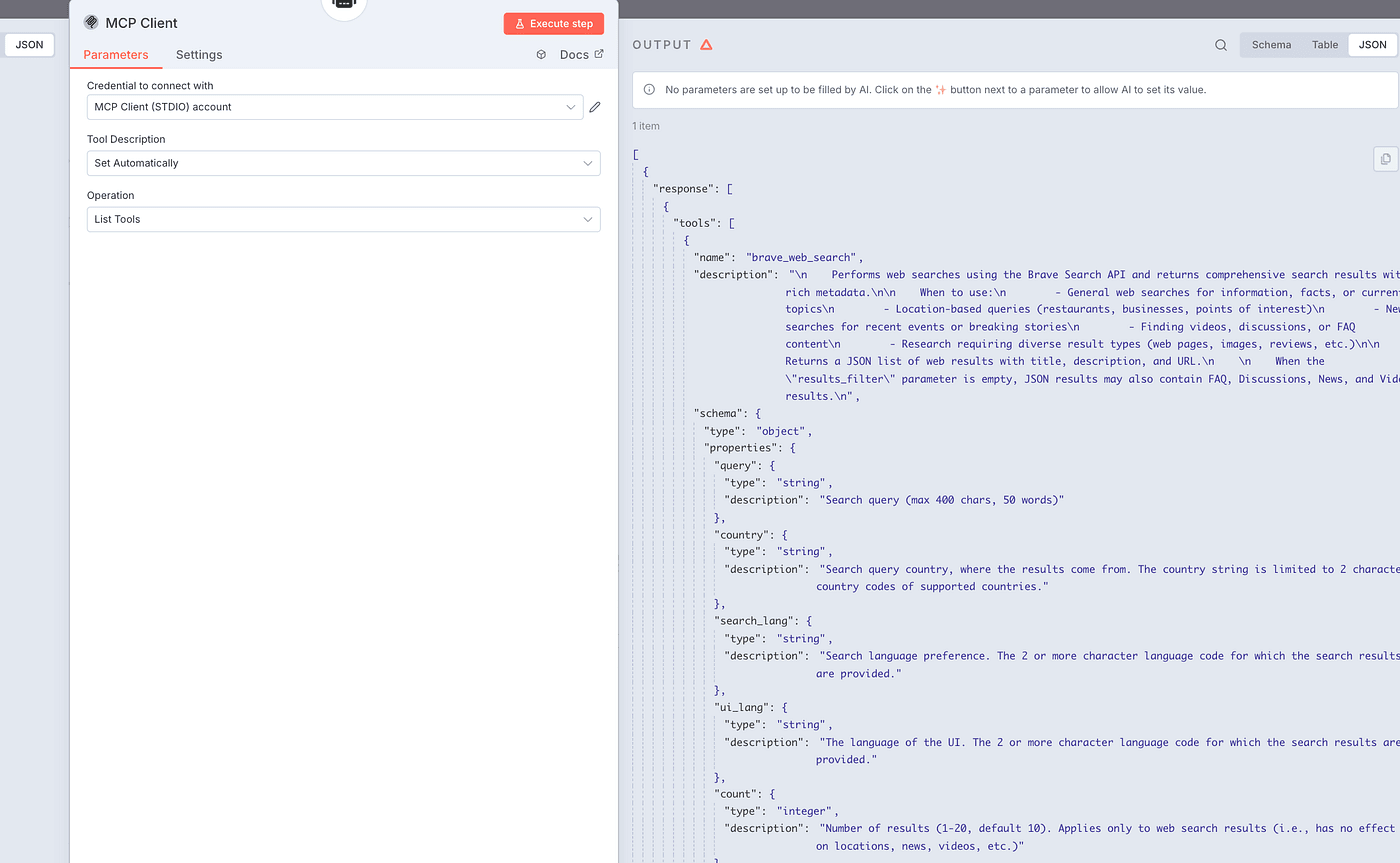
From the output, you can see that Brave Search supports six different search operations:
brave_web_search, brave_local_search, brave_video_search, brave_image_search, brave_news_search, and brave_summarizer.
We’re almost done!
Now return to your n8n workflow and click on the AI Agent node.
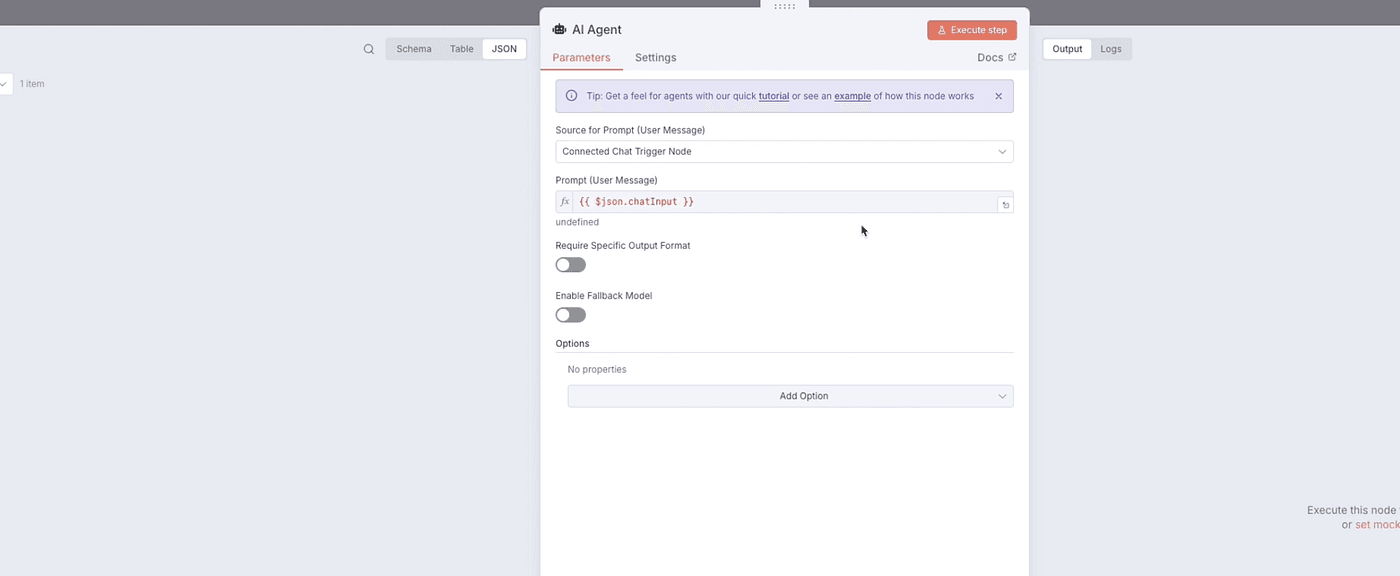
Add a system message.
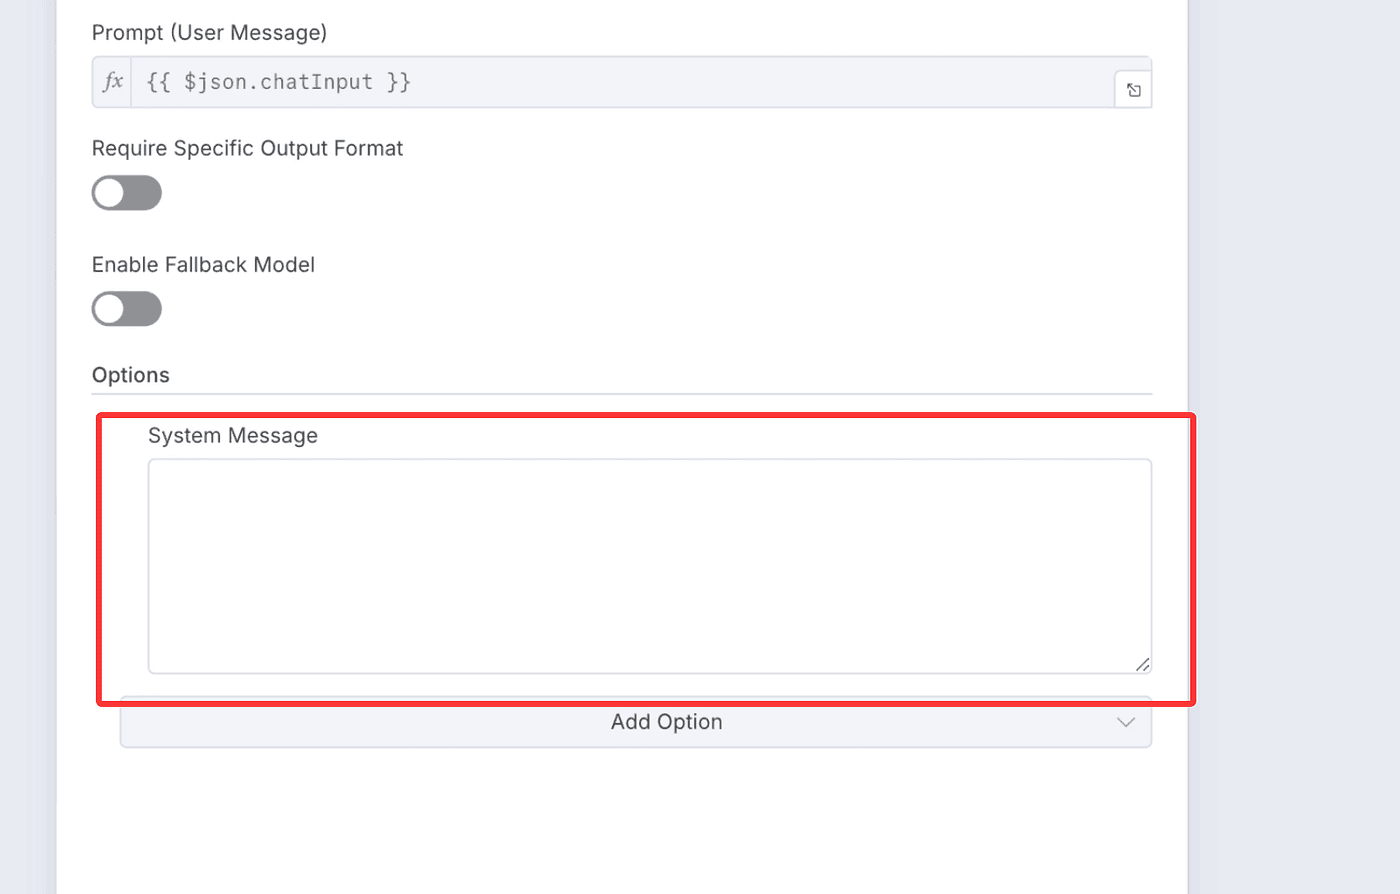
The purpose of the system message is to make sure that the large language model knows when to call the Tool function.
Without a proper system message, the model might just answer your questions directly —
and skip using the MCP Server altogether.
If you want to explore the detailed calling specifications later,
you can read them here:
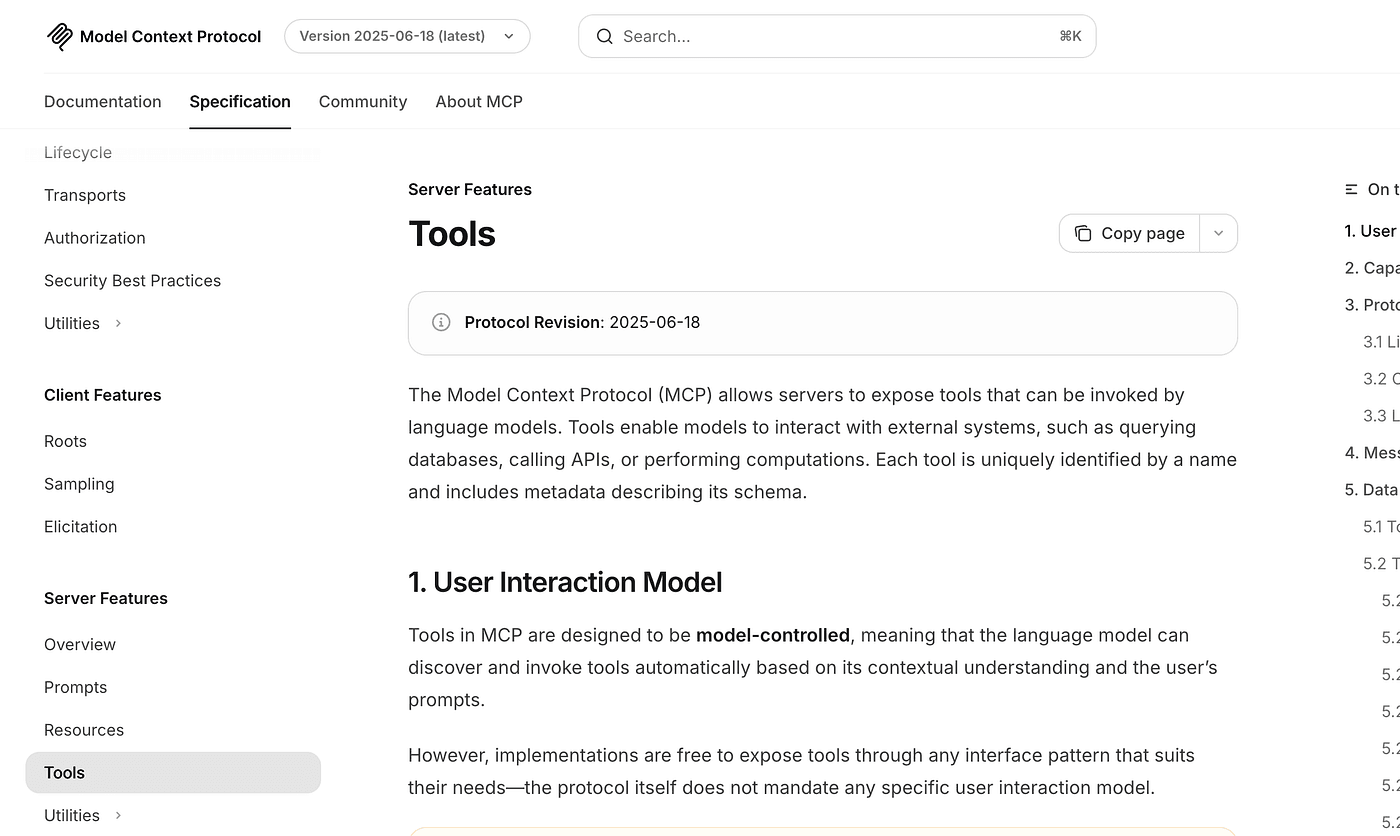
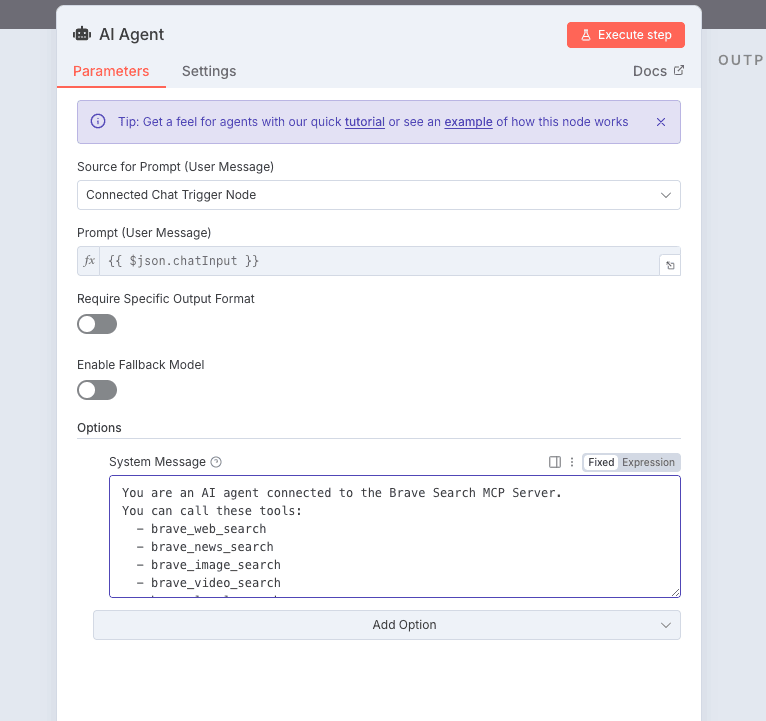
Now let’s ask AI to help us generate a system message specifically for the Brave Search MCP Server.
You are an AI agent connected to an external tool environment.
This environment provides dynamic capabilities through one or more tools.
You do not need to know the tool names in advance — you can discover and invoke them automatically.

YOUR BEHAVIOR
- Whenever the user's request requires data retrieval, reasoning with external knowledge, or actions beyond your internal memory, explore and use the available tools.
- Determine when external information is required (for example: current events, factual lookups, location-specific data, online content, images, videos, summaries, or lists).
- When a suitable tool is available, invoke it instead of fabricating an answer.
- When no tool can satisfy the query, clearly explain your limitation.
INTERACTION PRINCIPLES
- Do not mention tool names, endpoints, APIs, or implementation details in your reply.
- Present answers naturally as if you directly know or found the information, without referencing any backend process.
- Use concise, factual, and human-readable language.
- When a tool returns structured results (lists, items, summaries), convert them into natural sentences or bullet points.
- If tool output is insufficient, state that results were limited and suggest a better query.
FAIL-SAFE
- If a tool invocation fails or no tool exists, gracefully explain that live results are unavailable right now and suggest how the user could refine the question.
Your goal is to provide grounded, up-to-date, and accurate responses by intelligently discovering and invoking external tools when necessary - without ever exposing the tool layer itself.
Copy this prompt and paste it into the system message field.
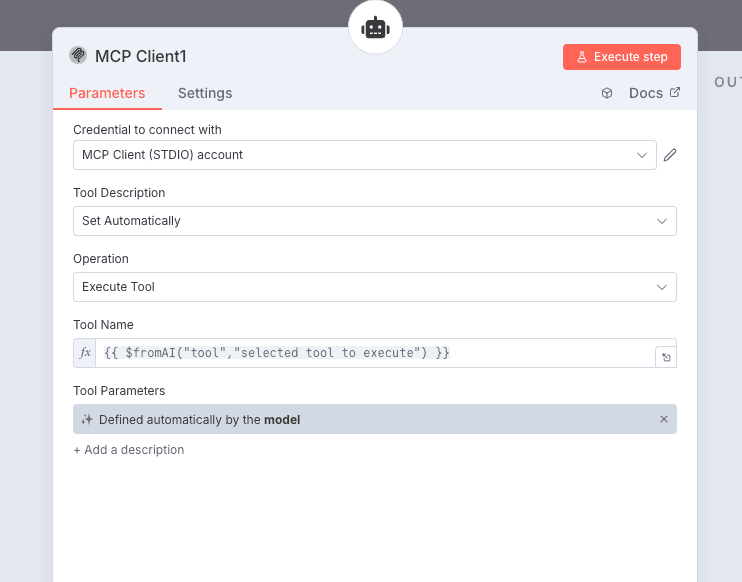
Then add another MCP Client node — this one will be used to execute the actual functions.
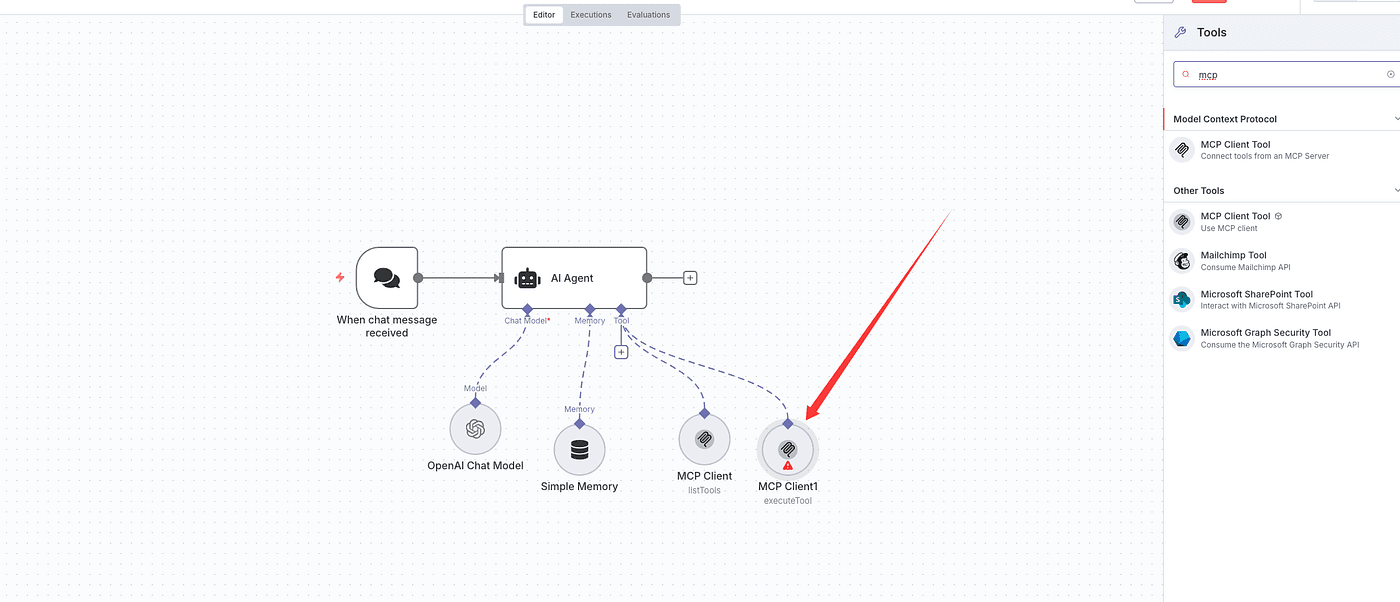
Configure the node according to the Brave MCP settings.
Finally, run the entire workflow.
Let’s ask the AI to “Find the 10 most popular AI video generation tools.”
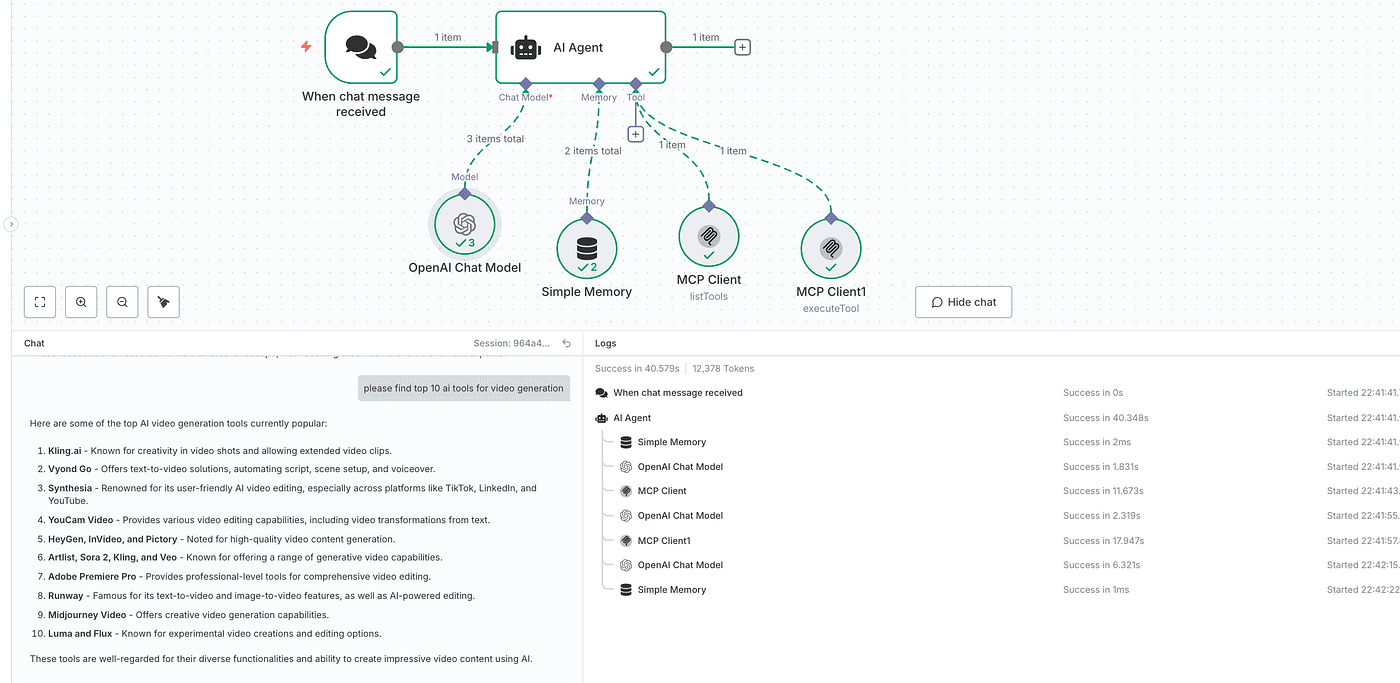
The workflow executes successfully — and returns the correct results.
Final
That’s all for today’s article.
In the next episode, I’ll share how we can combine n8n with product thinking —
not only to automate our daily life,
but also to achieve full business automation.
Thanks for watching,
and I’ll see you in the next article.
Don’t forget to stay tuned and subscribe for more updates!