A clean, lightweight, developer-friendly setup
For the past few days, I’ve been testing different ways to convert a VPS into a fast, minimal proxy server. In my previous guide, we built an HTTP proxy using TinyProxy.
But what if you need SOCKS5 instead?
SOCKS5 is far more flexible than a traditional HTTP proxy:
it can forward raw TCP traffic, works better with automation tools (Playwright, Selenium, curl), and is widely supported across apps and browsers.
datasets, and verifying outbound IP.

And the simplest way to run SOCKS5 on a VPS?
It’s tiny, fast, stable, and takes less than two minutes to install.
Let’s build it.
Why MicroSocks?
Because it’s:
- SOCKS5-only — clean and focused
- Ultra lightweight (written in C)
- Single binary — almost no dependencies
- Supports username/password authentication
- Handles multiple clients concurrently
- Perfect for developers and automation workflows
You don’t need SSH tunnels, VPNs, or heavy software.
Just one small binary — and your VPS becomes a SOCKS5 relay.
Step 1: Install MicroSocks
Ubuntu / Debian
sudo apt update
sudo apt install microsocks -y
CentOS / Rocky / AlmaLinux
MicroSocks is available via EPEL:
sudo dnf install epel-release -y
sudo dnf install microsocks -y
That’s it.
No compiling, no dependencies.
Step 2: Start MicroSocks (Basic Mode)
The simplest launch (no password):
microsocks -p 1080
This starts the SOCKS5 server on port 1080.
If you prefer another port, such as 5000:
microsocks -p 5000
Step 3: Add Username & Password (Recommended)
If your proxy has no password, anyone who knows your IP can use it — which is extremely dangerous.
Use BasicAuth:
microsocks -u myuser -P mypass -p 1080
Done.
Step 4: Run MicroSocks in the Background (systemd)
MicroSocks doesn’t include a built-in service, so you need to create one manually:
sudo nano /etc/systemd/system/microsocks.service
Paste:
[Unit]
Description=MicroSocks Proxy Server
After=network.target

[Service]
ExecStart=/usr/bin/microsocks -u myuser -P mypass -p 1080
Restart=always

[Install]
WantedBy=multi-user.target
Save, then enable the service:
sudo systemctl daemon-reload
sudo systemctl enable --now microsocks
Verify:
sudo systemctl status microsocks
You should see active (running).
Step 5: Allow the Firewall Port (If Needed)
Ubuntu UFW:
sudo ufw allow 1080/tcp
CentOS FirewallD:
sudo firewall-cmd --add-port=1080/tcp --permanent
sudo firewall-cmd --reload
Step 6: Test Your SOCKS5 Proxy (Very Important)
We need to confirm the proxy actually works.
Test A — Using curl
curl --socks5 myuser:mypassword@your-vps-ip:1080 https://ipinfo.io
Success example:
{
  "ip": "YOUR_VPS_IP",
  ...
}
If it fails, you may see:
- connection timeout
- 407 authentication required
- socks handshake failed
Check:
- is the port open?
- is the password correct?
- is the service running?
Test B — Using Chrome / Edge with SwitchyOmega
- Install SwitchyOmega
- Create a new profile
- Select SOCKS5
- Enter:
- VPS IP
- Port
1080 - Username/password
Then visit: ipinfo.io/ip
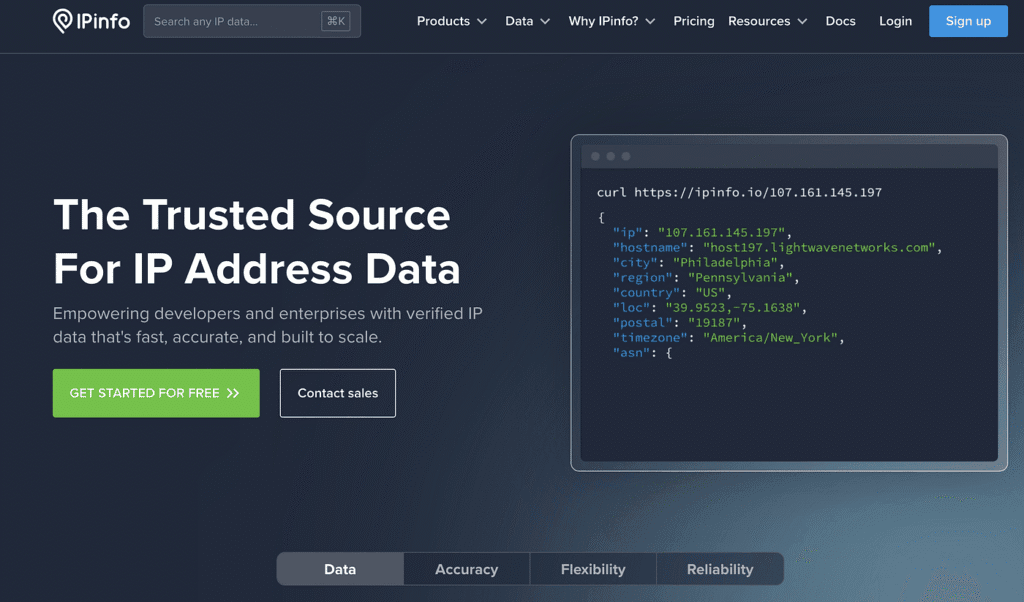
If it shows your VPS IP → success.
Test C — Test with Playwright / Node.js
Example:
const { chromium } = require('playwright');

(async () => {
  const browser = await chromium.launch({
    proxy: {
      server: 'socks5://myuser:mypassword@YOUR_IP:1080'
    }
  });

  const page = await browser.newPage();
  await page.goto('https://ipinfo.io');
  console.log(await page.content());
})();
Final
If TinyProxy is the simplest HTTP proxy,
then MicroSocks is the simplest SOCKS5 proxy.
It’s fast, minimal, and perfect for developers who want a clean, no-nonsense SOCKS5 setup on any VPS.